

Architecture
92nd Street Remodel & Addition: Before & After
Nothing like some dramatic “Before & After” photos to document a major residential remodel and addition! Explore everything from the front entry to the master bath – complete with a narrative about what we changed, and why – and learn what it took to give a house with an odd history a whole new chapter.

August 17, 2015
A Dramatic Change
There’s nothing like comparing some epic “Before & After” shots to remind you about how far an endeavor has come! When we began this project, back at the very tail end of 2012, the plan was to find a way to separate the dining room from the front door, and to update the kitchen and master bath, which were still sporting their ’90s remodel look. But, before long, the homeowners realized that they wanted to tackle a much larger scope. So, we gutted the house to the studs on all floors, moved around some walls, got rid of some of them altogether, and voila: a whole new home!
In case you haven’t already seen the 92nd Street Residential Remodel & Addition in the portfolio, you may want to hop over and take a peek, as there you will find not only more “Before & After” photos, but also the glamour shots, and a bit more of the narrative. Of course, there’s a lot to enjoy here, too, so: visit both!
A Peculiar Story
From its very start, this house had an odd history. Construction began after World War II, but a shortage of funds required construction to pause after only the day-lit basement was completed. So that it would be habitable, the owners put a roof on it and added a kitchen. When they were ready to begin again, the main floor was added, and, presumably, the kitchen moved upstairs. It’s also possible that at this time, the detached garage came into being, which would explain the common roof between the house and garage, forming an awkward – though covered – breezeway evident in photos by 1955.
Though there may have been other iterations over the decades, the next major remodel came in the late 1990s, which expanded the kitchen and dining room into the breezeway, and added a master suite on a new second floor. Though there is no harm in building in phases, in the case of this house, it had unfortunately occurred each time without design oversight. So, by the time it was in our hands, much help was needed!
Seeking a Little Street Presence
The main complaint about the entry to the house pre-remodel was not, in fact, its lack of street presence. Instead, it was that the front door opened directly into the dining room, with no transitional space at all. These two issues were actually one and the same. The entry sequence was never considered beyond sheer practicality: you could walk up to the front door, and get inside the house. Rather than a separate path for cars and pedestrians, both used the concrete slab drive for access, and there was no internal link between the garage and the house. With no front porch or formal entry, there was little hope for either a transitional entry space, or for traditional street presence.
Street presence, of course, is more than just being transparent about how to approach a house, it’s also about aesthetics. So, shifting gears, let’s look at finishes for a moment. This one is pretty straightforward: if you’re going to go with white vinyl windows with no trim, then don’t coordinate your gutters and downspouts to match, or those downspouts will become the new focal points of the whole house.
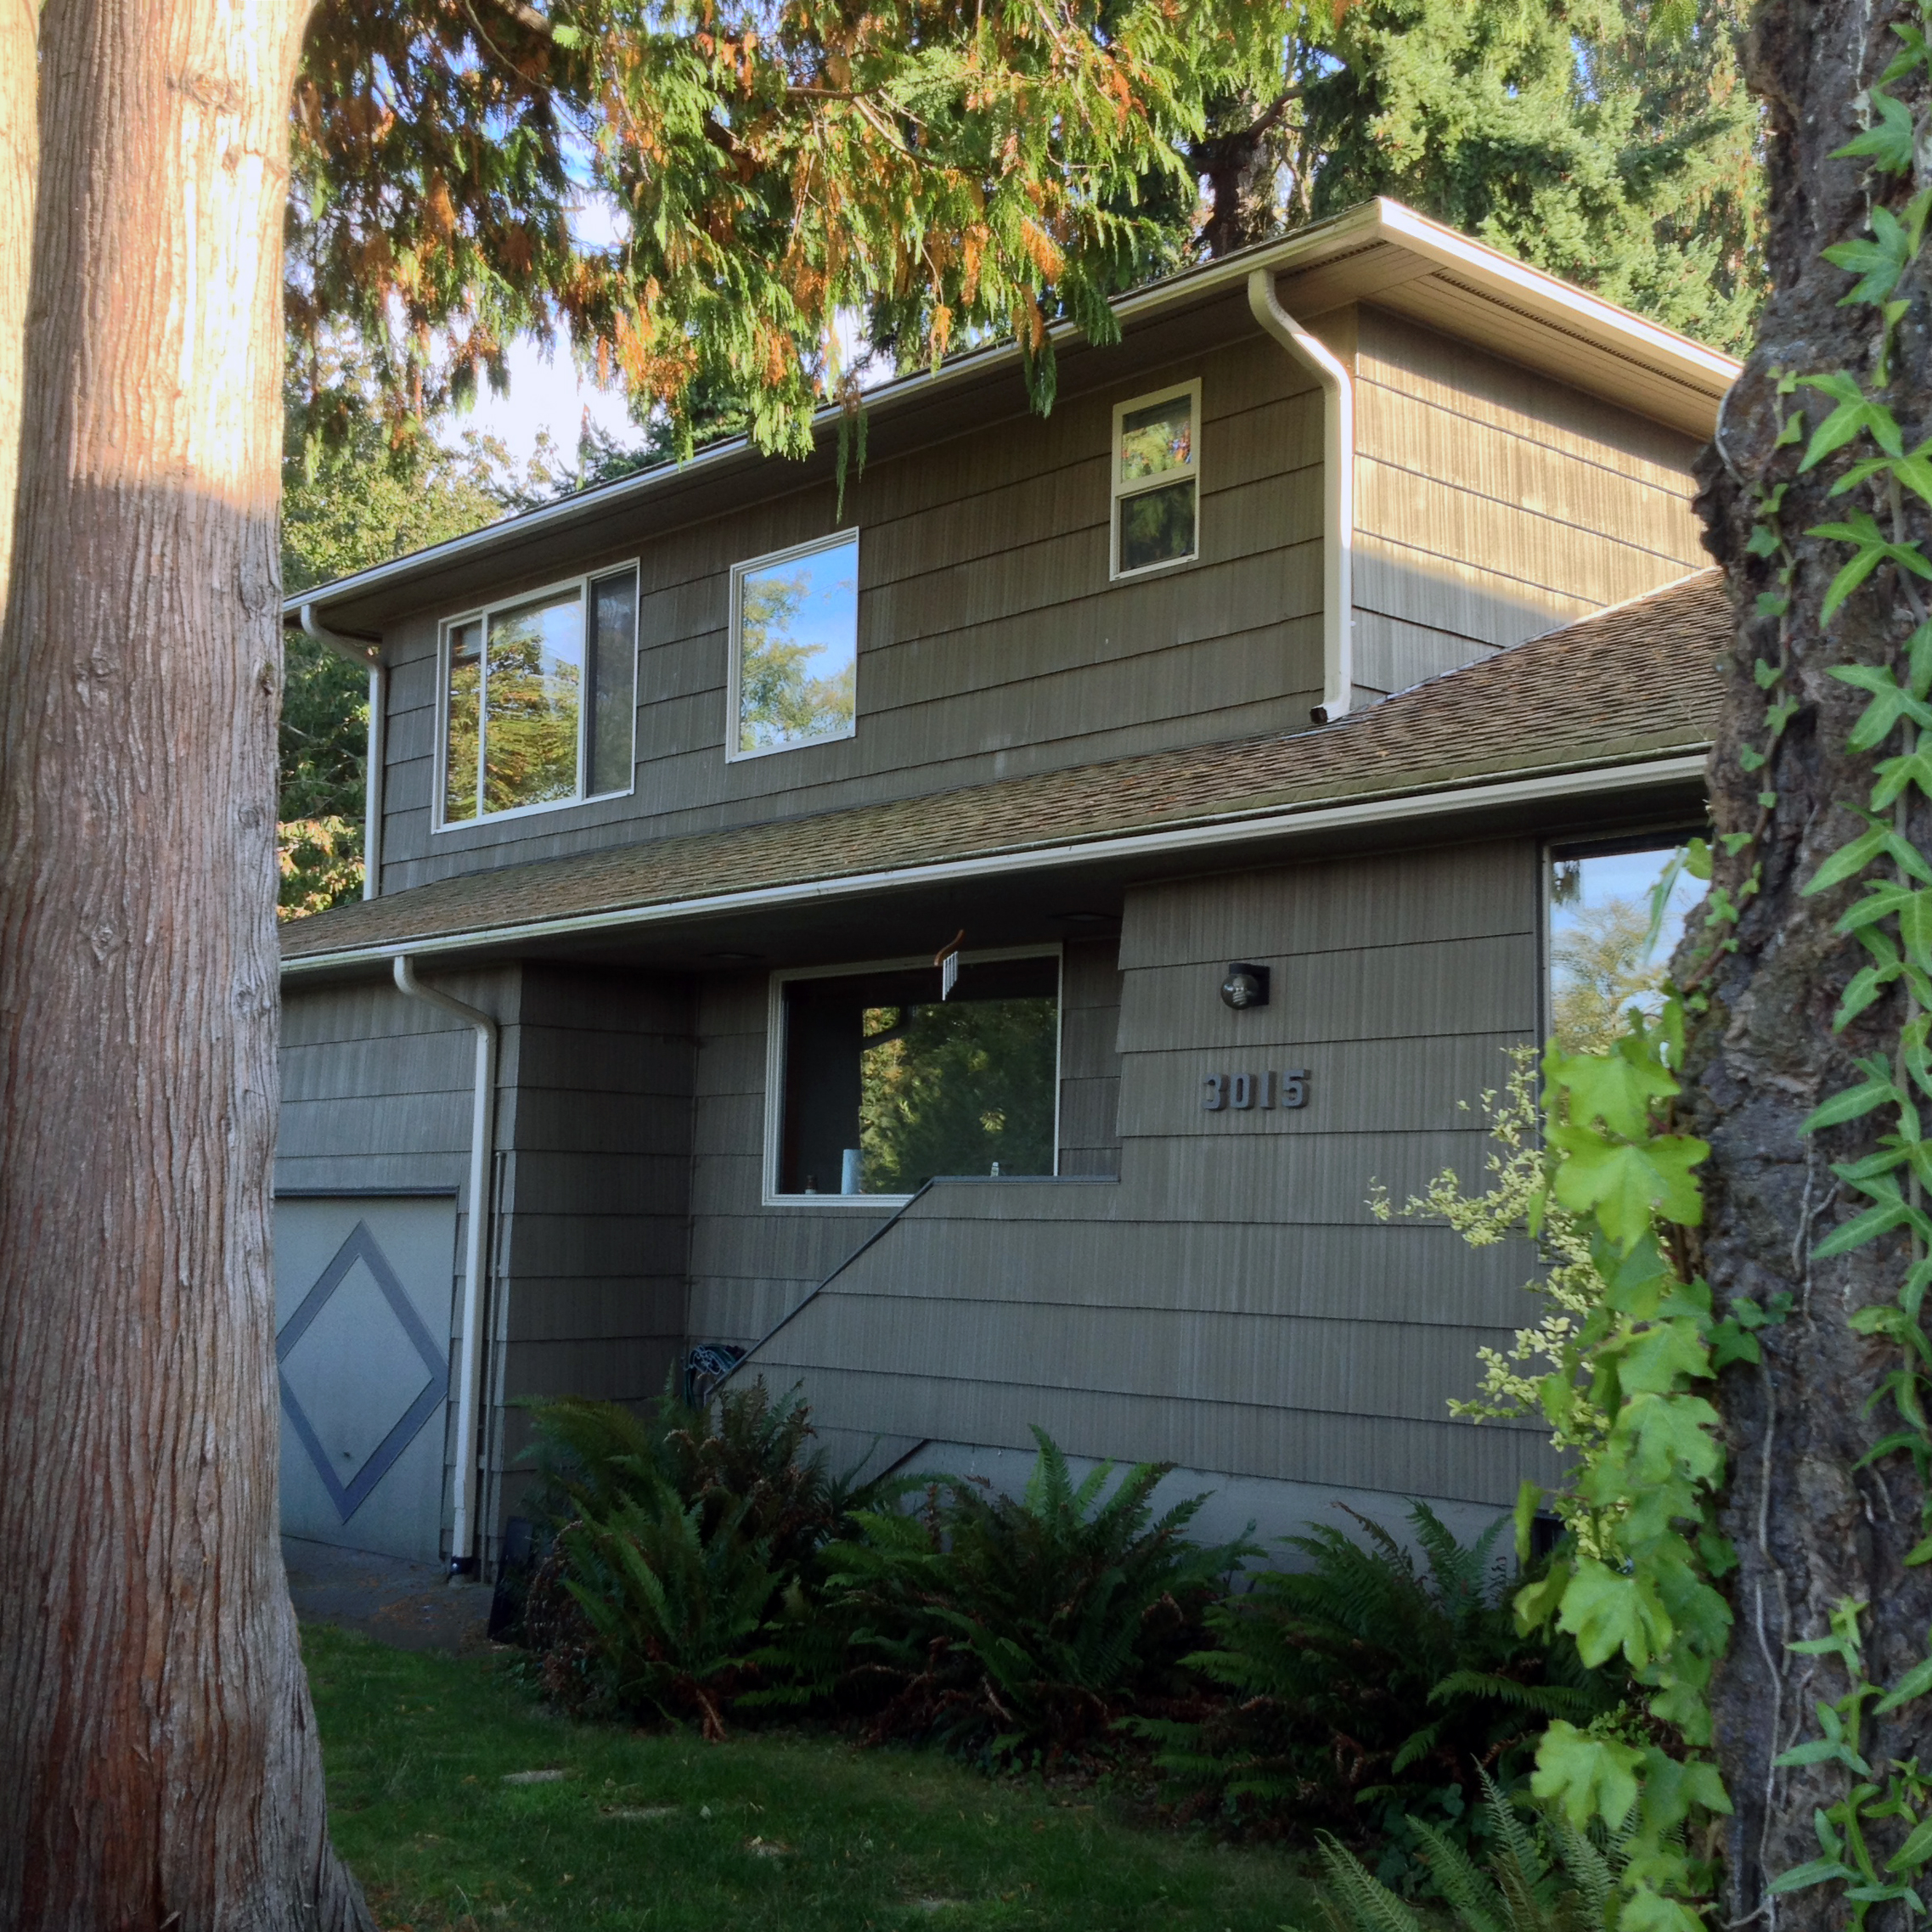
Before: Front Entry
Zero street presence, highlighted downspouts, and a front door entering directly into the dining room.
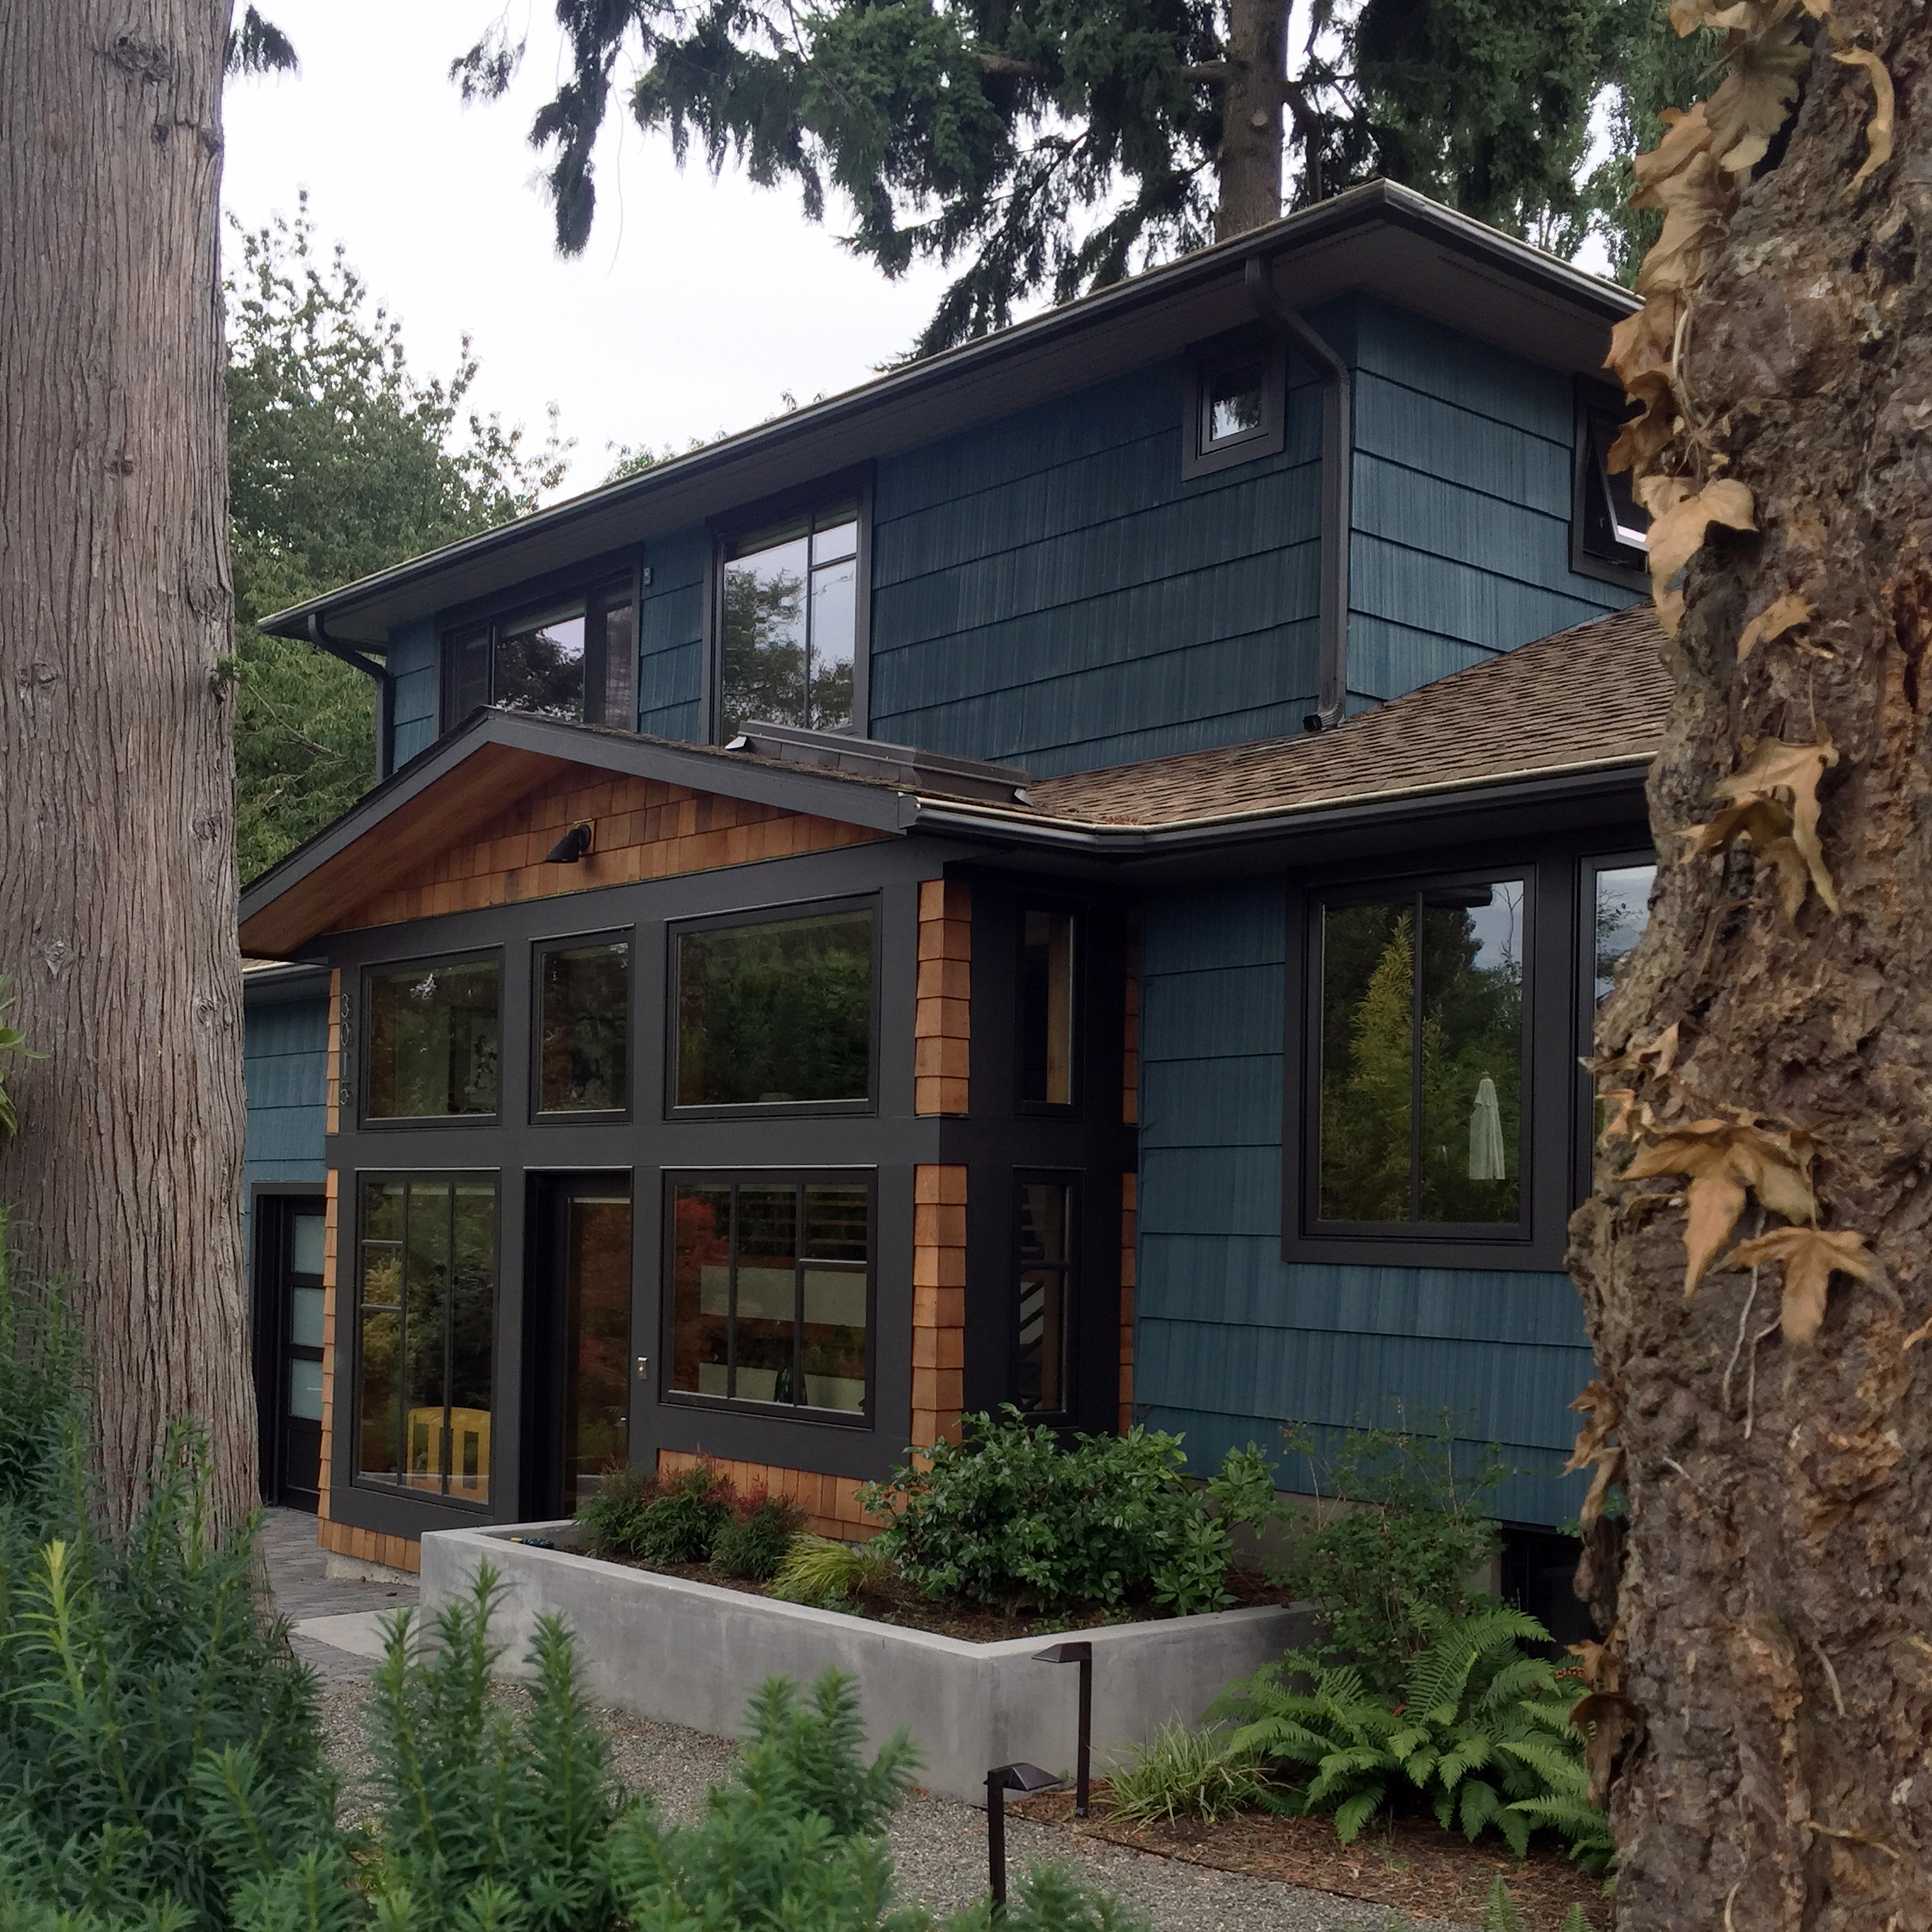
After: Front Entry
A beautiful new entry foyer, a coordinated façade, and loads of windows to let in the light.
One remodel with a new entry addition and a facelift later, and: BOOM, street presence and an entry foyer. By internalizing the front stairs, and moving the entry door to ground level, we ensure a privacy buffer. No longer is someone at the front door just one step from the heart of the house.
And, take a look at the gutters and downspouts – we didn't remove them with the remodel, but because we added trim to the all the windows, they are no longer the sole highlighted feature. Even if we had gone with contrasting light trim, there would be enough of it that the downspouts would just be part of a greater system.
The Front Door to the Dining Room
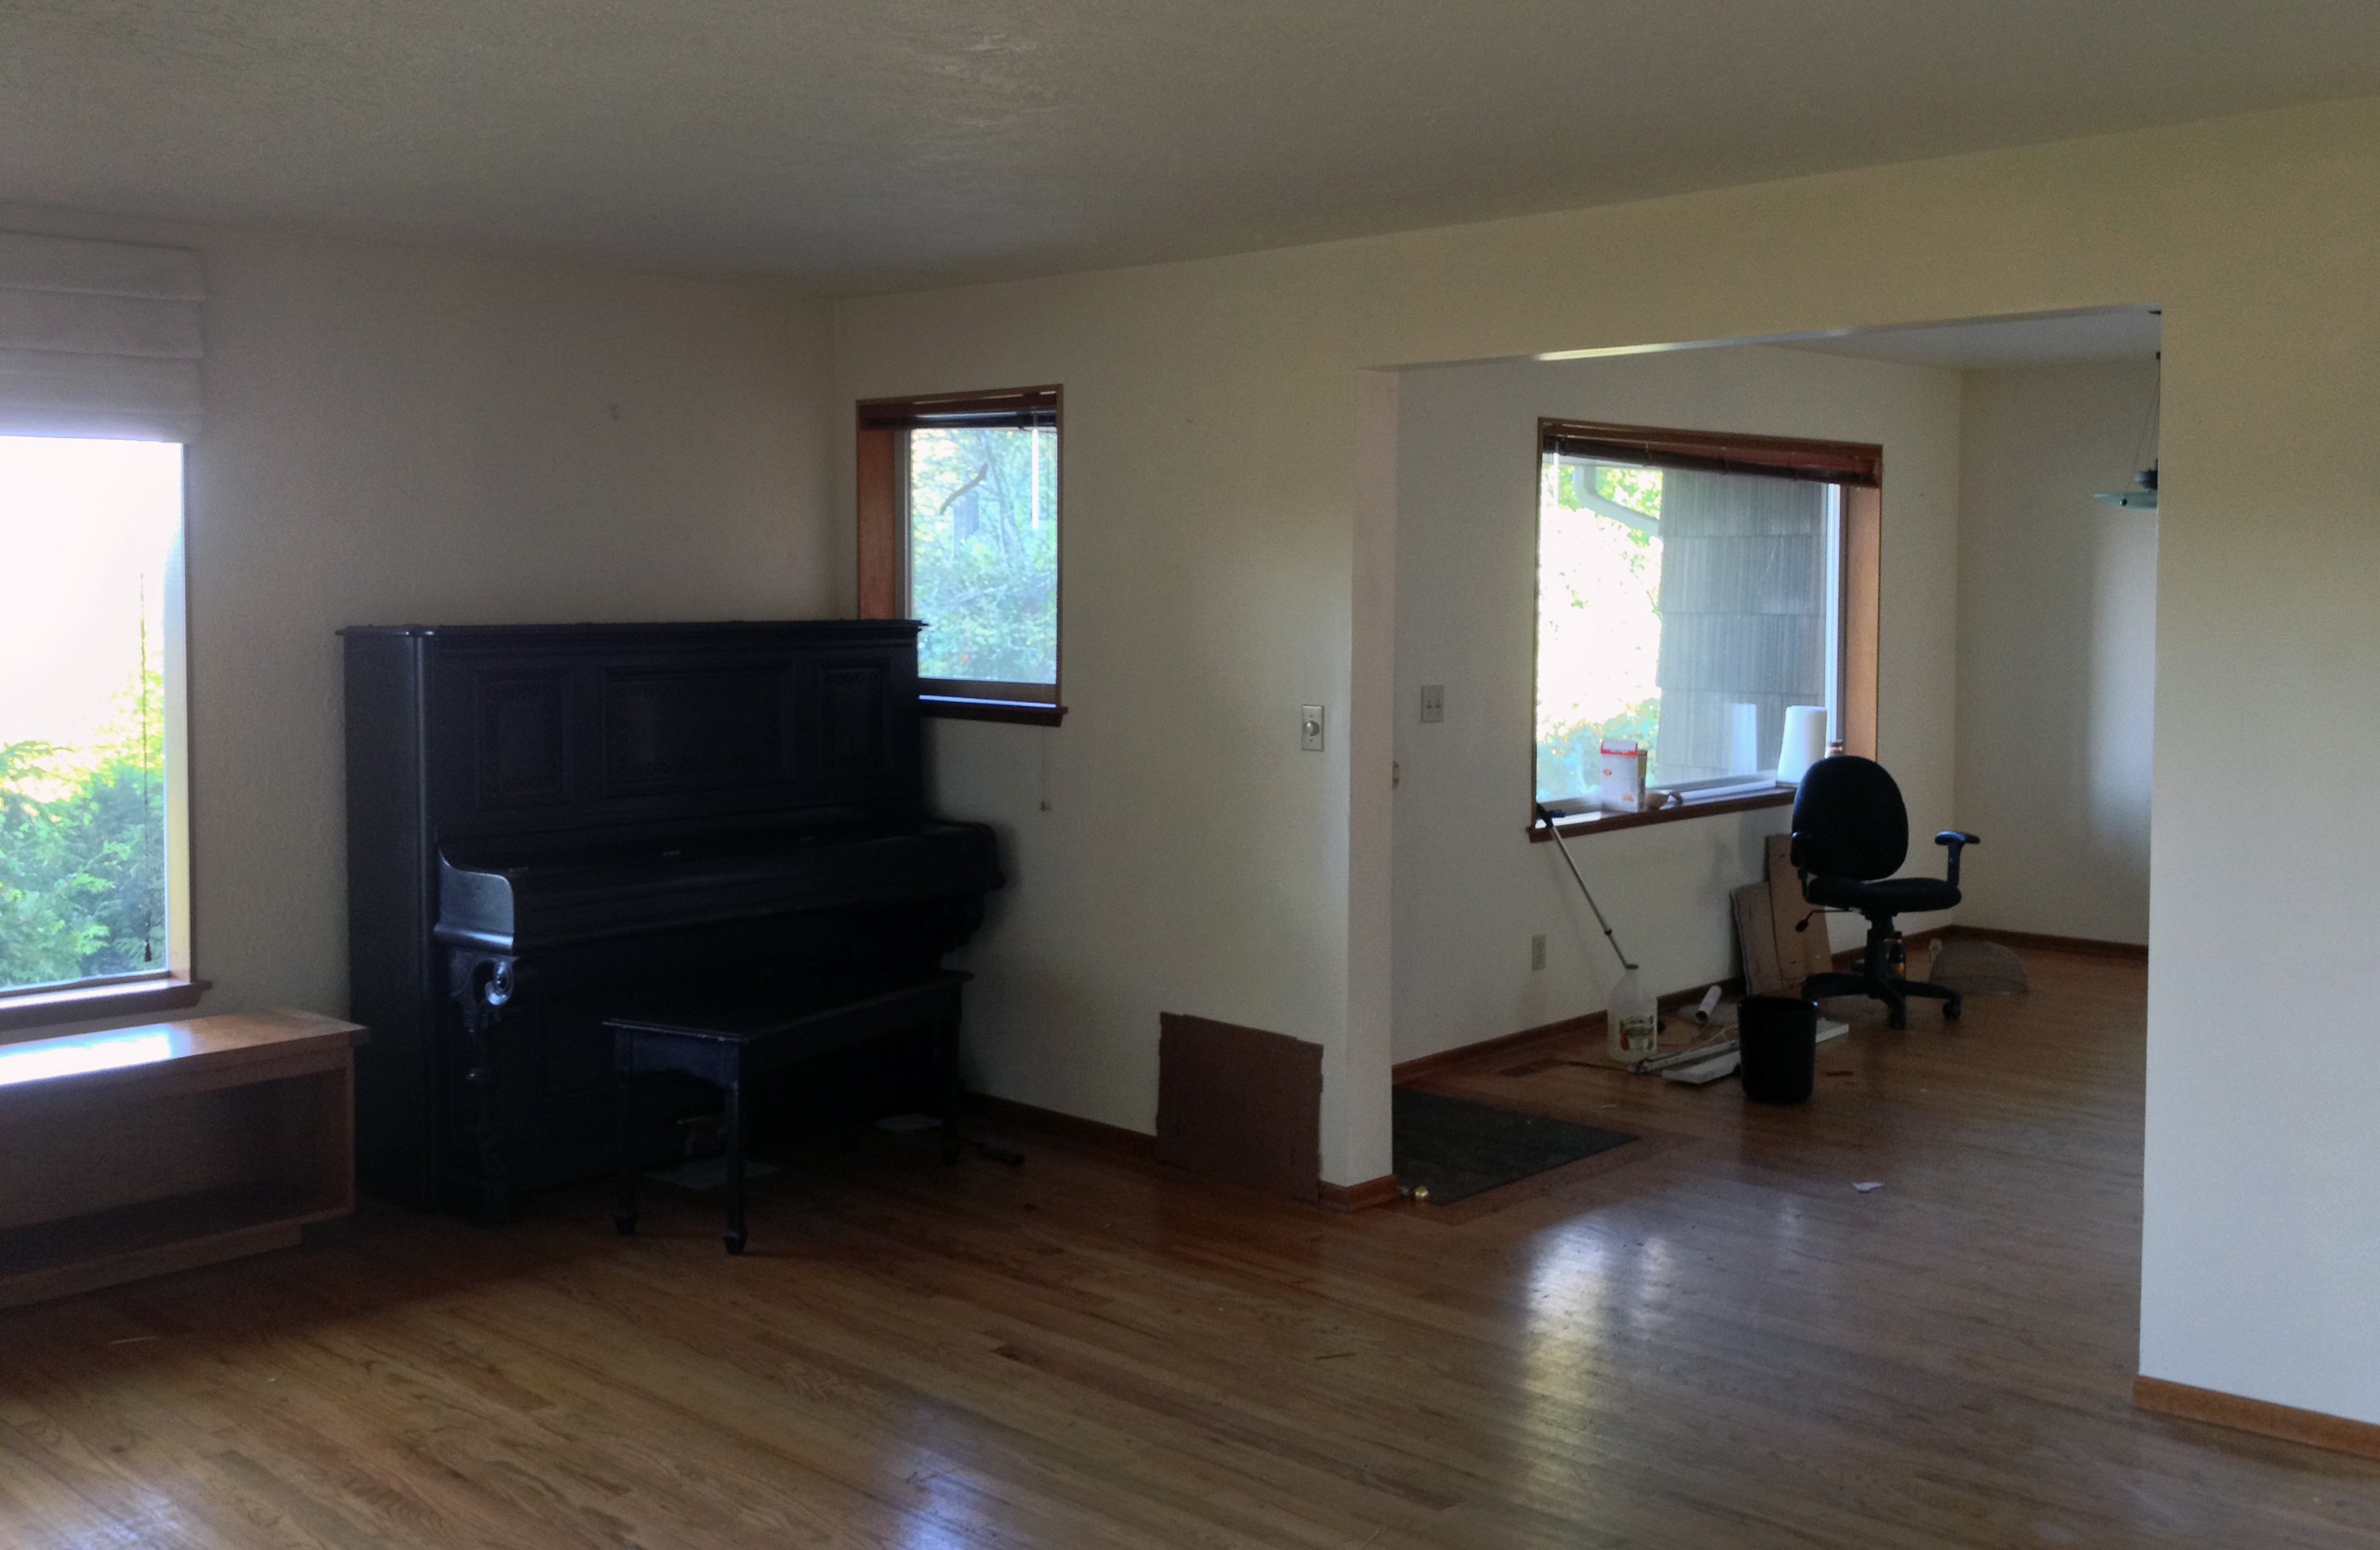
So, let’s take a peek inside. The first image below shows the pre-remodel view from the dining room table. And, there it is: the front door opening right into the heart of the space. Not only was this a problem for privacy reasons, but practical: any muddy shoes had to be left on the dining room floor.
The homeowners also noted that it felt uncomfortably dark in these north-facing rooms. The existing picture windows were by no means small, but the dining room window was beneath a four-foot-deep overhang, which certainly wasn't doing the space any favors. Furthermore, the dining room and living room were connected by a wide opening, but not wide enough to allow the light that made it into the spaces to spread much between them. All of this was a perfect recipe for glare: the area close to the windows was bright, but the northern light didn't penetrate very far into the spaces, creating an exaggerated feeling of darkness further into the rooms.
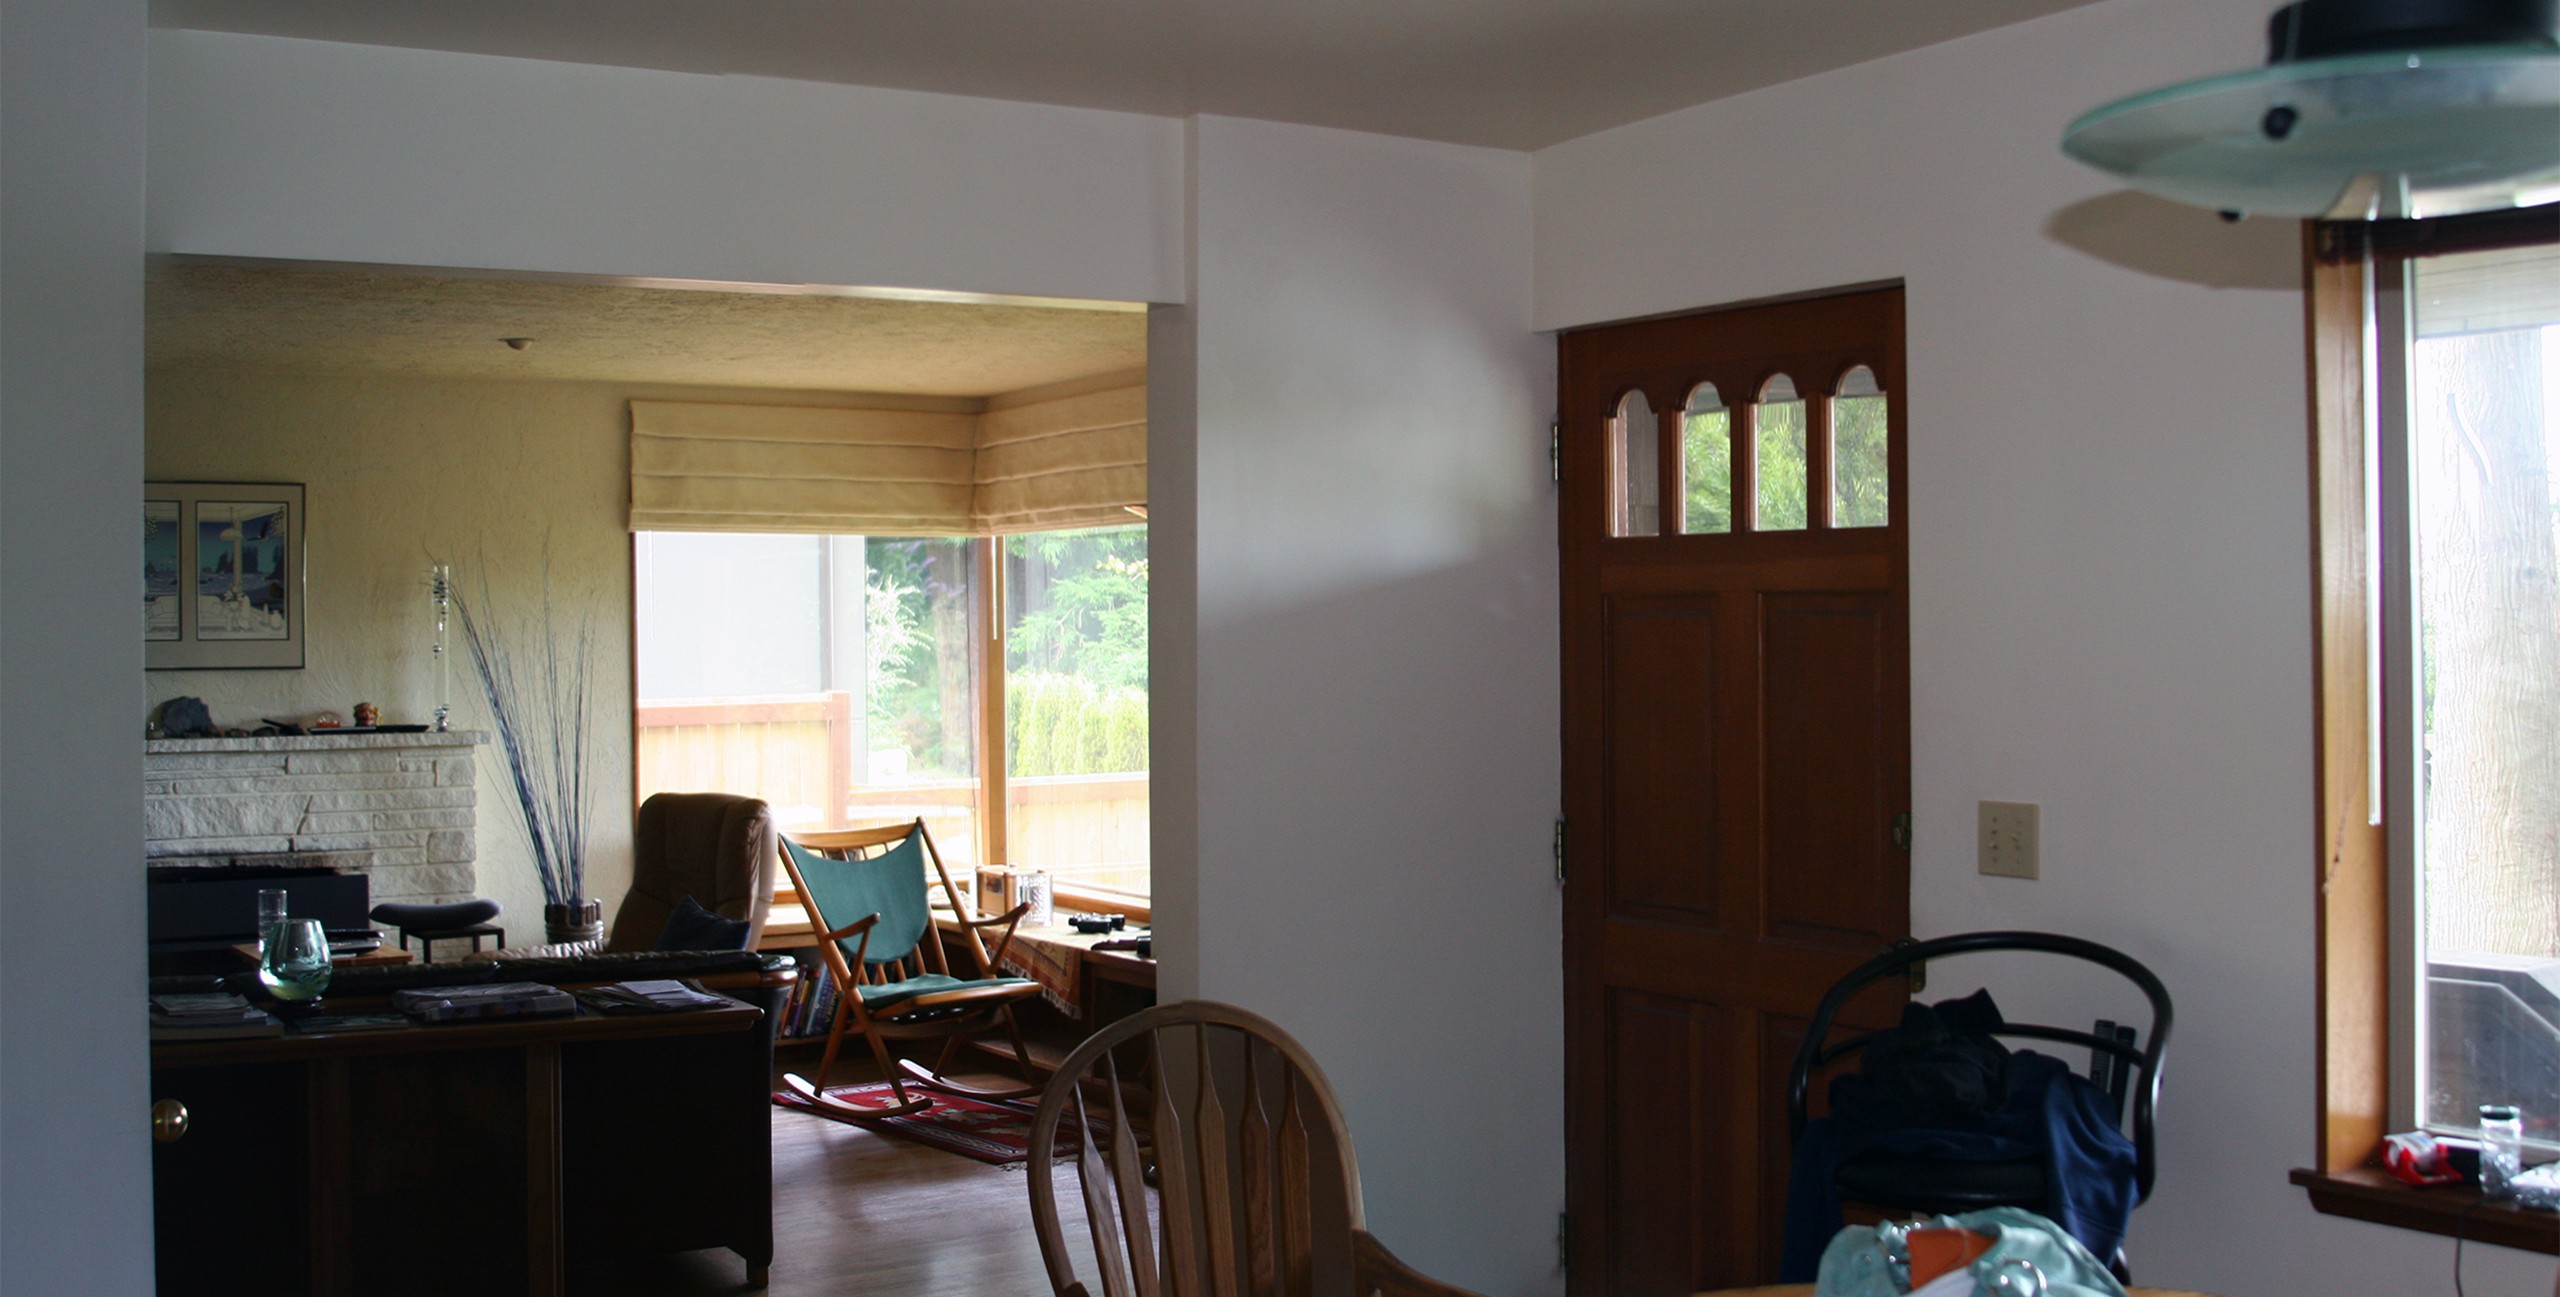
Before: View to the Northwest from the Dining Room
Formerly, the front door opened directly into the dining room, and the view to the living room windows was substantially blocked by solid walls.

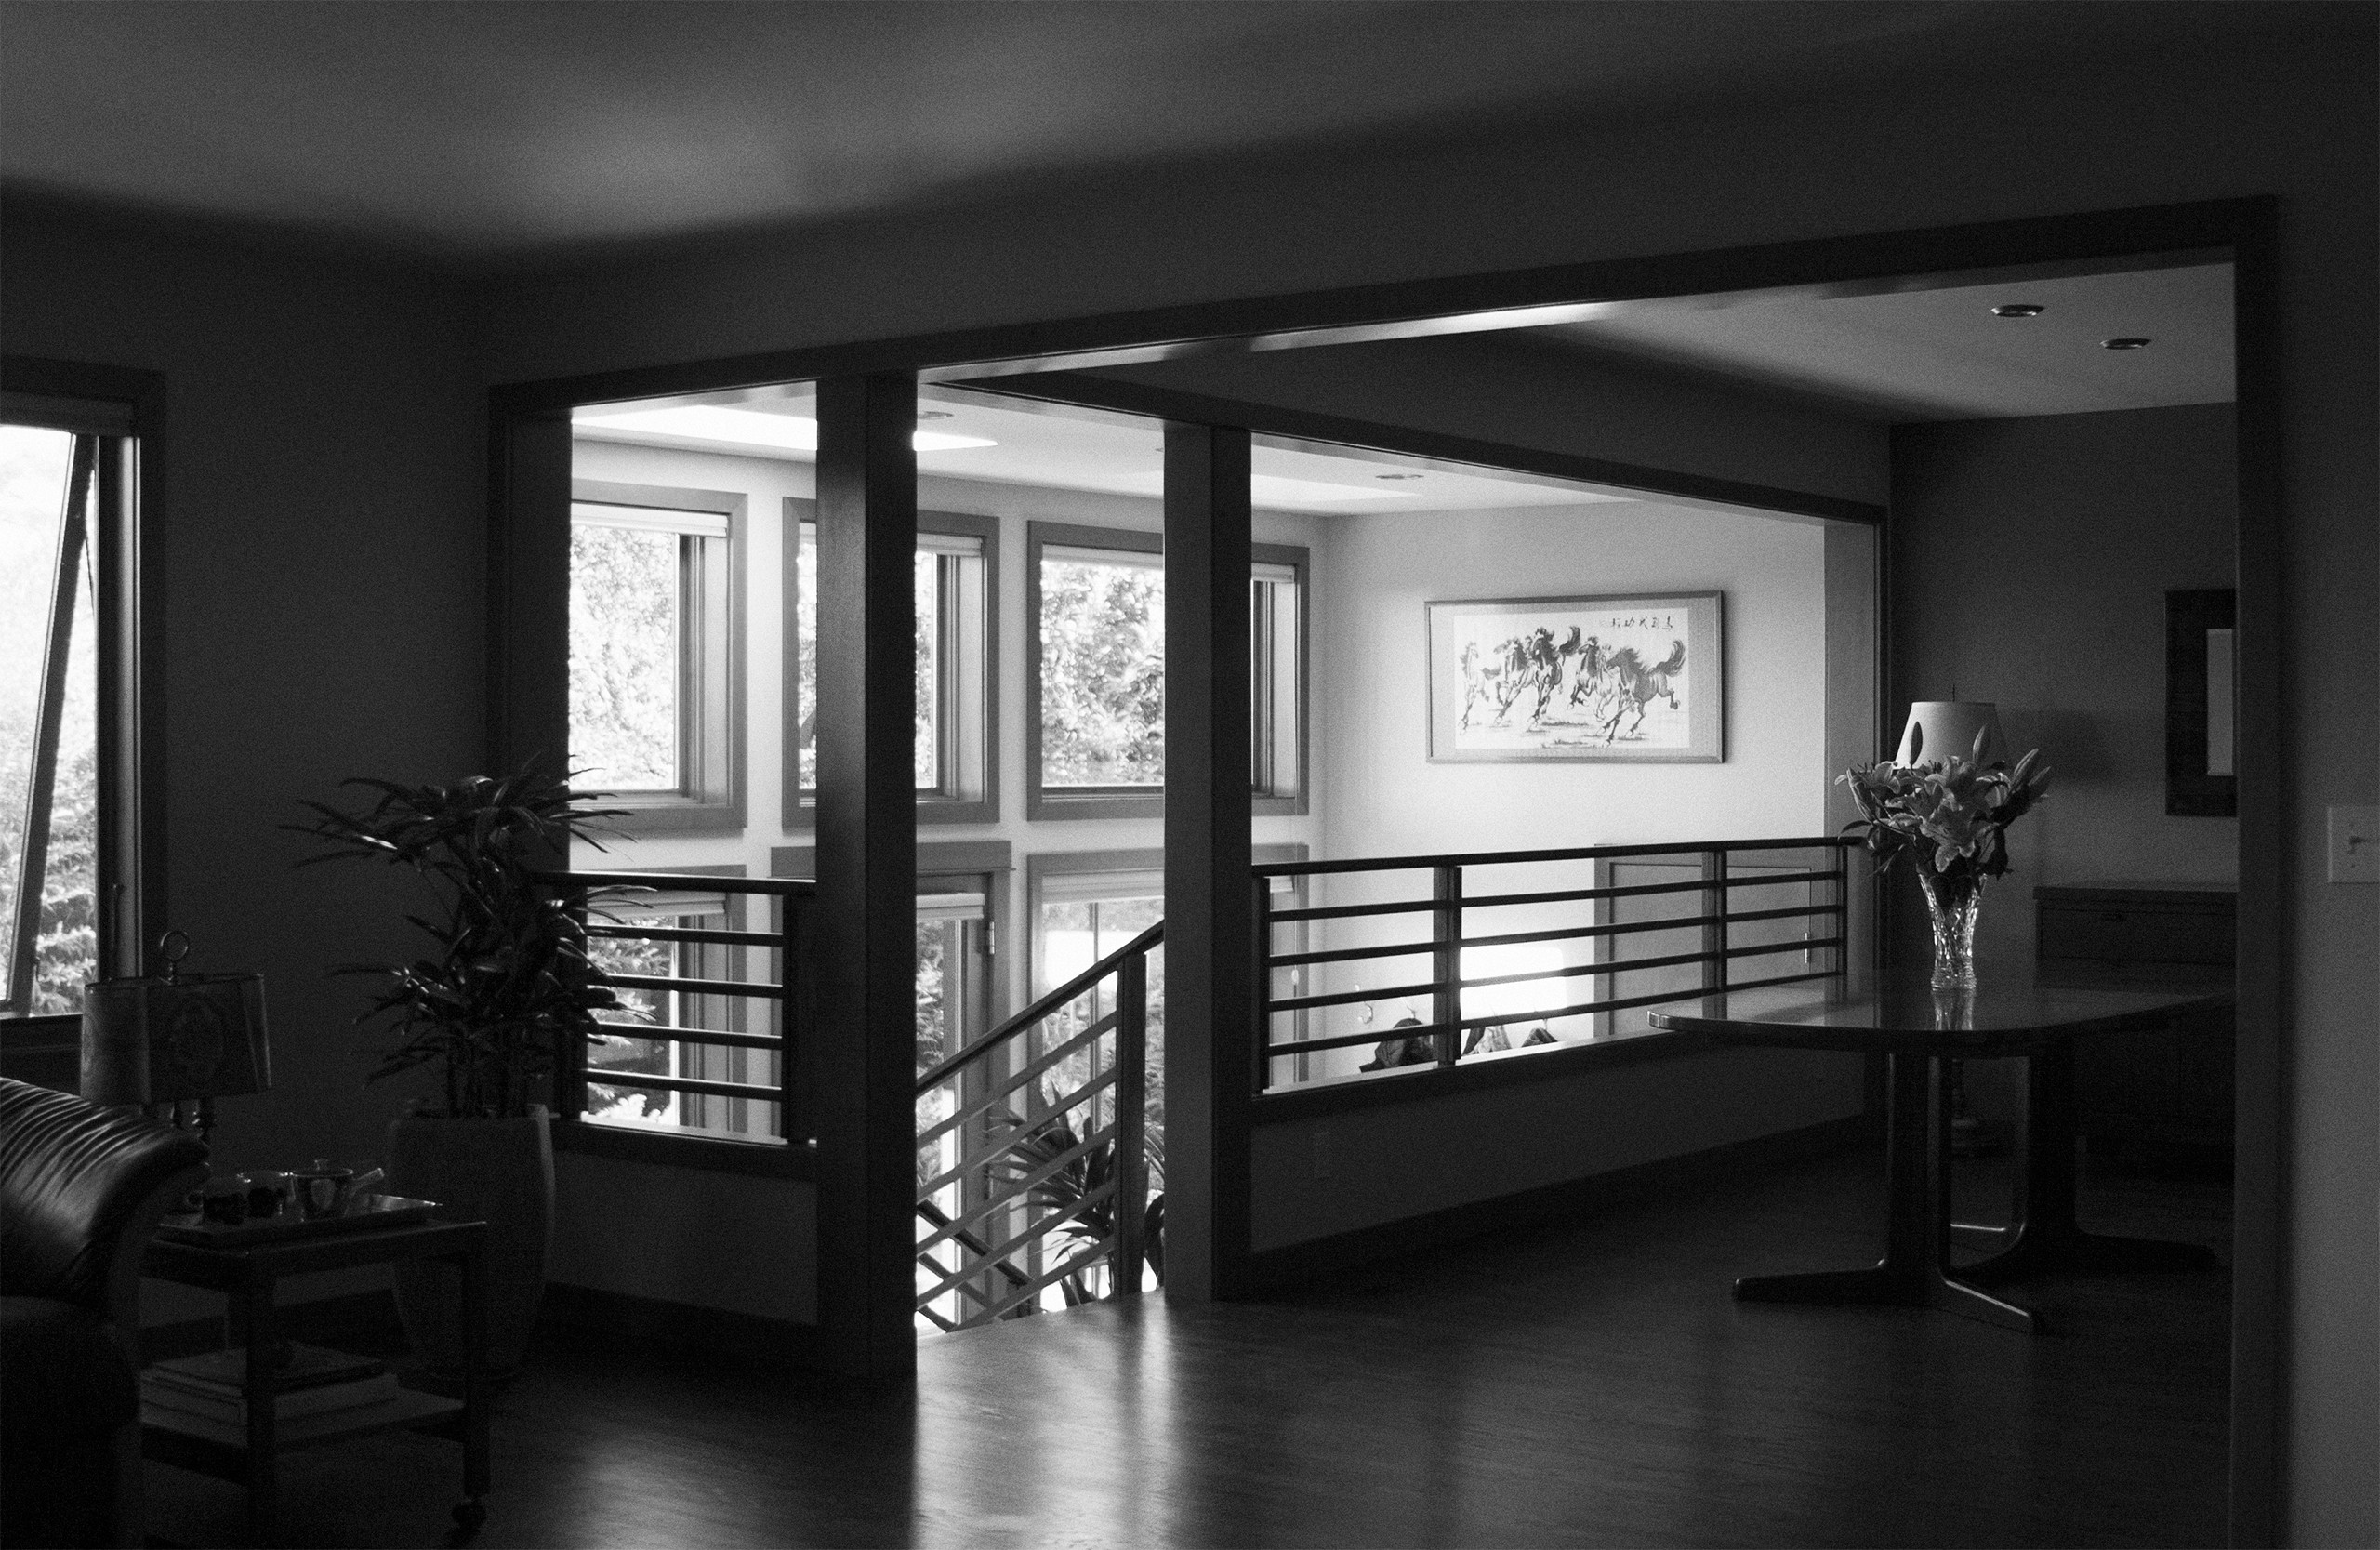
After: View to the Northwest from the Dining Room
The two wood columns flank the location of the former front door. Instead, stairs now descend between them into the entry foyer. With the dining room walls removed, the floor plan is opened, and light floods in.
Though the new entry addition in fact moves the exterior wall more than six feet further away from the dining room, much more light enters the space through the wall-to-wall windows, and through the two skylights in the roof of the addition. By removing interior partitions, and opening up the floor plan as much as possible, the flow of light into the space is more even, reducing glare, and allowing light from the living room windows to be enjoyed in the dining room.
A New Hearth & Custom Awning Windows
Before the remodel began, the homeowners had already purchased and connected a new gas fireplace insert for the existing hearth. As you can see in the “Before” shot, the accompanying metal trim for the insert didn’t fully cover the opening to the firebox, and soot from the formerly wood-burning fireplace had stained the white brick. The original plan for the remodel was to use the existing hearth as a substrate for a new tiled finish that would fully cover the hole behind the metal trim piece. However, during demolition, we discovered that the existing hearth was not properly anchored to the wall, as it began leaning out into the room: it had to be removed, and a new plan implemented.

Before: Hearth & Northwest Corner of the Living Room
The existing hearth was perhaps never intended to be a focal point of the space, and, at the very least, it needed a retrofit to properly house the gas fireplace insert.
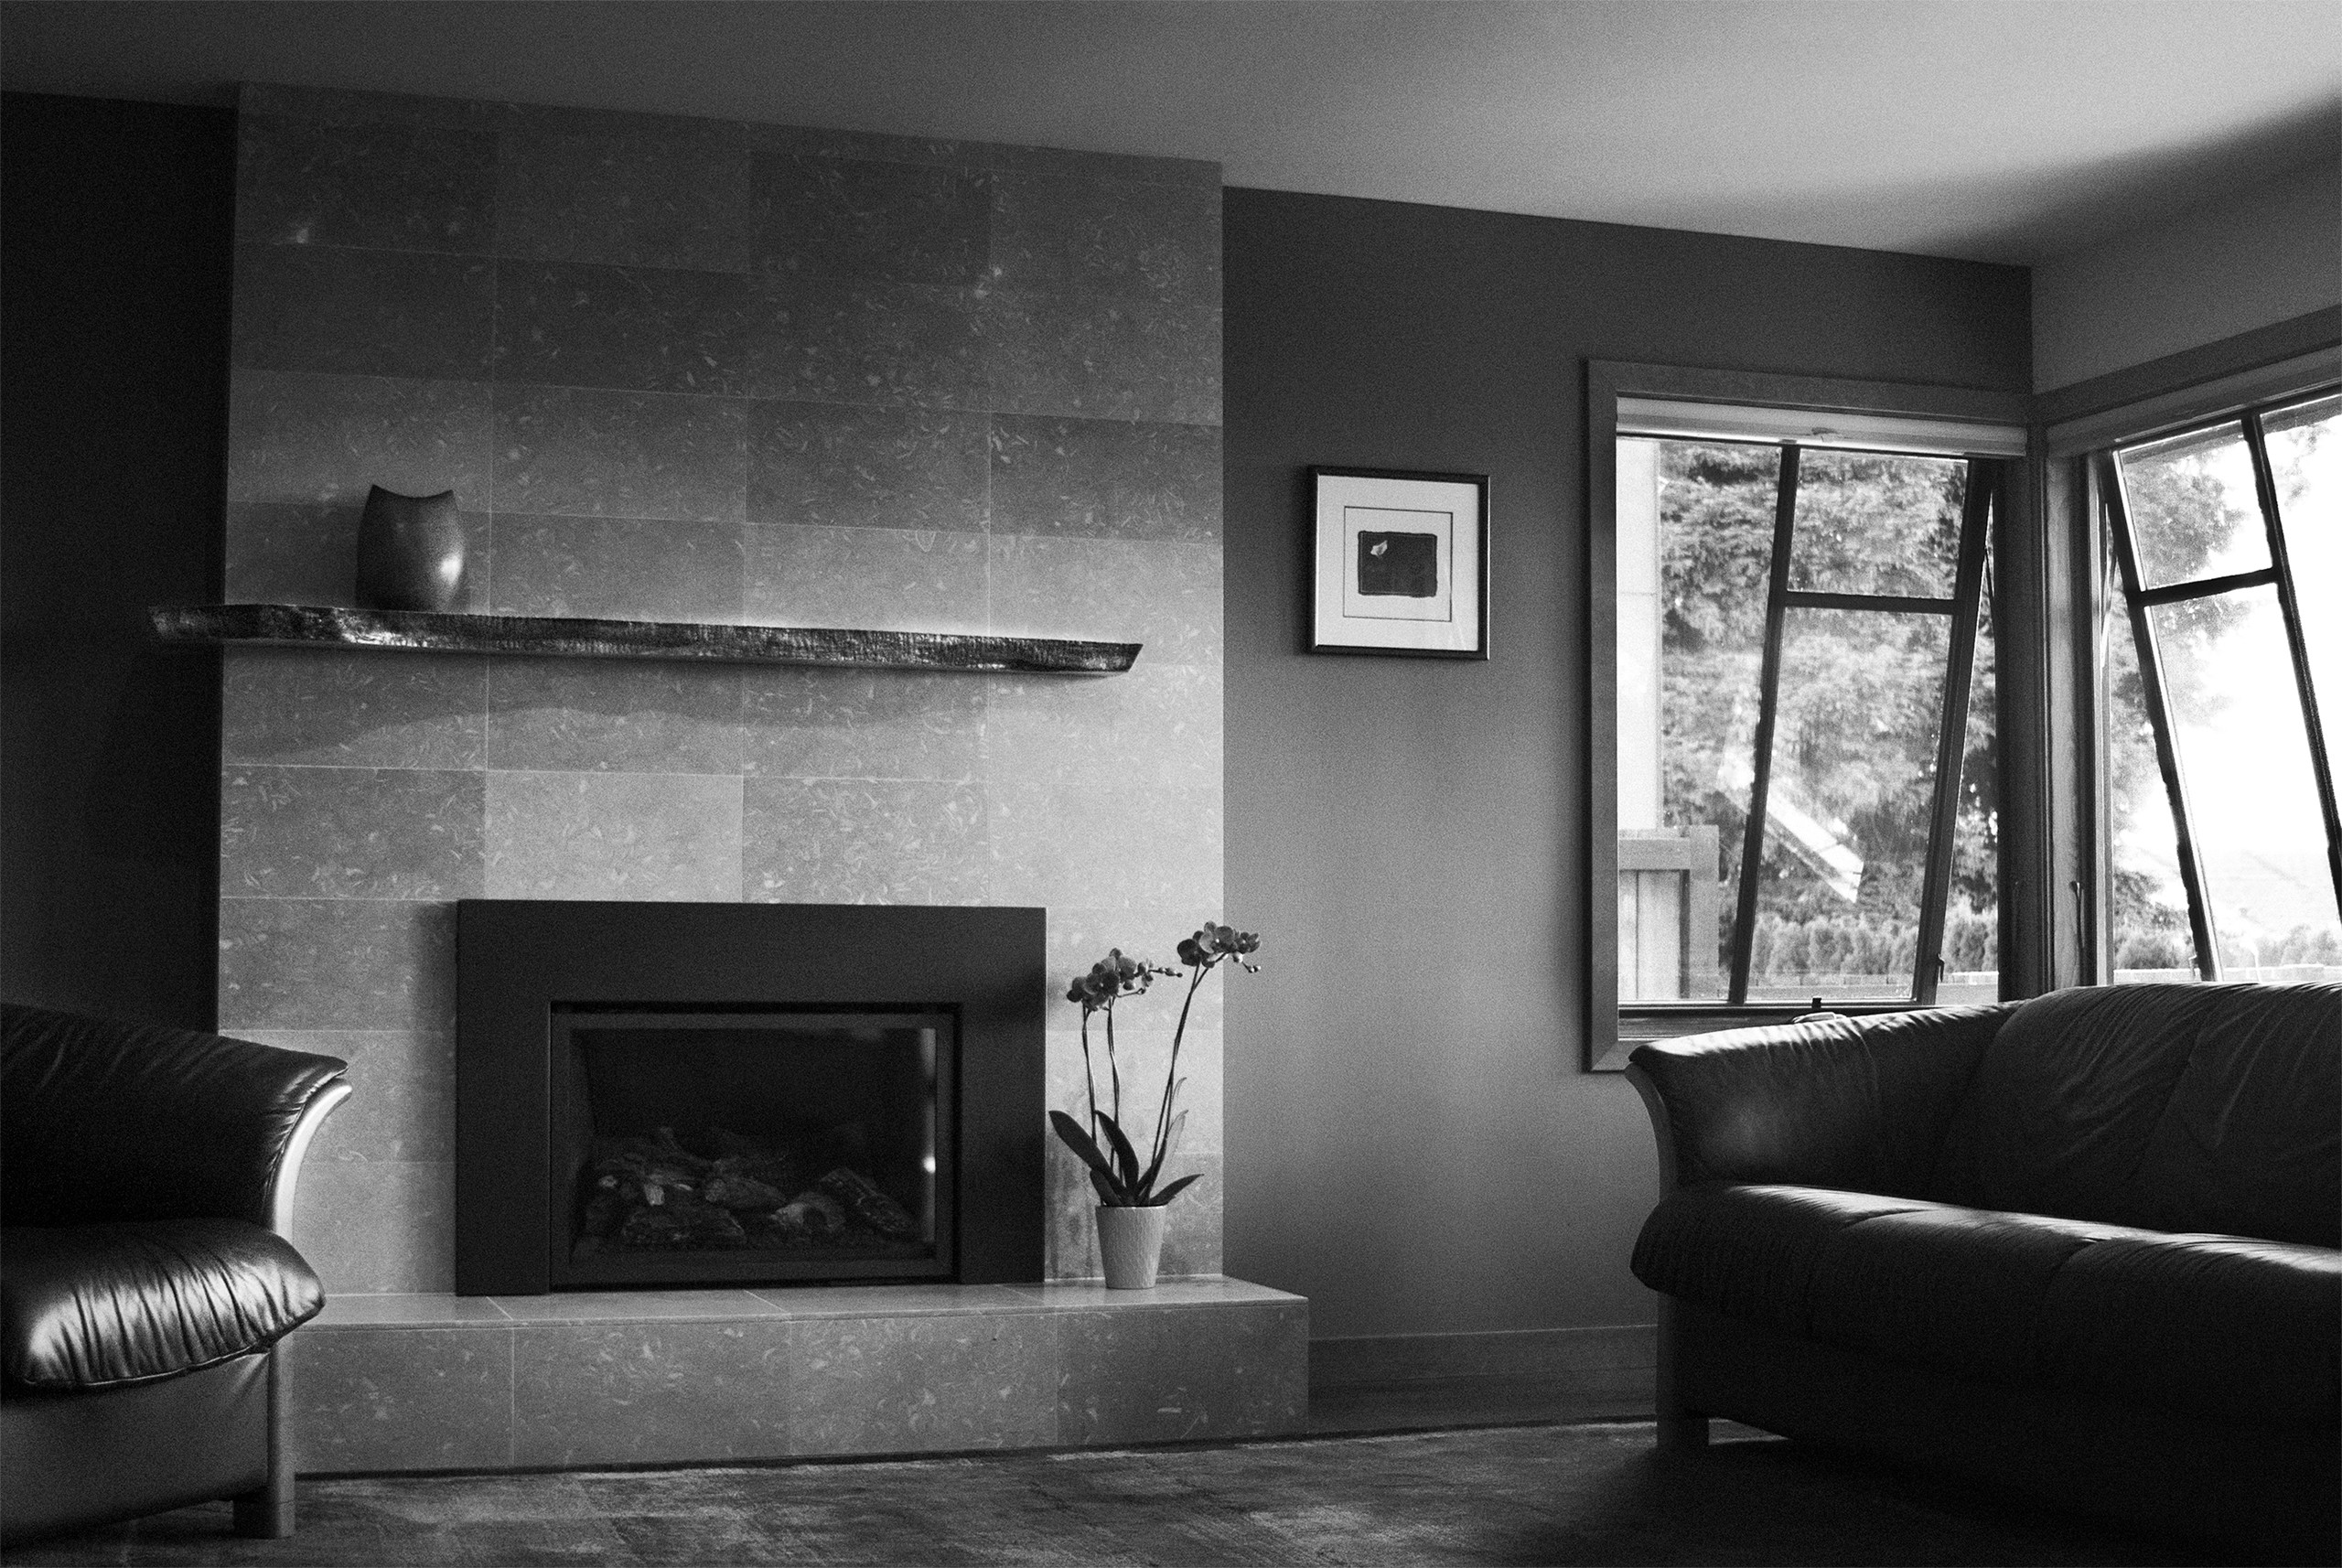
After: Hearth & Northwest Corner of the Living Room
The new hearth – clad in limestone tile with a live-edge maple mantelpiece – not only acts as a focal point for the space, but functionally absorbs, then later releases, the heat of the fire.
The new hearth is constructed of CMU blocks, sheathed in seagrass limestone tile, with a live-edge maple mantelpiece, crafted by Gary A. Leake Woodworking. Due to its mass, the hearth retains the heat of the fire, and releases warmth into the room for hours after the gas has been turned off. The foot of the new hearth covers the old hearth’s floor tile, and elevates the fireplace insert as far as possible, while still fitting within the existing firebox.
The old picture windows of the pre-remodel house are now replaced with massive, high-performance, aluminum clad, wood awning windows, which crank open with ease to invite in the cool air off Puget Sound. It’s the perfect paired feature for the warm hearth in winter: a light salty breeze in summer.
A Kitchen for Entertaining
Though the kitchen was open to the dining room prior to the remodel, it was not a kitchen fit to host a dinner party. The electric cooktop was positioned in the peninsula without an island range hood, so the kitchen could only handle light cooking. Furthermore, the counter was all at one level, so any evidence of meal prep remained on full display during dinner. And, let’s be honest, sometimes dinner party prep gets away from even the best of us, so a little safety net of privacy never hurts.
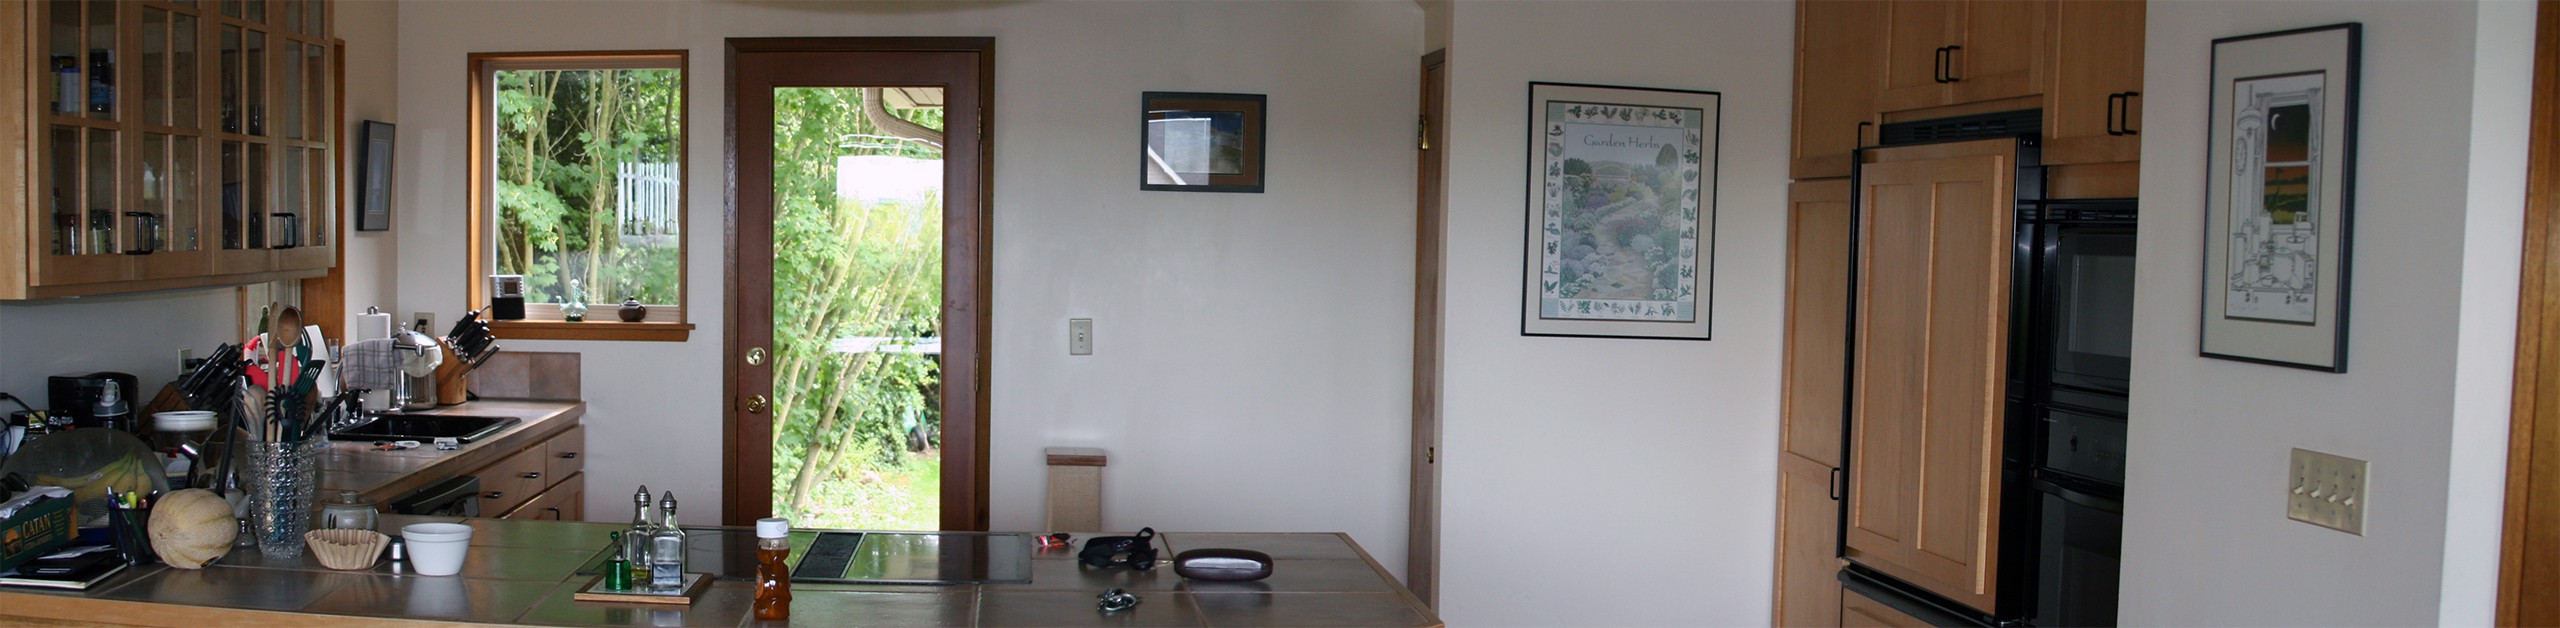
Before: View into the Kitchen from the Dining Room
Open kitchens are great for entertaining, but if there is no privacy shield or implied division of space, then every bit of mess in the kitchen will feel like it’s on display in the dining room.
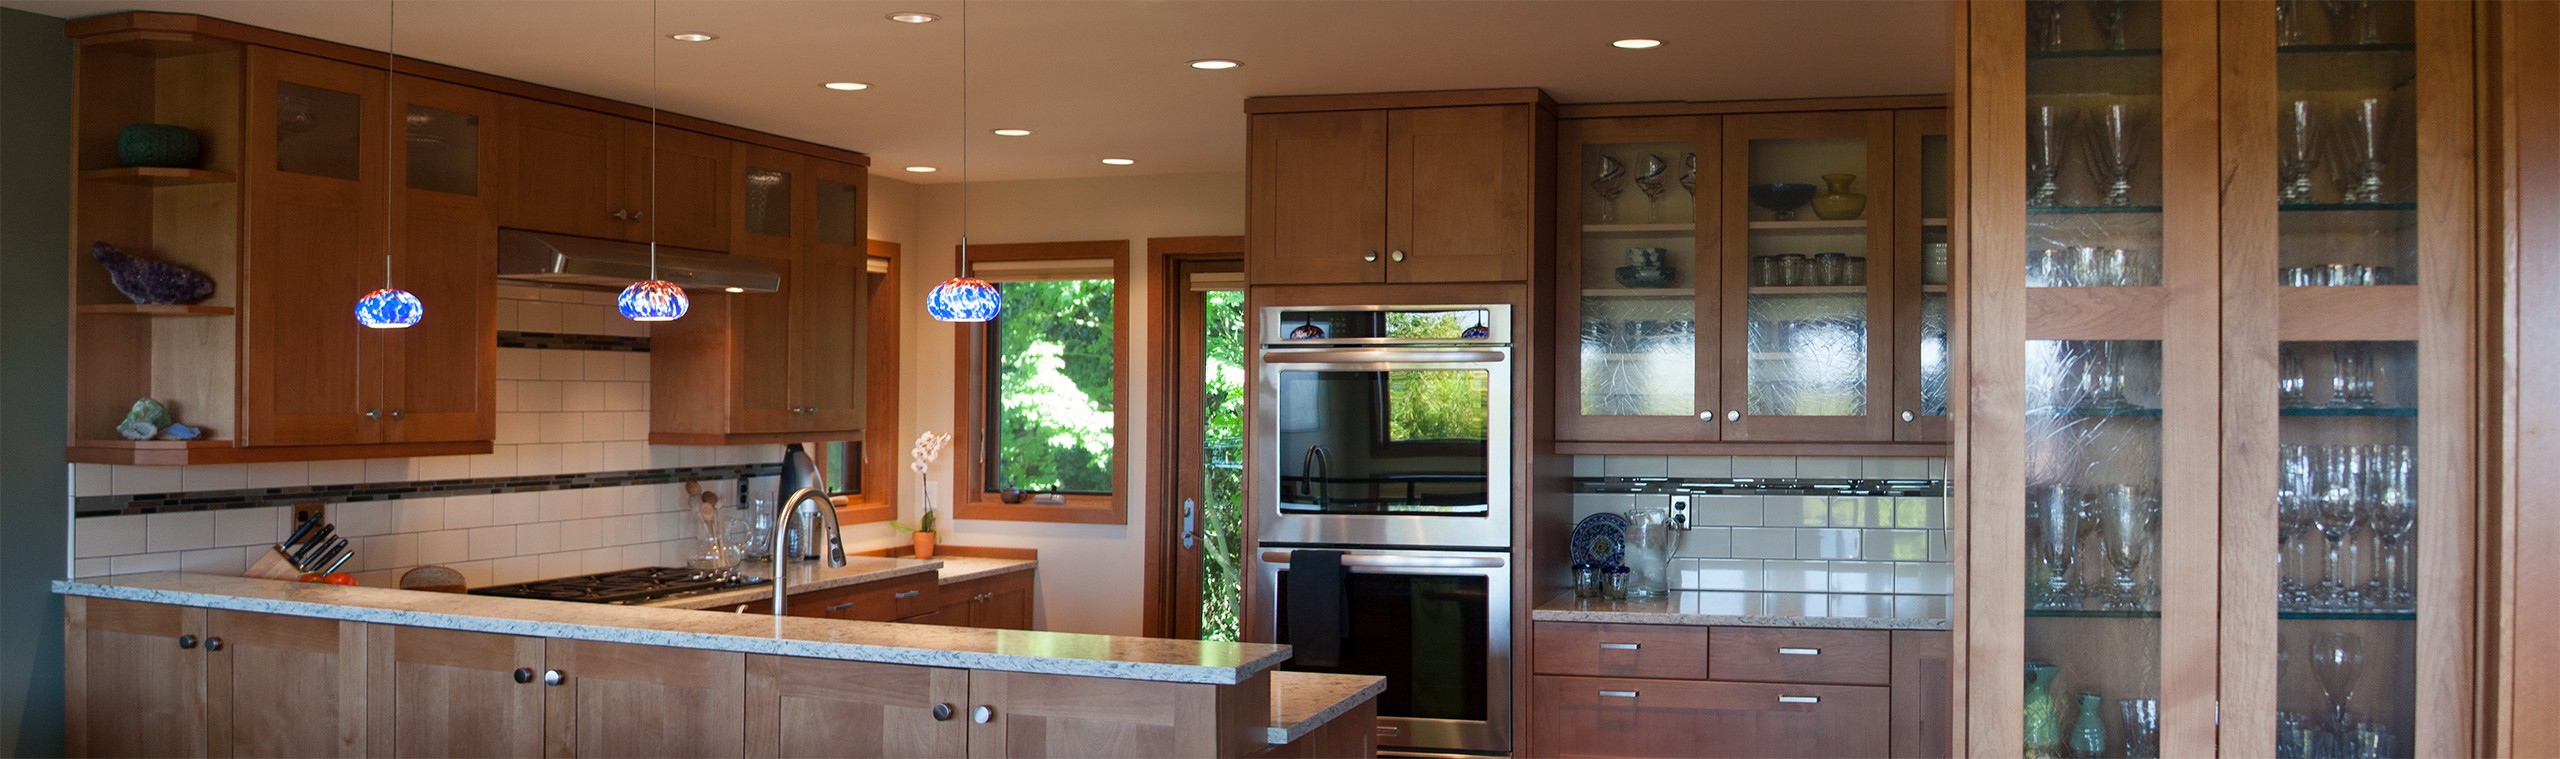
After: View into the Kitchen from the Dining Room
A stretch of counter raised as little as six inches shields kitchen work surfaces from the view of seated dining guests. Adequate cabinetry means the counters can be used for working space, not storage.
The pre-remodel kitchen was essentially an L-shape, with a separate linear run of cabinetry housing the refrigerator, oven, and microwave. It was a capital “L” and a lowercase “l,” if you will, severed from one another by the empty south wall. By extending the wall flanking the basement stairs, the south side of the kitchen is activated, converting the kitchen into two interlocking L-shaped sections. Relocating the cooktop to the east wall allows it to be vented to the exterior, and three blown glass pendant lights can hang over the peninsula. And, of course, a bar-height length of counter along the peninsula shields the work surface from guests seated in the dining room to ease the transition from cooking to eating for those dinner parties.
Make Space for Stairs
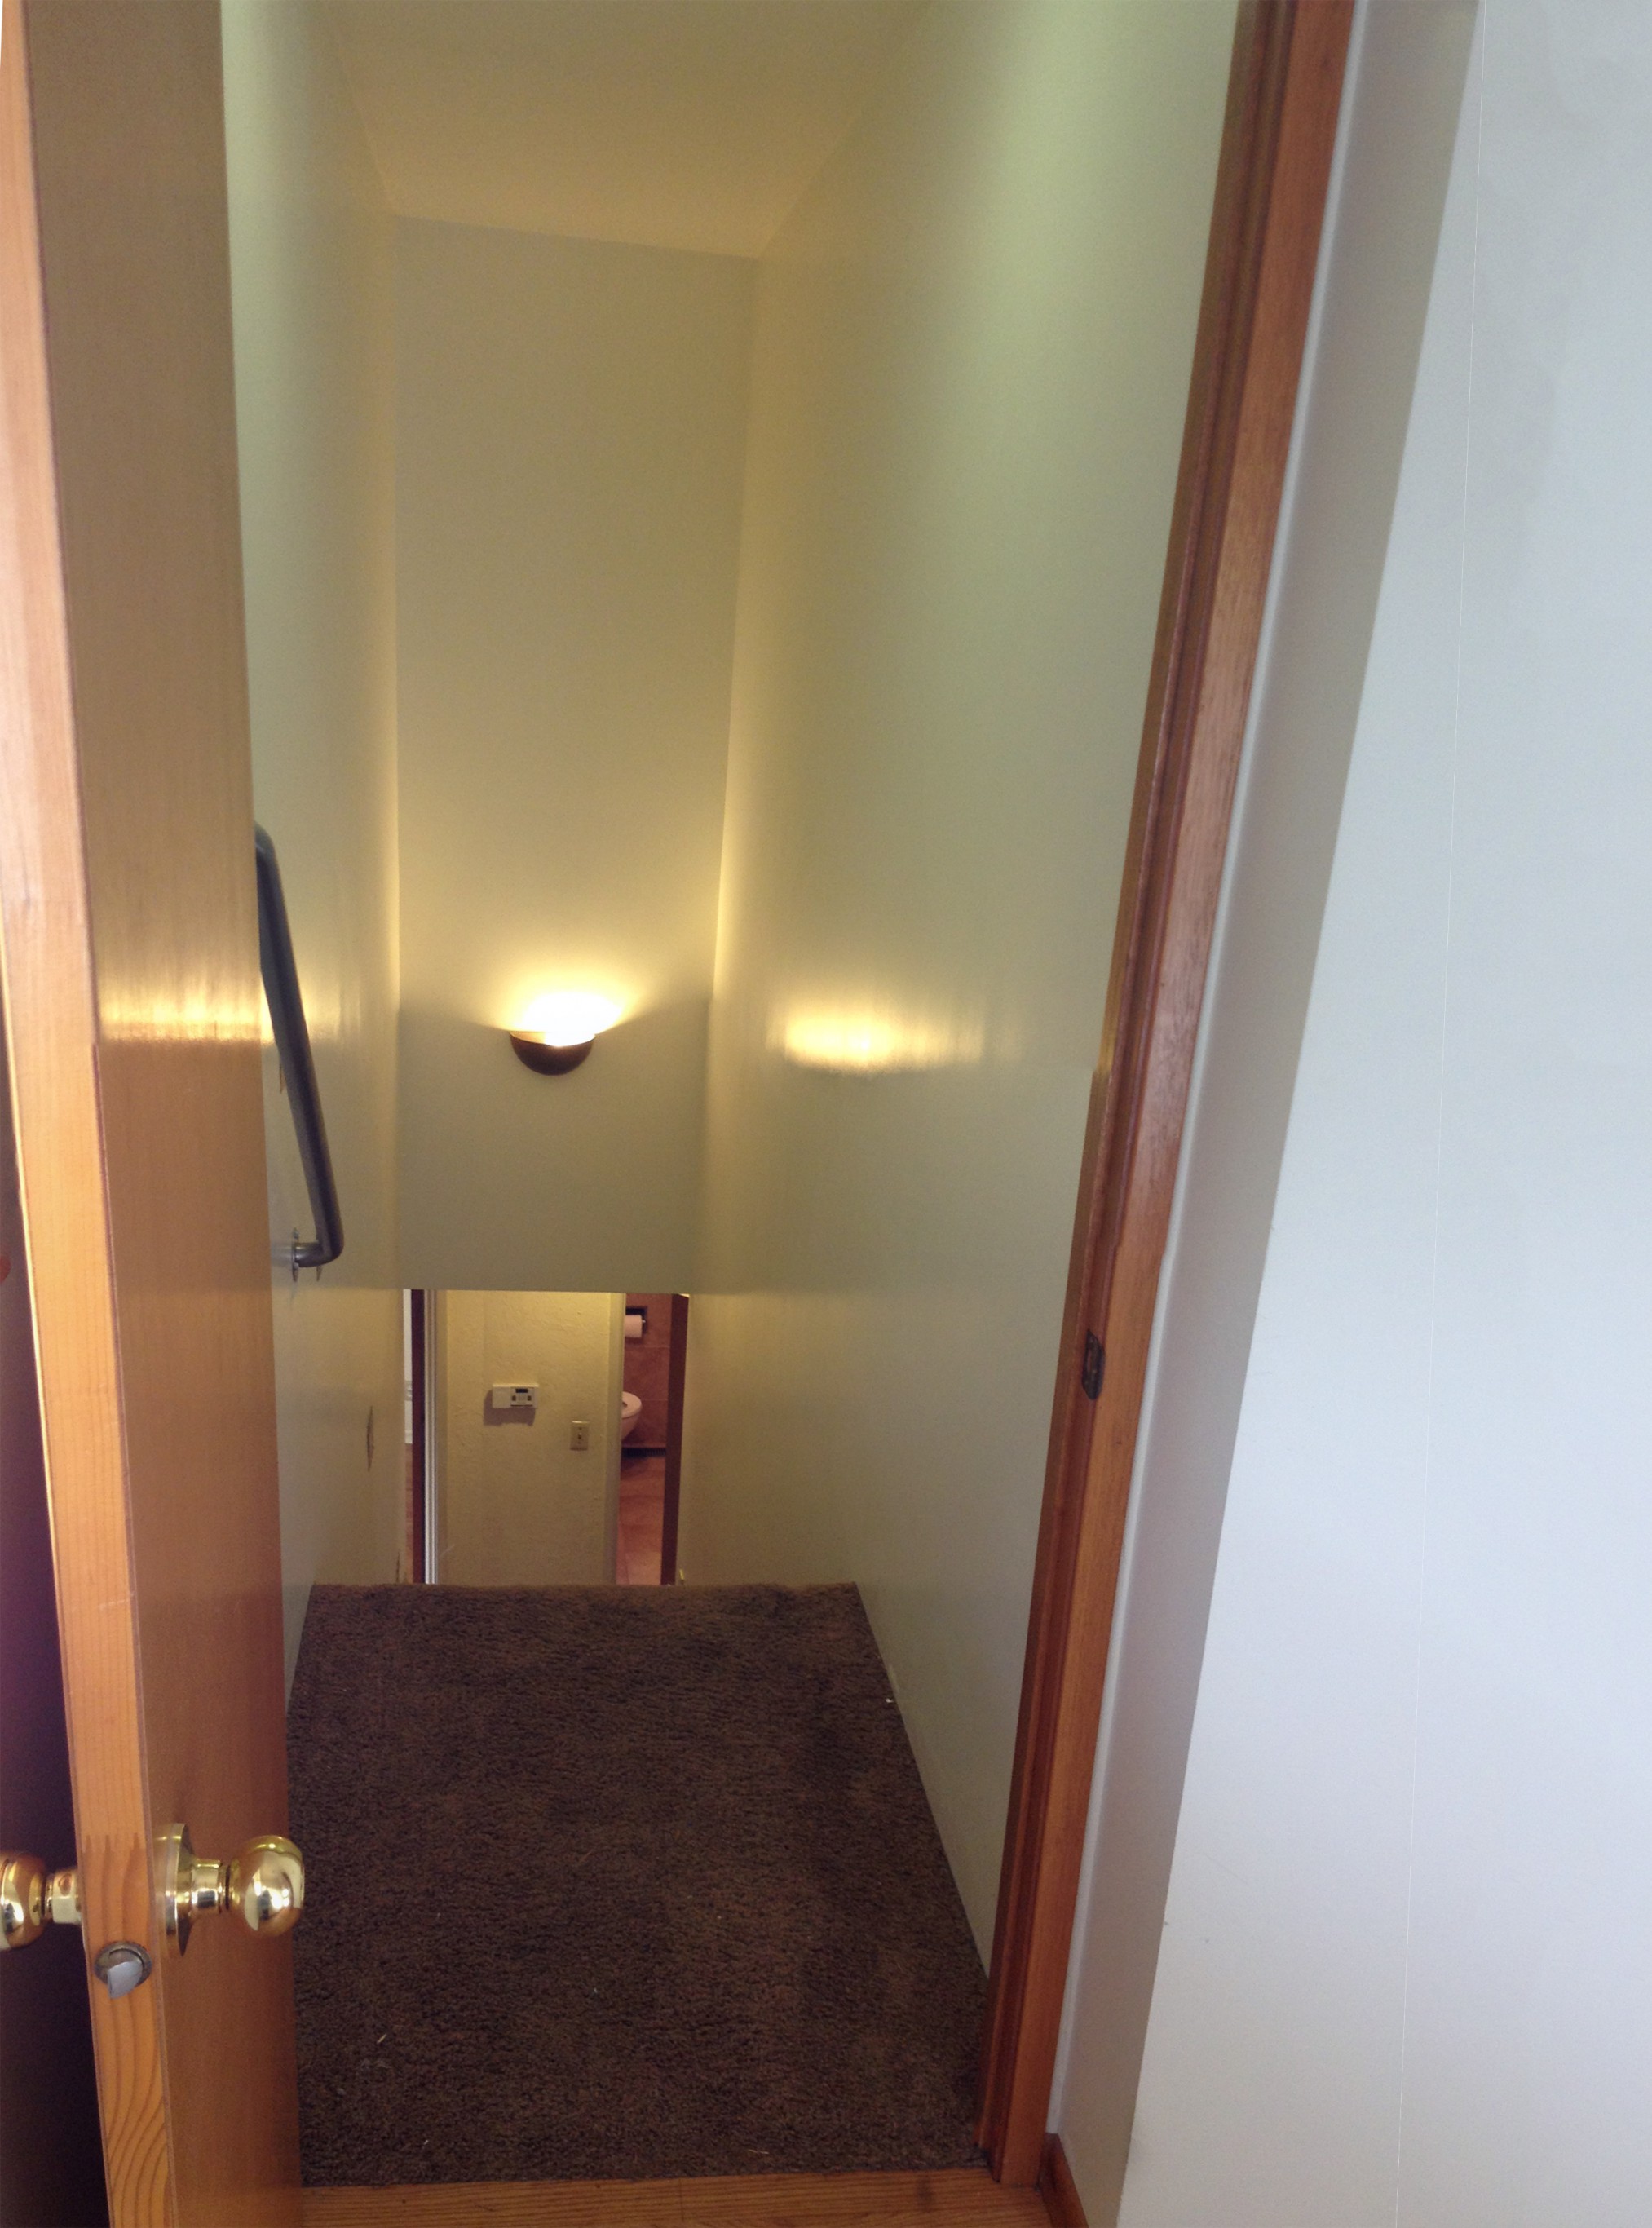
When the second story was added in the ’90s, the new stairway was fit into as small a space as possible, and ascended in one, steep, narrow run. The carpeted first tread even hung out into the narrow hallway, which, in turn, opened through a doorway from the living room.
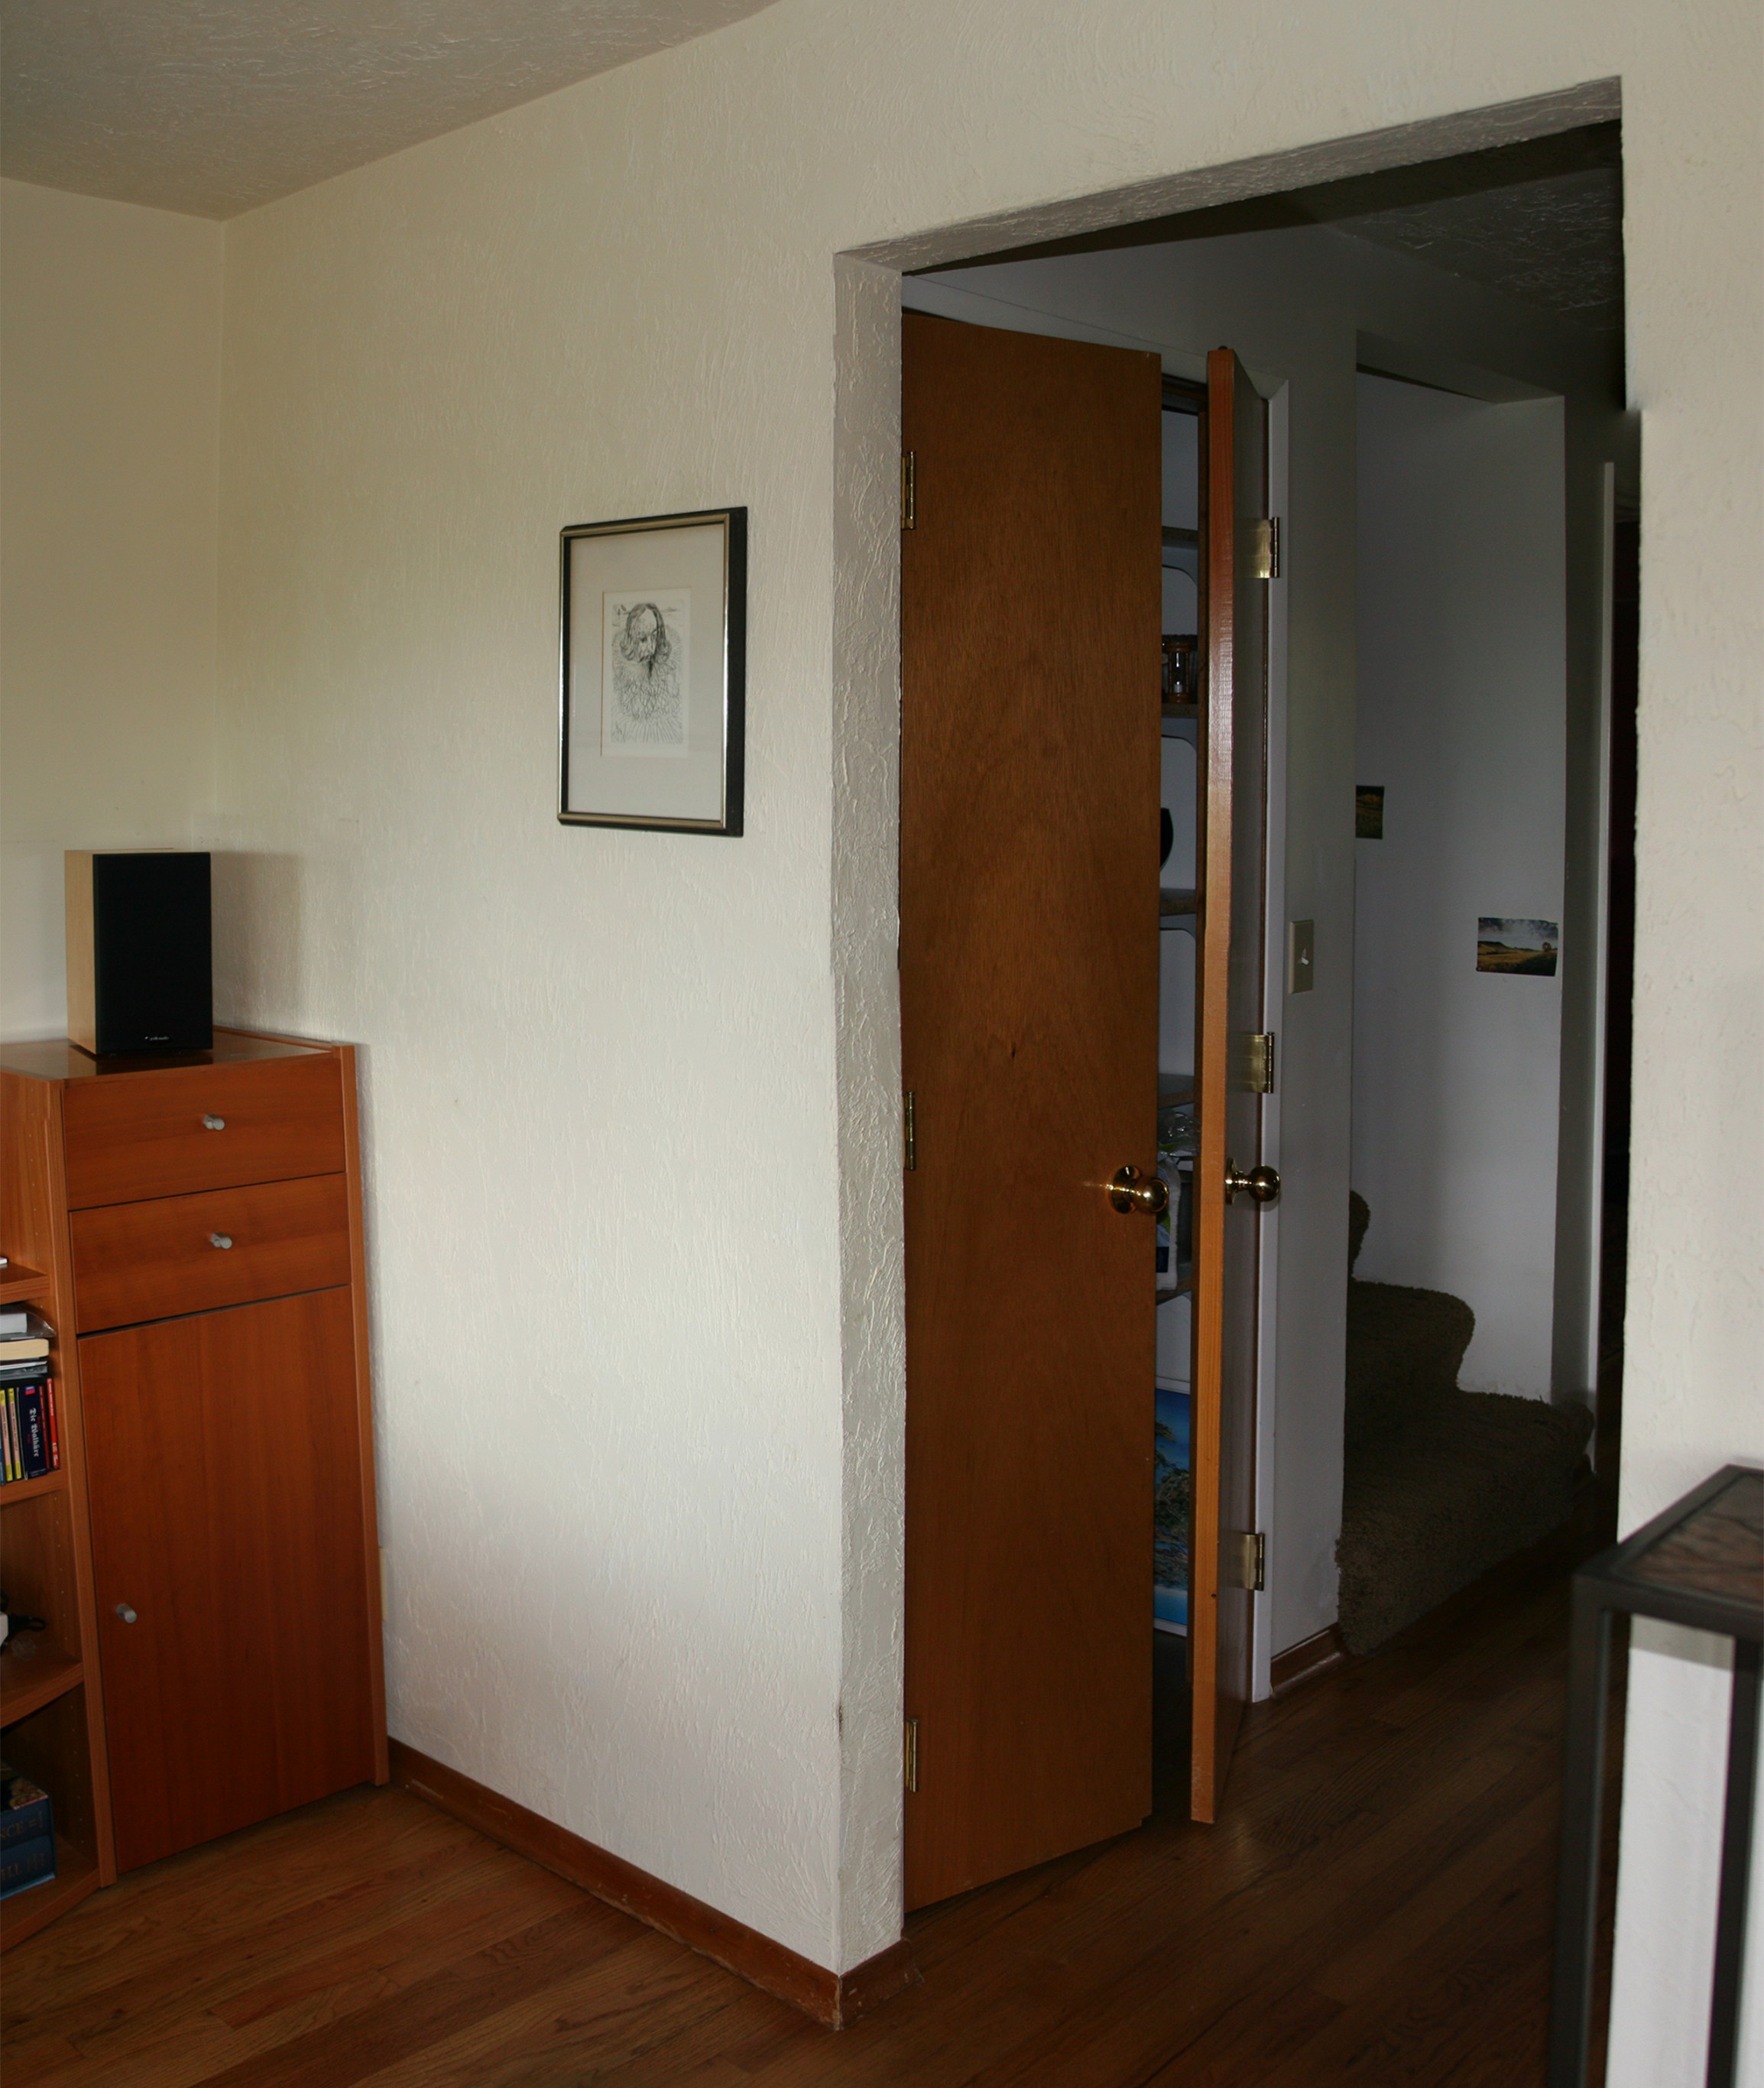
Before: Hall & Stair Up to the Master Suite
The living room and hall were compartmentalized from one another, making each feel smaller. The stair up to the master suite was one, steep run off the hallway.
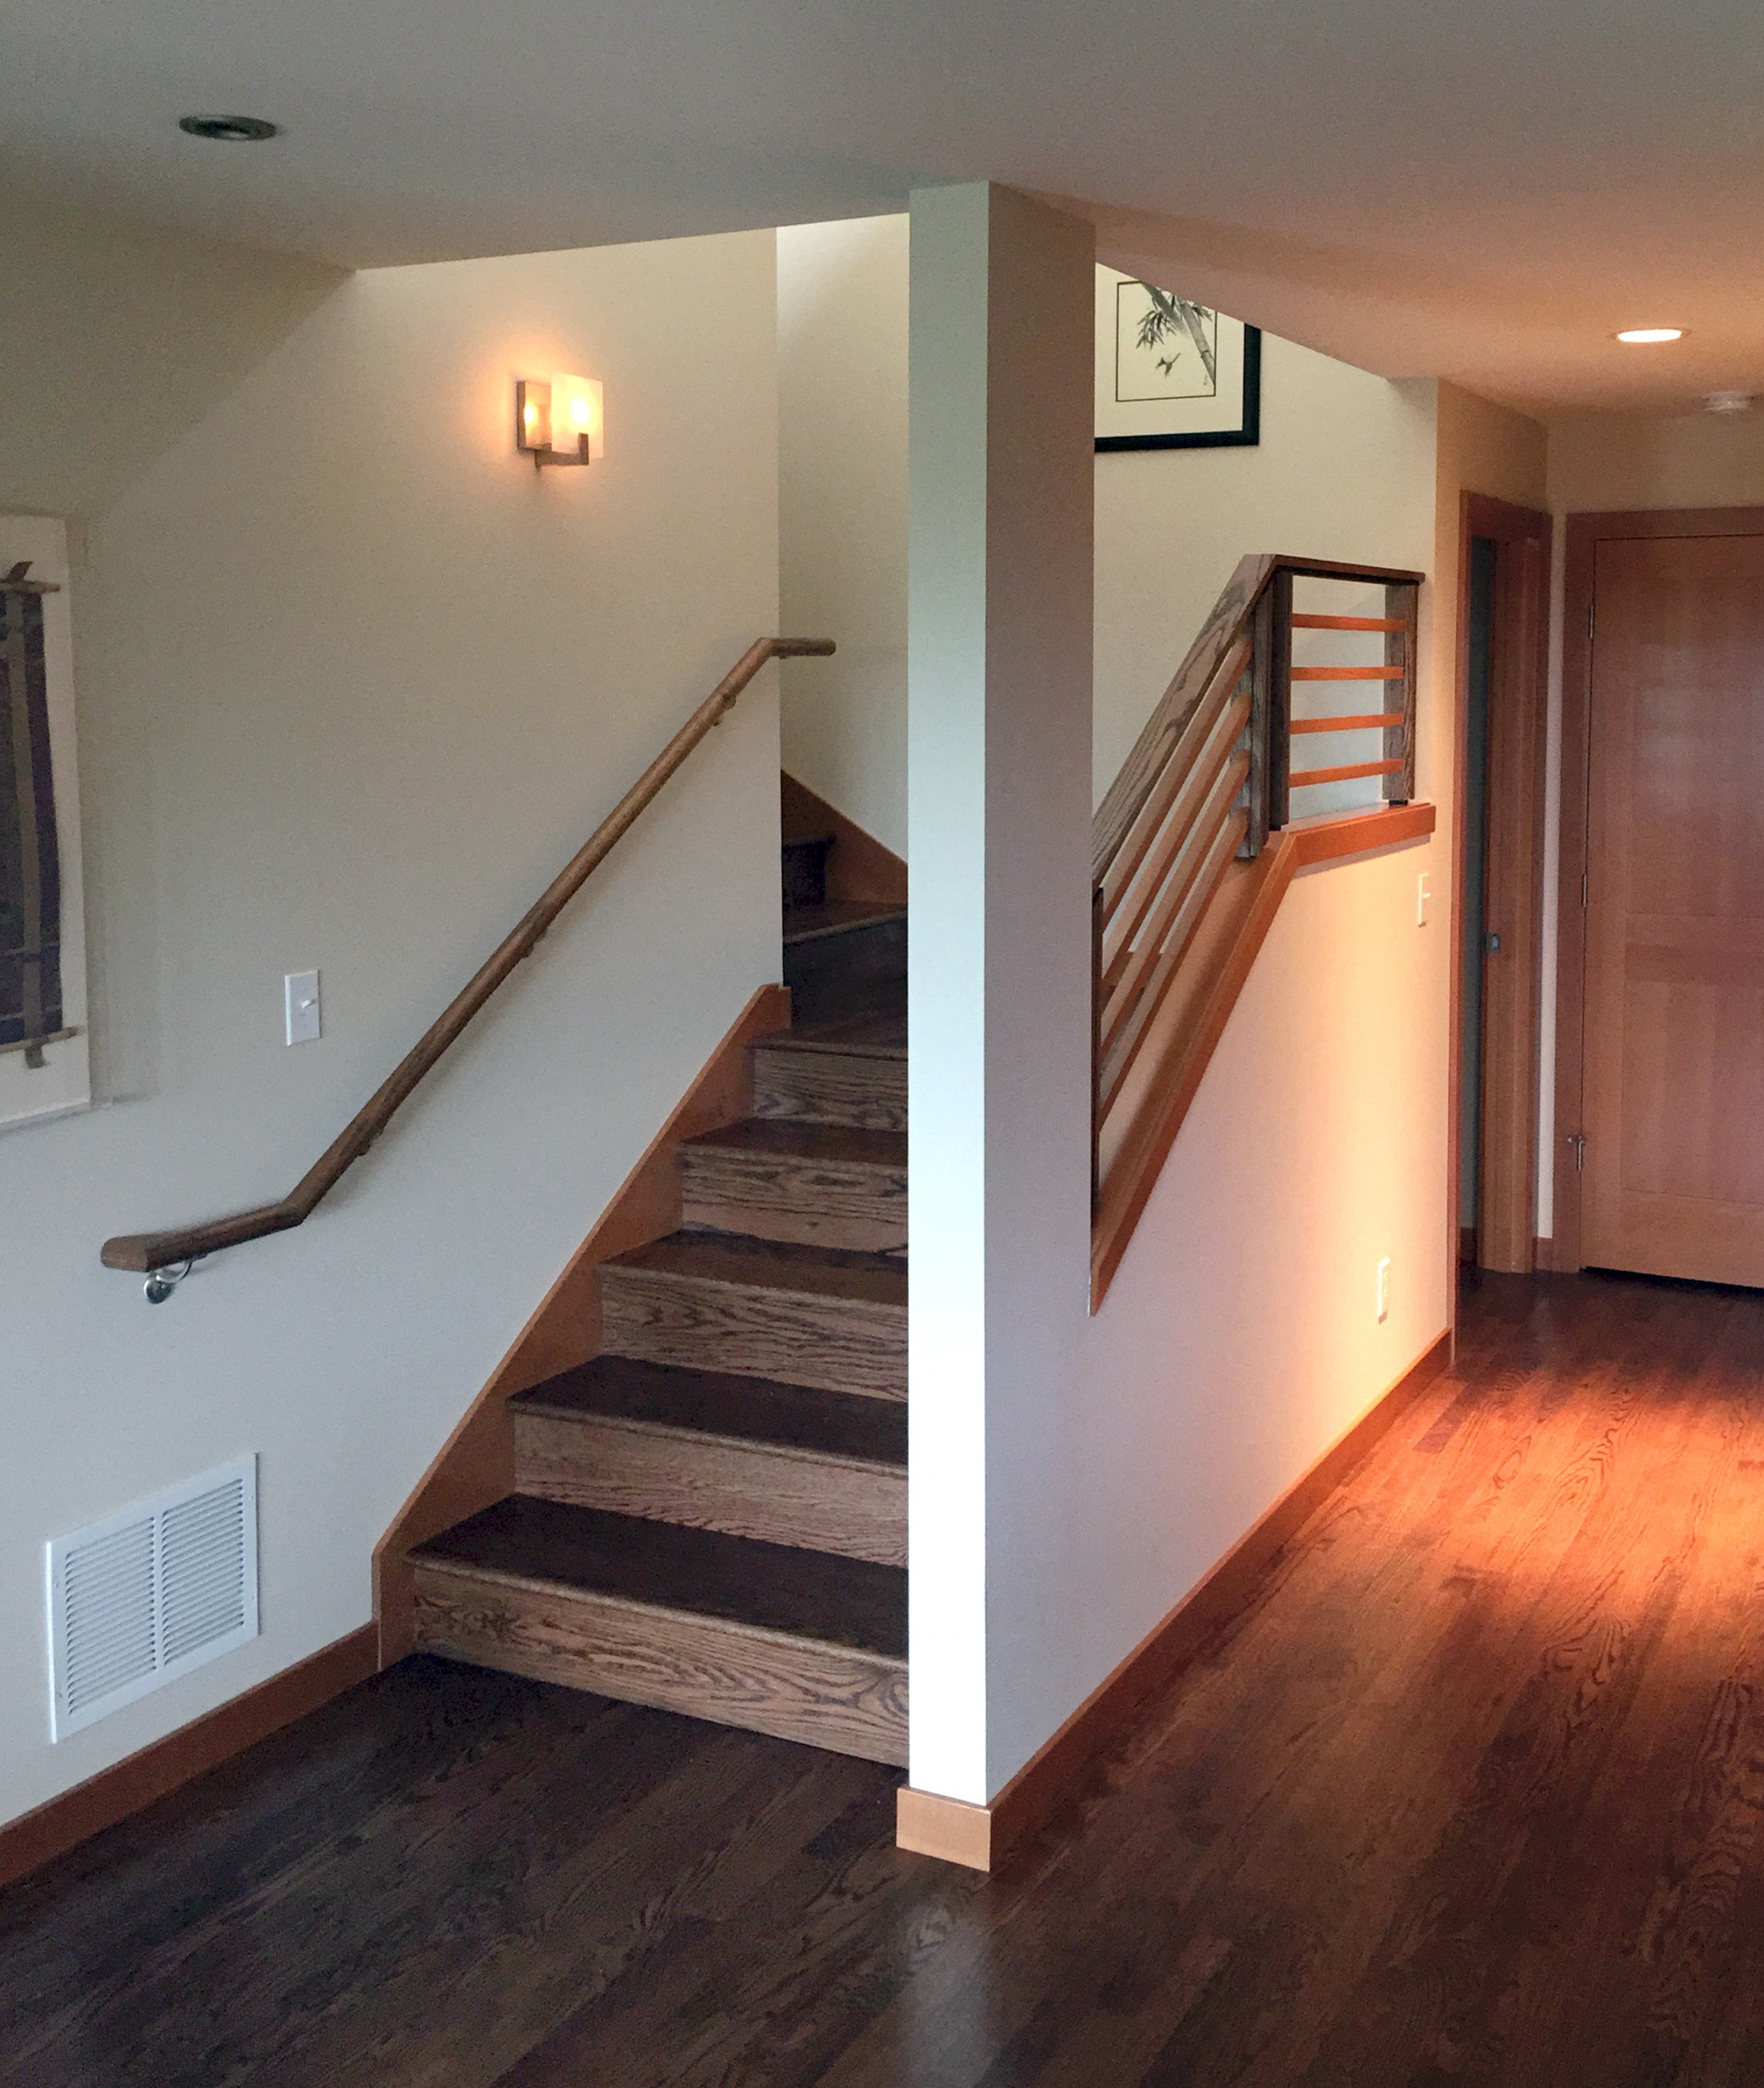
After: Hall & Stair Up to the Master Suite
By eliminating the extra closet and doorway to the hall, the stair can have a comfortable rise and run, and has an interim landing to break up the climb.
The new layout reconfigures the closets for the bedrooms at the end of the hallway, eliminating an odd diagonal wall, and adding a coat closet. Rather than the hall being treated as a space that must be compartmentalized from the living room via a doorway, the unnecessary header and jambs are removed. This allows the ceiling and walls of the living room to continue smoothly into the hallway, unifying the spaces, making each feel larger.
With the storage closet removed, there is space for the stairs to turn after a landing. The ceiling in the stairwell is at the level of the second floor ceiling, and new windows high above introduce the glow of southern light to the living room, balancing what was previously one-sided light from the north.
Being Smart with Square Footage
Before the remodel, the master bath featured two sinks, one shower, one jetted tub, and a separate toilet room. Despite ample square-footage, the space wasn’t utilized to improve the experience. The shower was a cramped fiberglass insert, and the tub surround was outfitted with the sort of stepped entry that is now recognized not only as a space hog, but as dangerous. Unflattering top lighting, dated finishes, and a backache-inducing low counter rounded out the complaints about the existing bathroom.

Before: Master Bath, Looking West
Even though there is plenty of room, the old master bath featured a tiny shower, small mirrors, and a diminutive counter. The only natural light came from a north-facing window over the tub, that sat with an oddly low header.

After: Master Bath, Looking West
In the same footprint, the new master bath features wall-to-wall finishes, and a beautiful double shower. Instead of just a door off the bedroom, the new layout also creates a loop through the master bedroom, closet & bath.
In the same footprint, and also with two sinks, a generous toilet room, and the same jetted tub, the bathroom redesign features a large, double shower, and a dropped vanity counter with a bench. A wall-to-wall mirror over the counter reflects the view of Puget Sound, such that it can even be enjoyed while in the shower. A new window on the west wall brings in warm afternoon light. The walls of the shower and tub enclosure are lined with Napolina limestone tile from floor to ceiling. This maintains the clean lines and spa-like atmosphere of the space, rather than introducing the needless extra edges that occur when finishes are forced to end partway across walls.
Returning to the Stair
Now heading back down the stairs to the main level, as we have already discussed, the pre-remodel stairs felt like a steep, dark chute that would cause an easy tumble to the floor below.
Before: Stair Down from Master Suite
Going down these stairs scared even us young-ish 30-somethings.
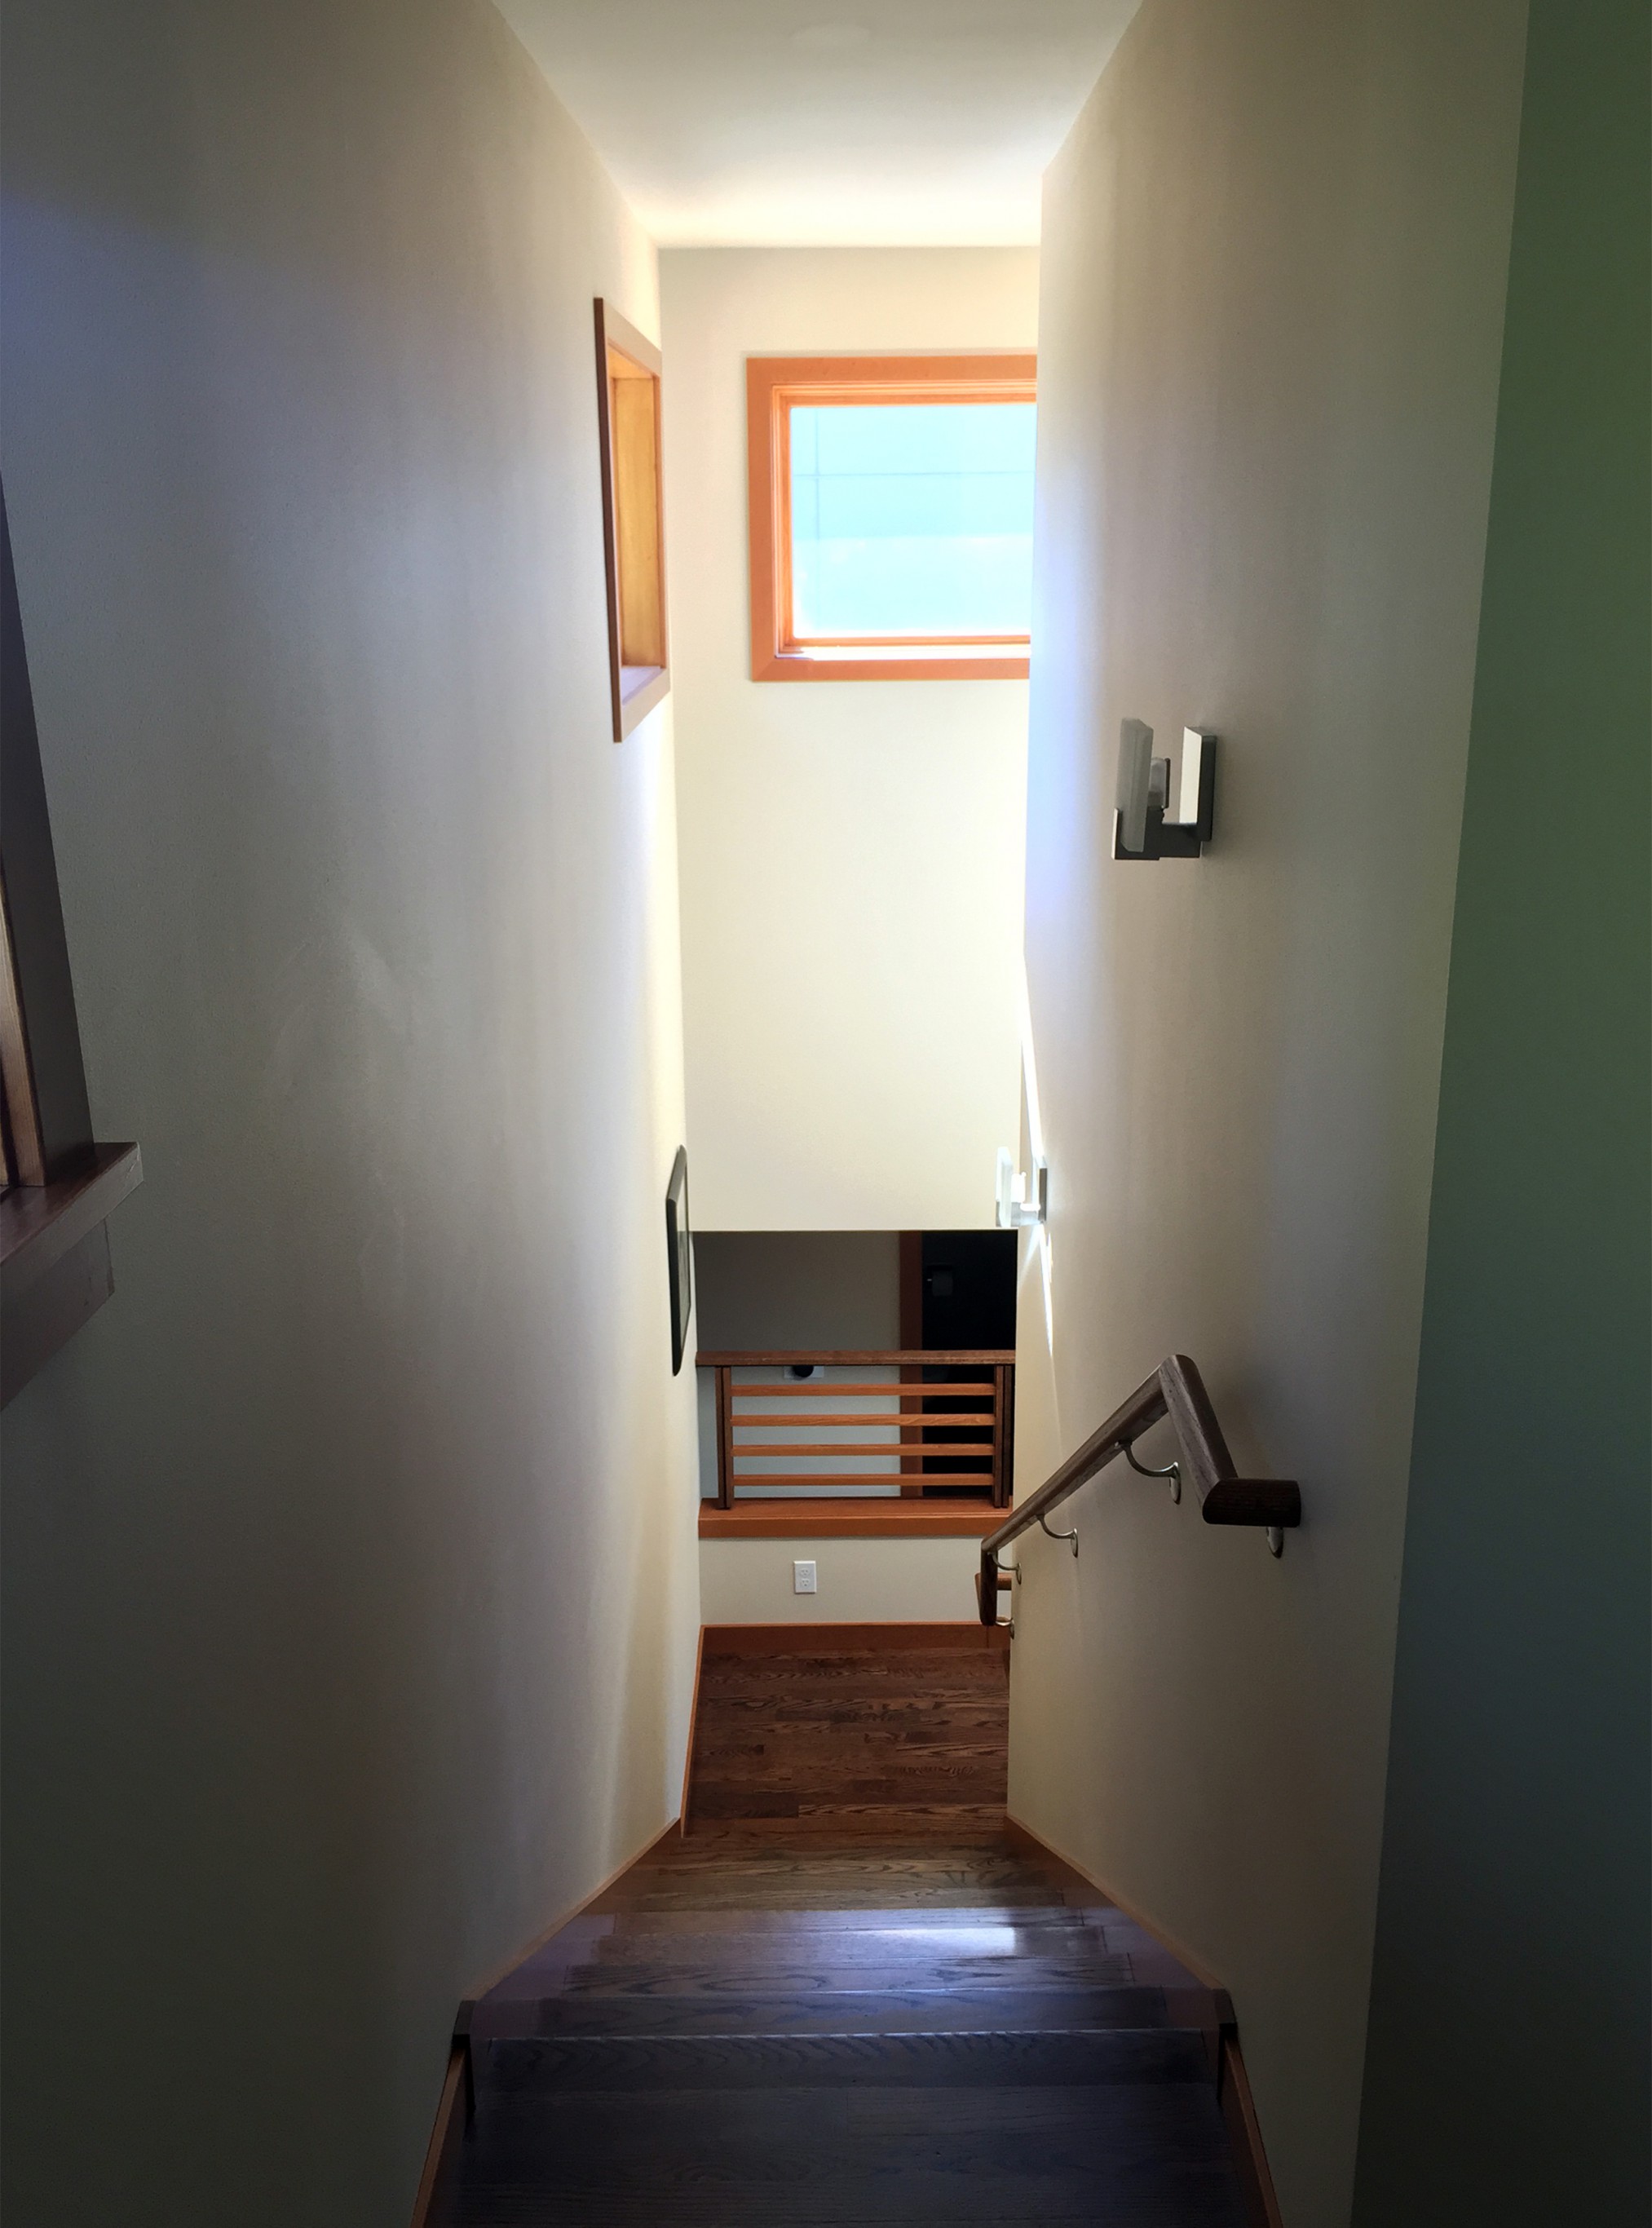
After: Stair Down from Master Suite
New wood windows, and beautiful details make this descent something to enjoy.
Being more generous with the rise and run of the stairs, combined with adding a landing and two large windows to the stairwell creates a much more comfortable descent, rich with natural light.
The Beauty of a Transitional Space
Continuing back towards the dining room and entry from the base of the stairs, the exterior walls of the pre-remodel house cut the space short at the edges of the main rooms. There was no architectural richness of detail, only basic openings and finishes.
Before: View from the Living Room to the Entry
Little care was put into the former layout of the house and its architectural detailing. Rather than designing to optimize function and experience, the house was a series of spaces perforated with openings meeting basic requirements.
After: View from the Living Room to the Entry
When design comes into play, each architectural move is carefully considered and crafted to optimize both function and enjoyment of the space: good design curates space for its inhabitants.
Once room is granted for transitional space and architectural detail, a rich world of experience is revealed. From the new abundance of light, to the custom wood railings, and warm wood trim wrapping the columns & beams, the house barely resembles its former self.
A Home Renewed, An Investment Well Made
As dramatic as these “Before & After” shots may be, they are also a testament to how much you can improve an existing space without tearing the place down and starting over, as long as you do so with care. After many chapters of sporadic alterations, this house has finally turned a new page, and is pulled together as the whole it was meant to be. No doubt, it will be updated in the decades to come to suit new owners, or new styles, but it no longer will need a major remodel just to solve issues as basic as needing more natural light, or a sense of privacy from strangers at the front door.
A successful major remodel is only something that can be done with considered design. Remodeling a house is a huge commitment, and it can be an expensive endeavor. While it does cost more to hire a designer, without architectural oversight, you risk losing the value invested in the project. Designers are trained professionals, and we are here to help you! If you wouldn’t act as your own lawyer to save money in court, or set your own broken arm to avoid paying a doctor, don’t invest money into your remodel without professional oversight. Let us, or your architect of choice, help you create the home you’ve always wanted, even from within the one you already own.


