

Product
Wedged Walnut Cabinet: The Build
A consolidated collection of posts on the construction/build process for the Wedged Walnut Cabinet, a one-off piece of furniture. Composed of walnut, formaldehyde-free MDF, and brushed steel, the Wedged Walnut Cabinet was built by hand in the wood shop at the University of Oregon School of Allied Arts.

June 26, 2011
Let's Get Our Build On
More than any other class, I have been hearing that, if at all possible, I must take the furniture design studio. It's not that I've been avoiding it. Rather, I've been hoping for it. Finally, it is happening this quarter, and (do I even have to say it?): I am stoked. This time around, the theme for the studio is storage. Of course, we aren't talking boring bookshelves or standard drawer sets here. The whole point is to take it further, to make something that is well-designed, and meaningful – something that hasn't been made before. And so it begins: we will all design, then build, our own furniture pieces, all in a matter of a few short months. I'm ready. Let's do this.
If your journey here didn't come by way of the Wedged Walnut Cabinet: Design Process post, you may want to take a peek at it first, as it tells the story of how we made it this far. Or, if you're only interested in the construction of the Wedged Walnut Cabinet, then carry on. As I did for the design process posts, I've consolidated blog posts of the furniture build into one, sorted below by the date of the original entries. Enjoy!
May 8, 2011
All of the Pieces
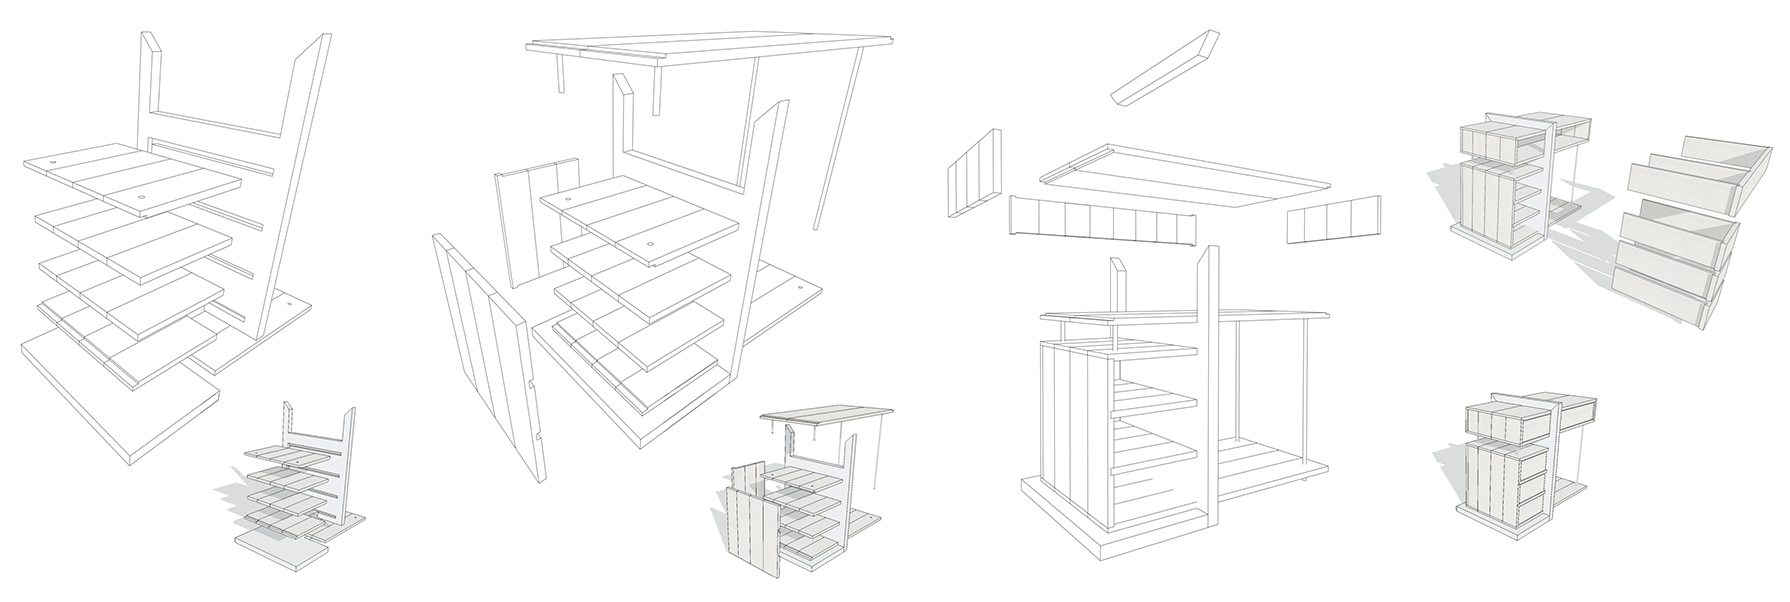
A Detailed Digital Model
In lieu of formal construction drawings, every component piece of the project is sized precisely in the 3D model, for reference in the shop. Should alterations need to be made in the shop, the digital model would be altered accordingly.
It's time to take the leap and build this baby. But, as excited as I am, I am also a little terrified. Pulling this off properly is a big deal, and a lot of careful attention needs to be paid. Not only is time short, but the materials are expensive. It would be a shame to ruin a perfectly good piece of walnut because I didn't “measure twice, cut once.” Needless to say, I have built an elaborate digital model of the cabinet, with each piece of wood and each joint carefully modeled to scale. I'm not leaving this one up to chance, or “figuring it out on the fly.” Nope. This baby is all planned out, and just waiting to be built.
May 11, 2011
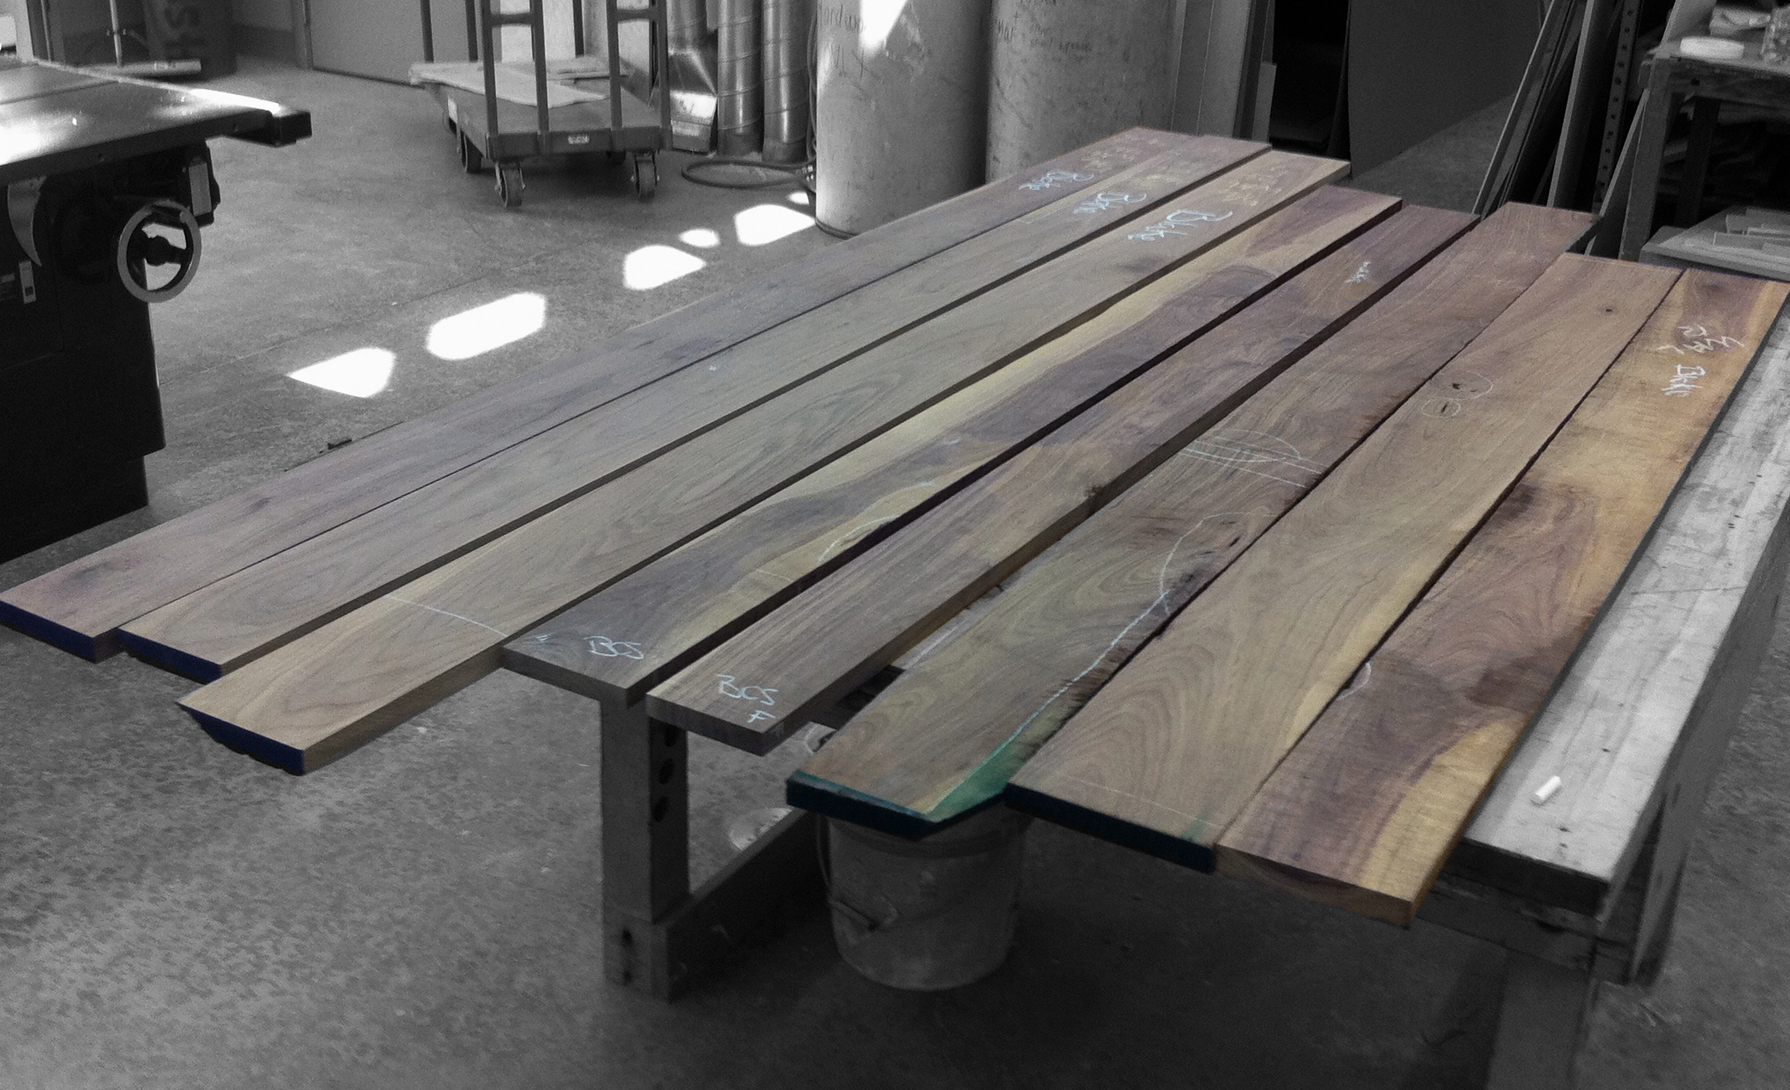
Construction Begins: Walnut Milling
The first week of construction is well underway, with the milling process for the walnut boards nearly complete. In these photos, I have documented the progression from raw to planed boards of approximate length.

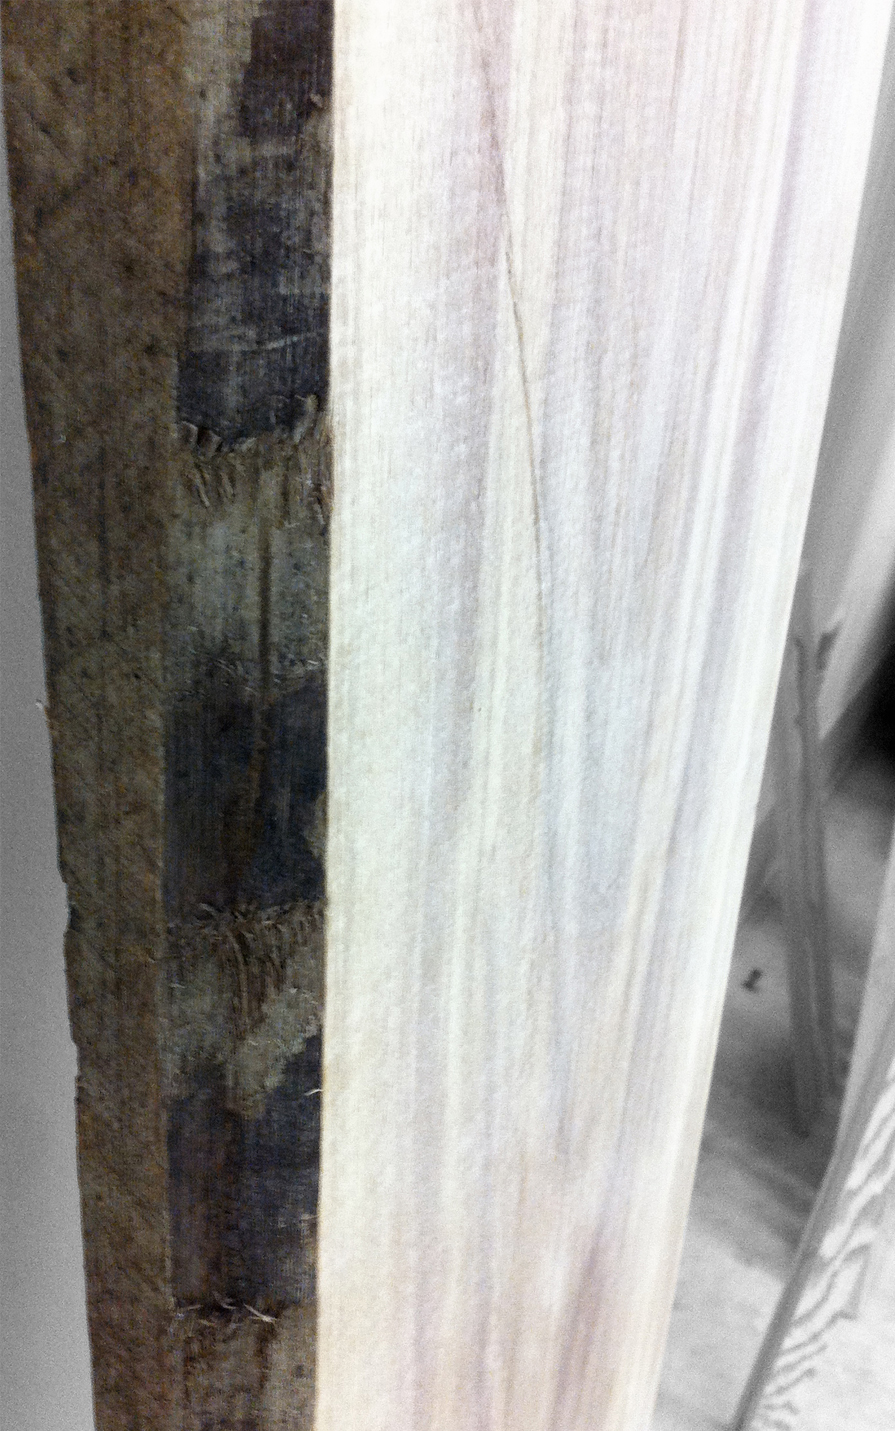
Rough Edges
Here, the edges of the boards are still rough, looking a bit rustic.
Full Length
The boards will be trimmed down to the approximate lengths needed for each piece.

Beautiful Boards
Milling and joining (or jointing) complete! The boards are now flat and square, ready for construction.
Later today, I will begin edge joining these boards together. The placement of boards adjacent to one another during edge joining is integral to the overall success of the project, considering the variability in the figuring and grain patterns. That is to say, the patterning of the wood is very particular, and to obtain the look I want in the finished piece, each board that joins another, forming, say, a side of the box, needs to be carefully curated with its neighbors for its particular figuring, grain pattern, and grain direction.
The Largest Piece
This 8’ by 11” by 2” raw walnut board is too large to deal with at the university wood shop facilities, and will need to be handled professionally.
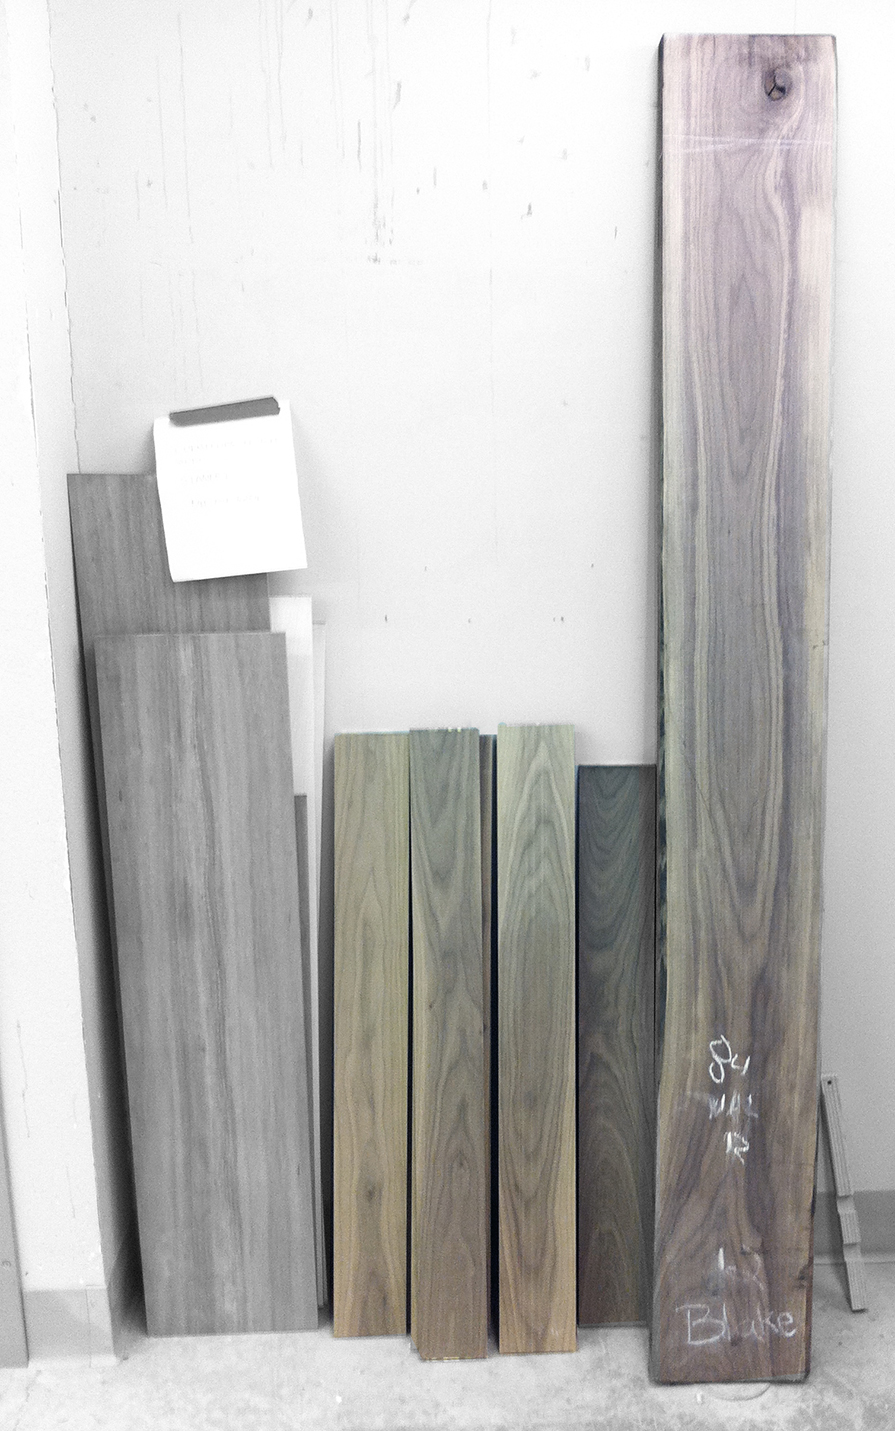
Cut Walnut Boards
The large, still un-milled, walnut board dwarfs the other boards, which are ready for construction.
These last images show the massive eight-foot-tall, 11-inch-wide, two-inch-thick beast of a walnut board I purchased, which will become the top and bottom of the largest wood element in the piece. This board will require professional re-sawing and planing, as the machines in the shop are too small for me to complete this process myself.
MDF Frame Cuts
The MDF base is nearly complete, and it took approximately two days to finish all of the cuts. The two most difficult parts of this process were ensuring pieces were identically sized, as well as the accurate cutting of the 3/4 inch, squared-off grooves where the shelves wedge into the core of the structure.
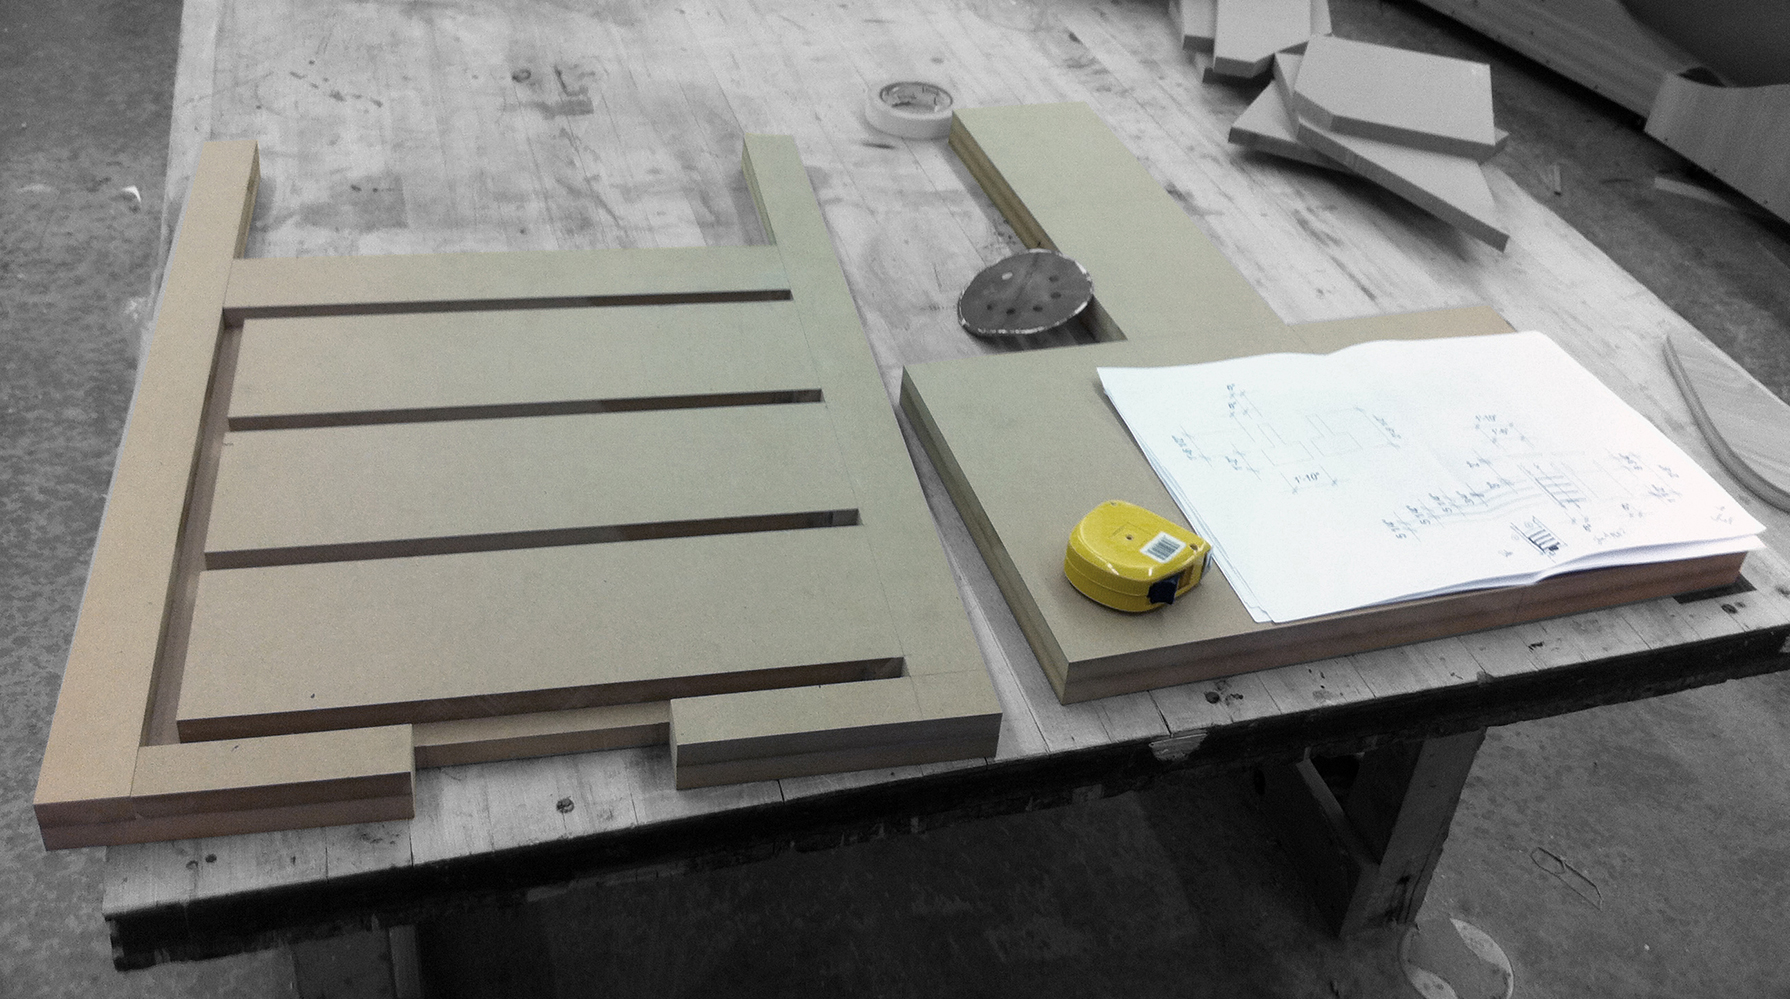
Cutting the MDF for the Core
Making these cuts involved a series of complicated steps, executed with patience, using the dado saw, bandsaw, chisel, and sandpaper.
Identical sizing of pieces was accomplished through the use of the router, utilizing the first copy as a template for the second. Creating all this required the dado saw, bandsaw, chisel, sandpaper, and lots of patience. Success allowed for zero mistakes, which made each cut more sensitive than the previous. I completed the work leaving only one seam, which will be in the back of the piece and should disappear under the paint.
May 13, 2011
Making Bigger Boards
Composing larger boards from dimensional lumber was the most complicated during the gluing and clamping phases. In order to retain as much thickness in the boards as possible, close attention was paid to board alignment in all three dimensions. Shorter boards are easier to work with, as there are fewer variables involved in a clean, straight join.

Curating Grain Patterns
Deciding just how the grain patterns should meet is a time-consuming process, and hugely impactful on the finished work.
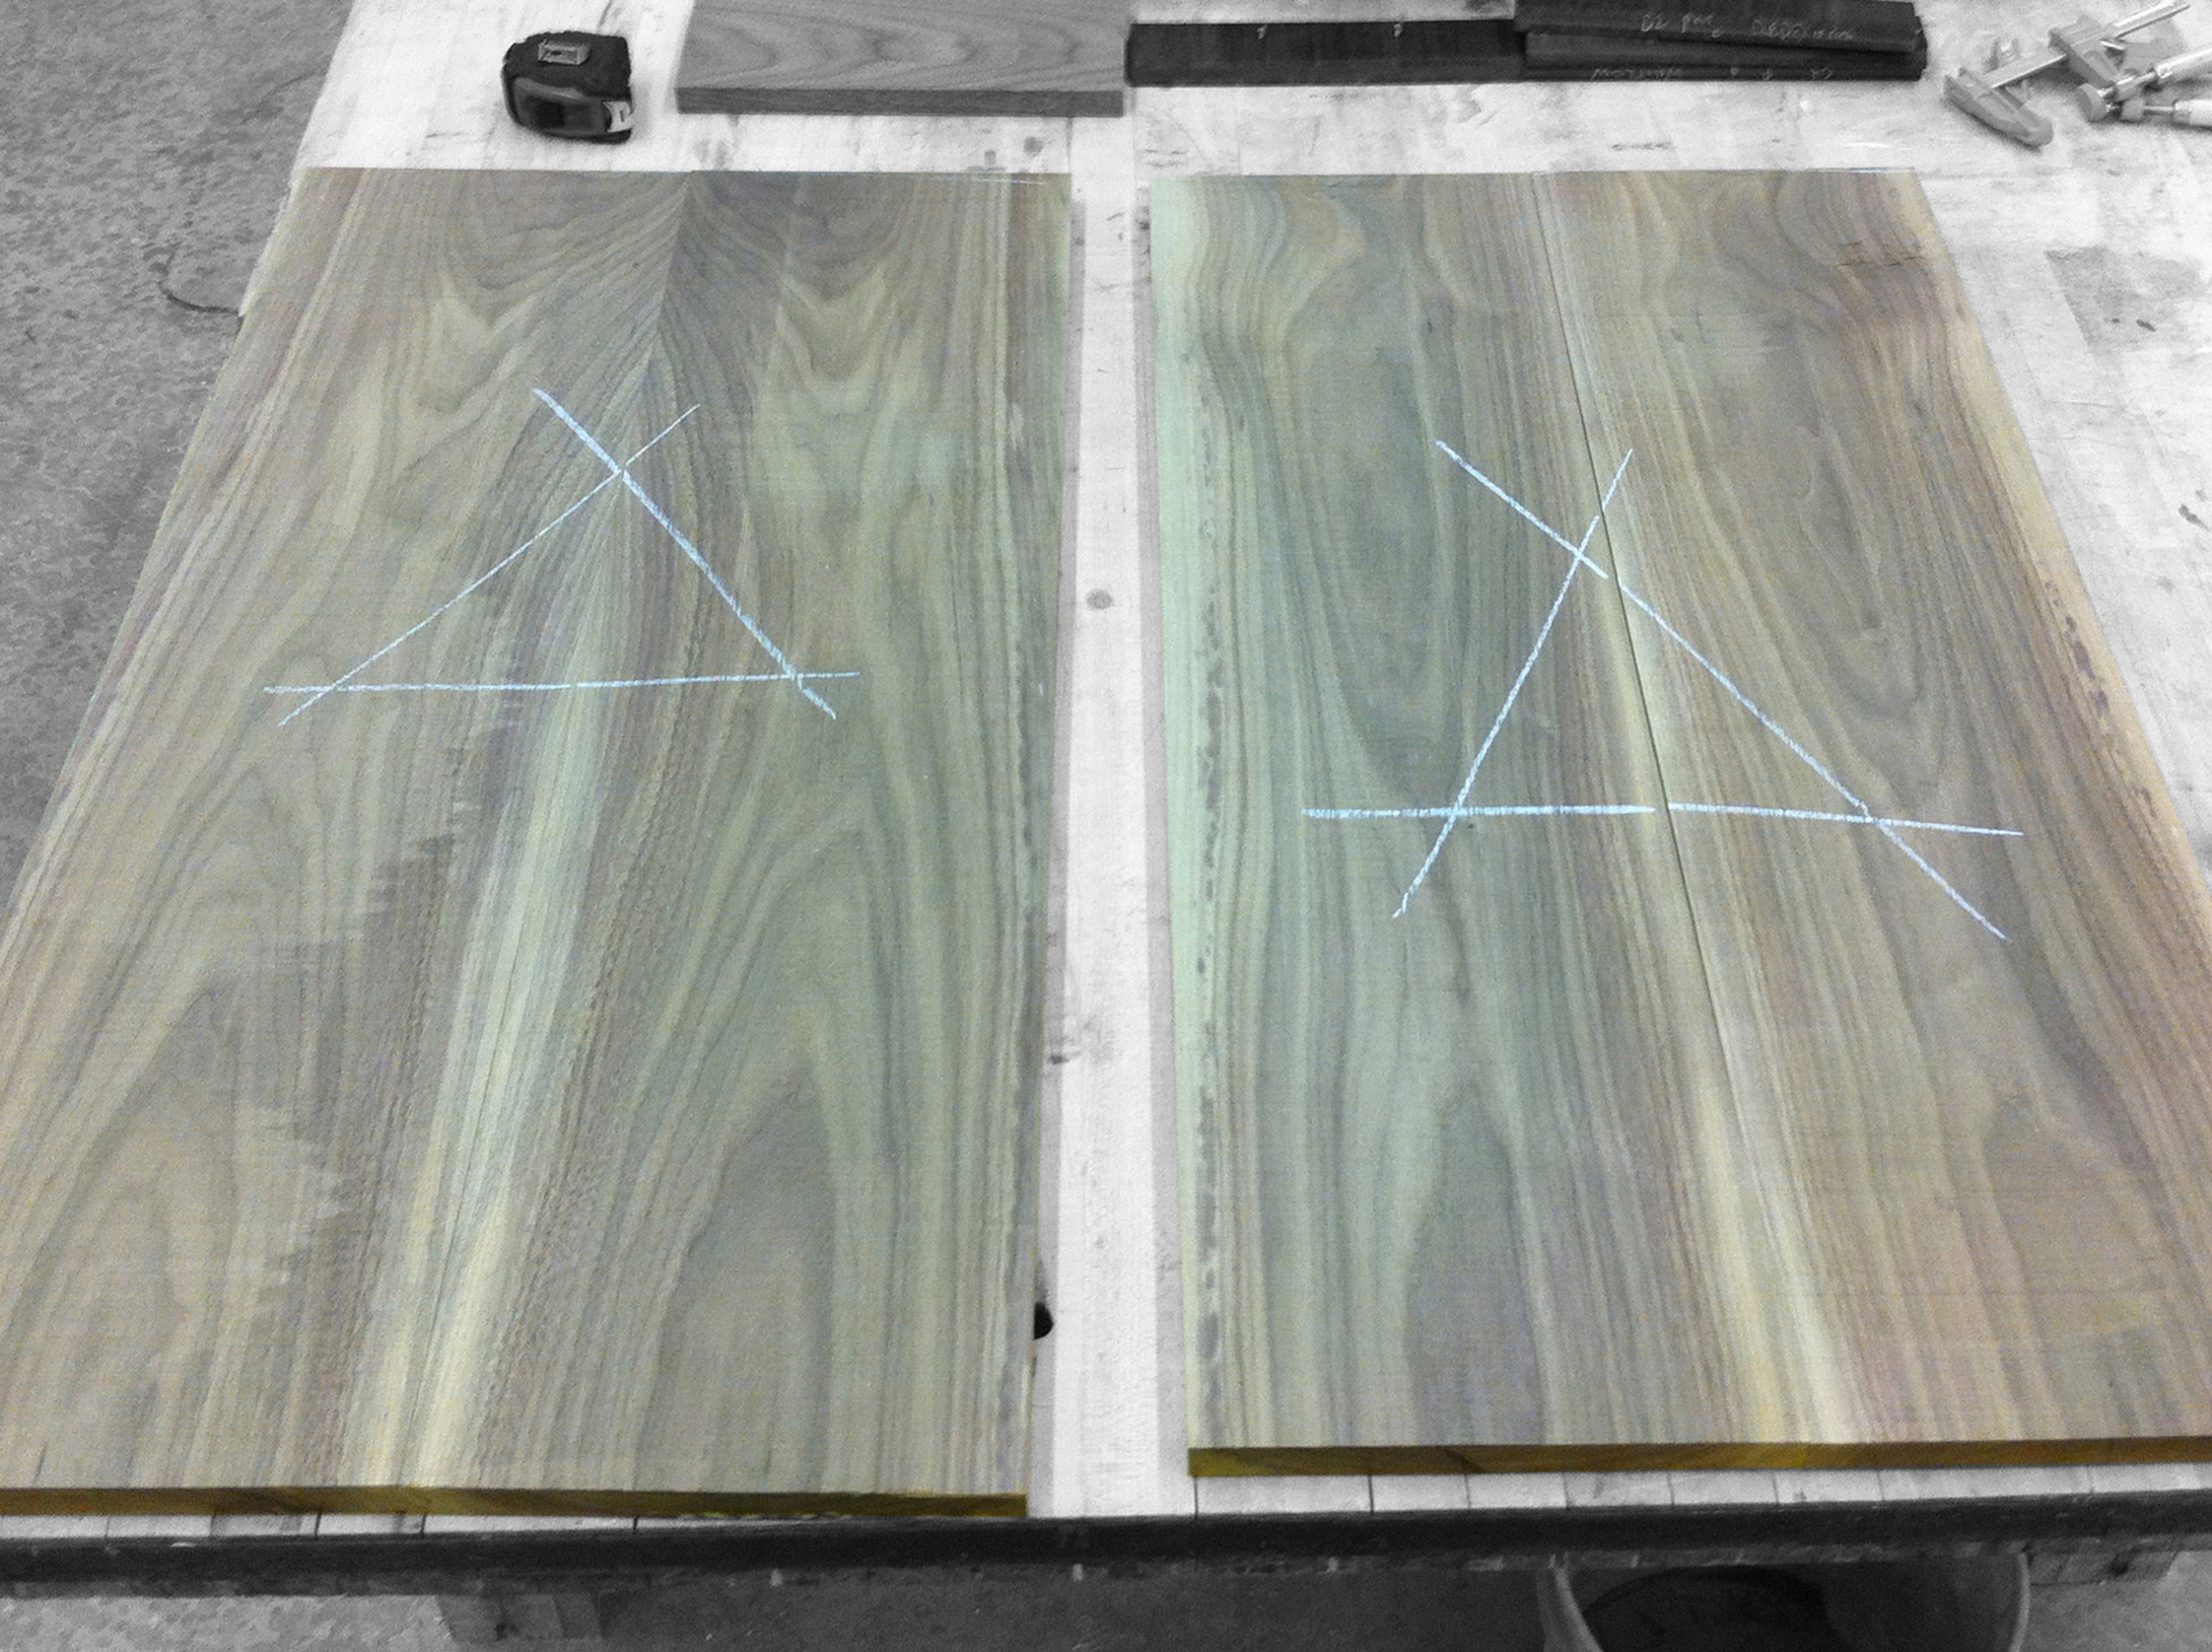
Large Walnut Board, Bookmatched
Professionally milled and split, the massive walnut board will be glued up with a bookmatch alignment of the grain.
Deciding how the grain patterns should meet between boards was the most time-consuming part of this process. The chalk triangle sketched across boards is an efficient trick for remembering and resetting the alignment, as boards are moved from one location to another.

Quick Trick
Once the preferred alignment of grain pattern between boards is determined, drawing a triangle across them in chalk allows the boards to be easily and quickly realigned, as they move about the wood shop.
Making it Final
Careful glueing and clamping solidifies the separate boards into one, large plank.
The figured nature of walnut quickly creates visual complexity as multiple boards are joined together. The design of the overall piece relies heavily on this visual complexity, which should juxtapose nicely with the clean lines and orthogonal organization of the various components.
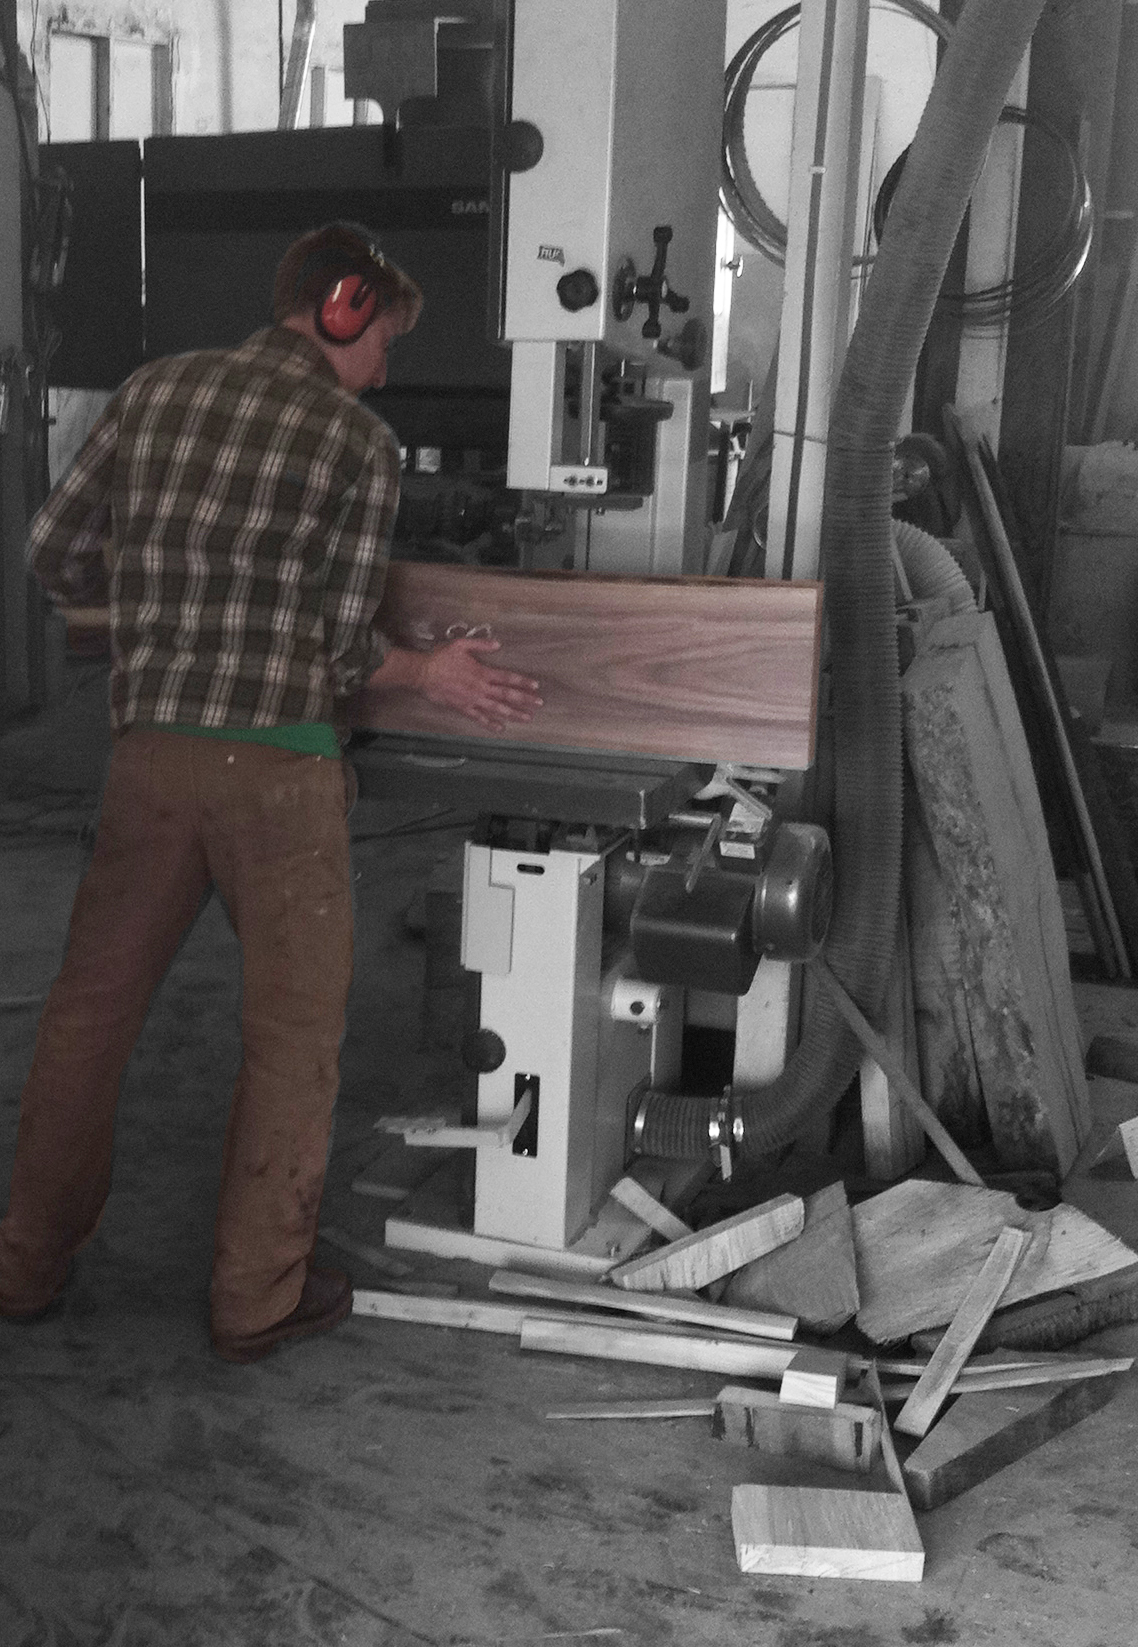
Splitting the Large Walnut Board
Since it was too large to be accommodated on the tools in the wood shop at the university, the large walnut board was milled and split by the talented people at Urban Lumber.
For the largest board (8 feet x 11 inches x 2 inches), a bookmatch join will be employed. The newly composed board will become the top (and most prominent) surface on the finished piece, so any mistake will be very evident. Because it is too large to saw using the machines at the university, I took it over to the good people at Urban Lumber to have it re-sawn on their much more industrial equipment. I am just a wood shop novice, where as they are seasoned professionals, but even so, it's always a little scary handing over your materials to someone else to execute a “make it or break it” cut. But, of course, they did an excellent job re-sawing it, and it looks fantastic. Phew!
May 15, 2011
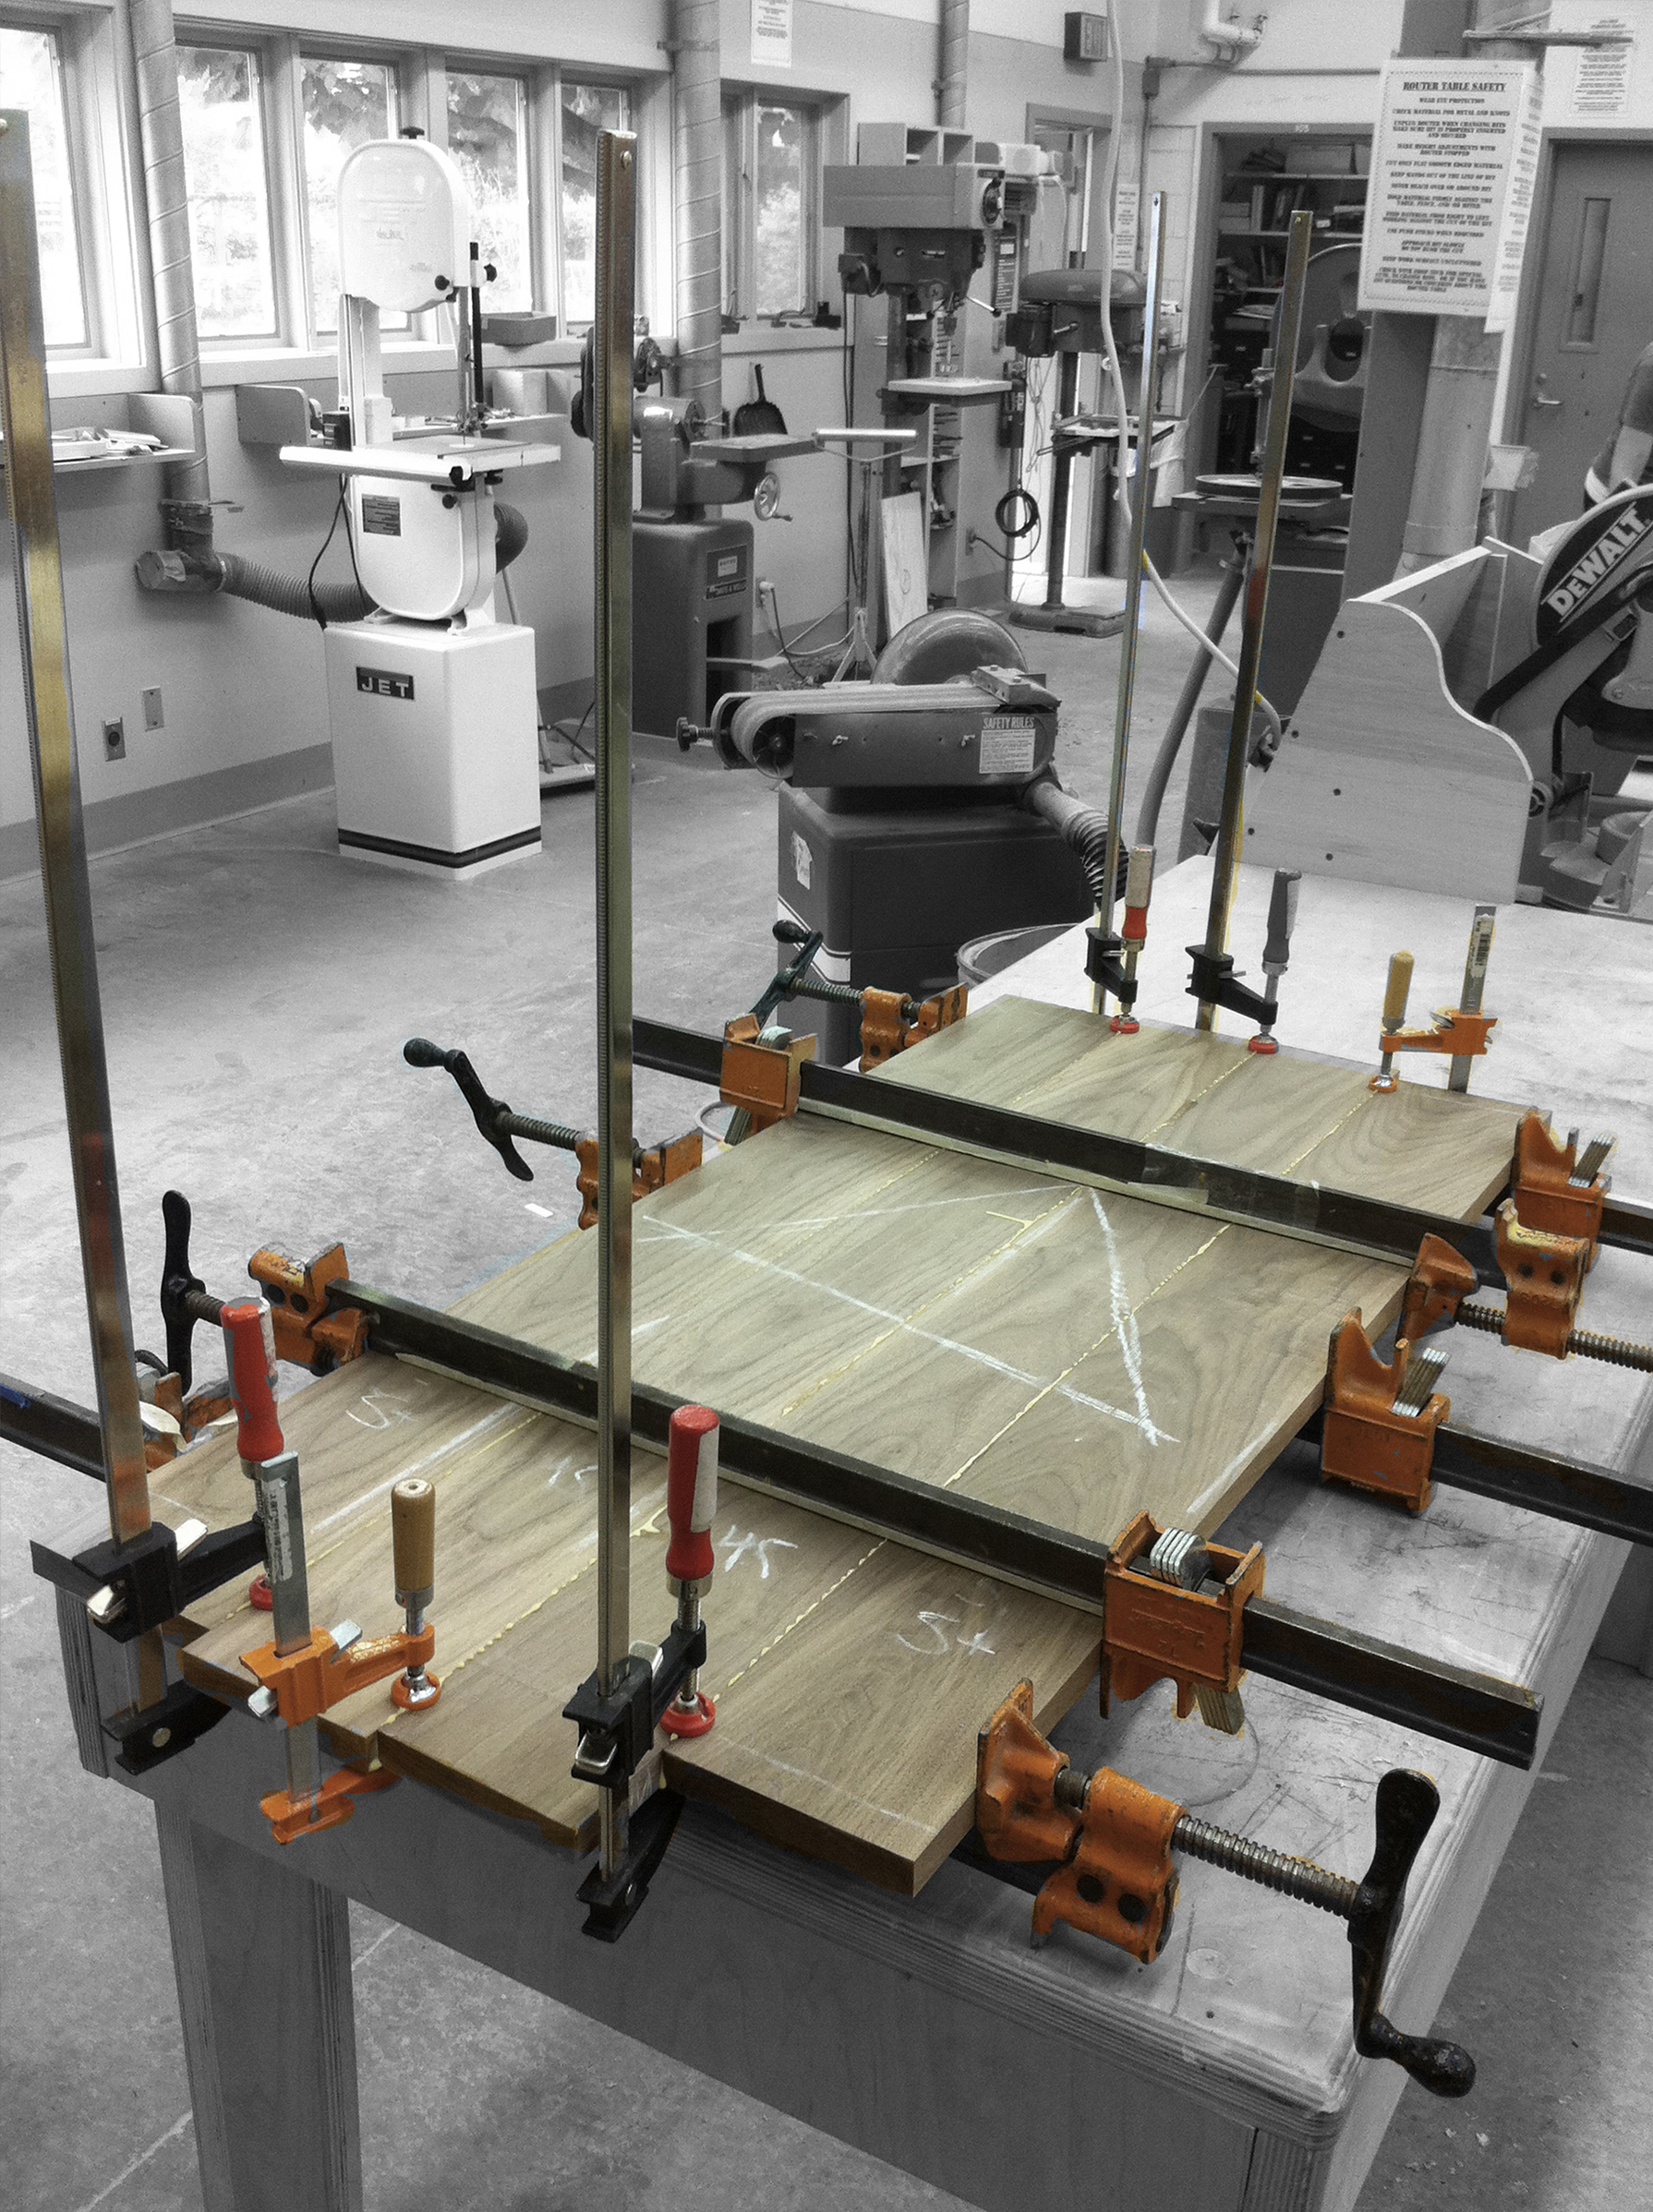
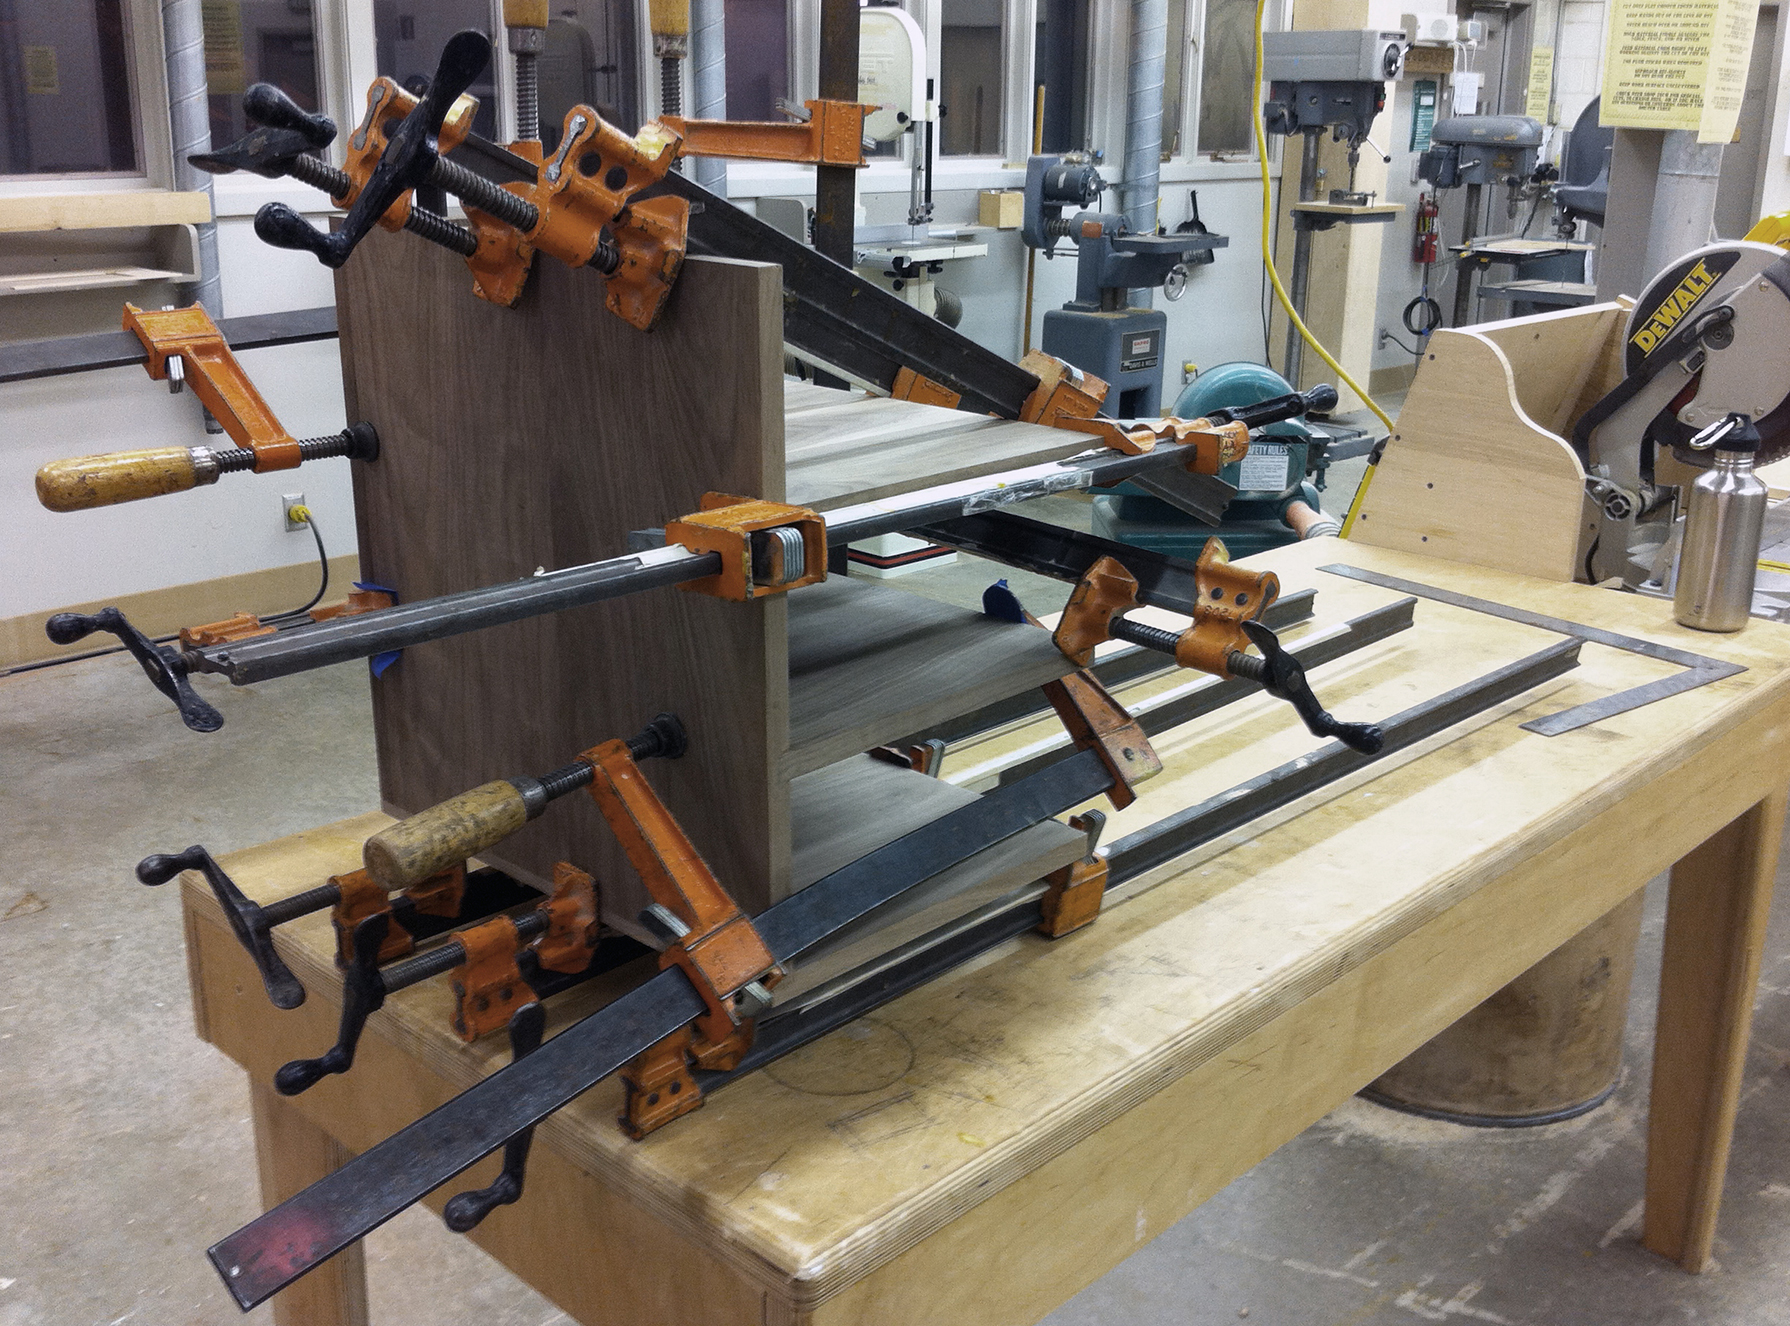
Crazy Clamping
Employing clamps well, is difficult to finesse, but integral to hardware-minimal furniture production. These images illustrate the high-volume clamping used to face join the 3/4” thick pieces of formaldehyde-free MDF to one another, creating the 1 1/2” thick structural base for the project, and the edge joining of some of the walnut boards. Consciously avoiding the use of hidden screws and/or nails, a comedic number of clamps and concrete blocks were required to complete these glue-ups.
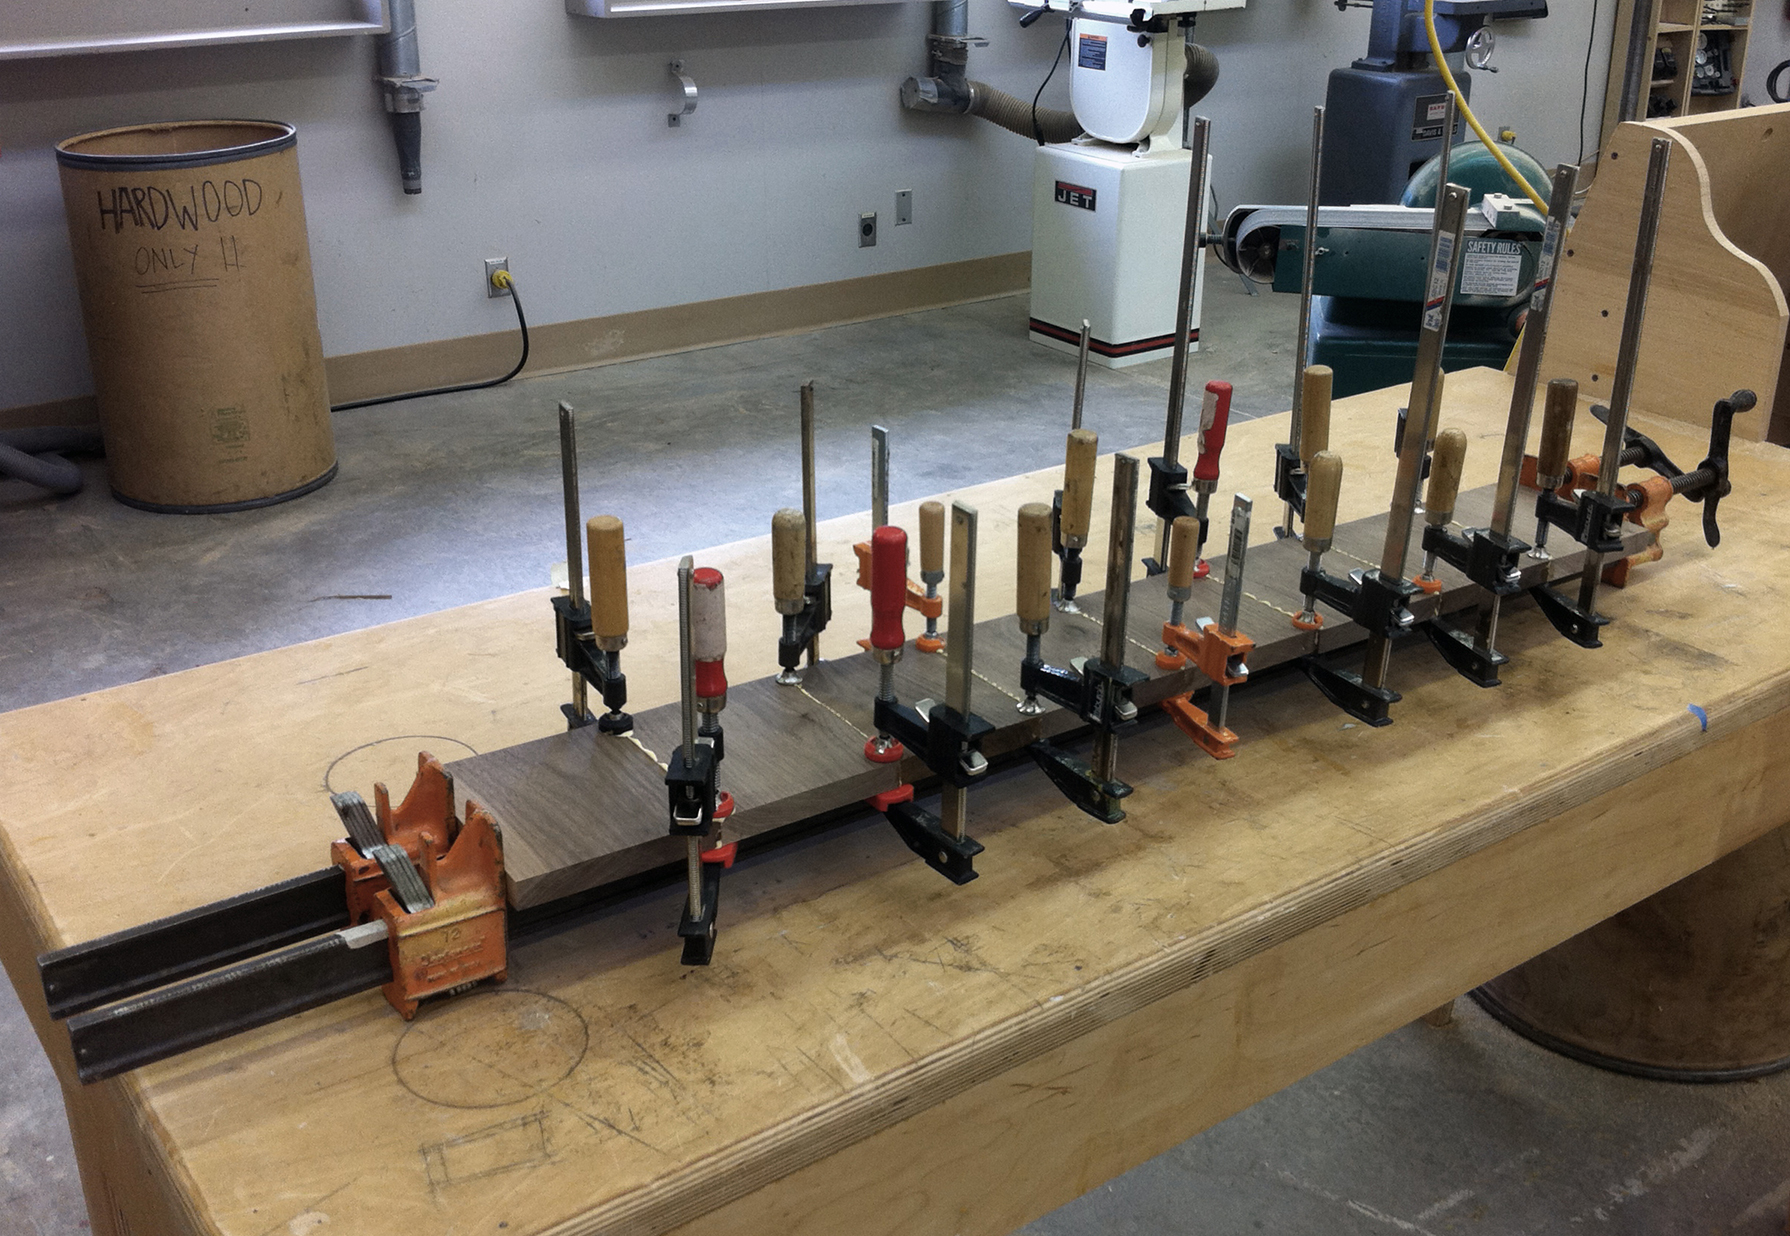
Clamping the Back Board of the Box
Though the back piece of the box could have been made from one board, it would have had the incorrect grain orientation – functionally, and aesthetically – so instead I constructed it of eight smaller pieces with the proper grain orientation.
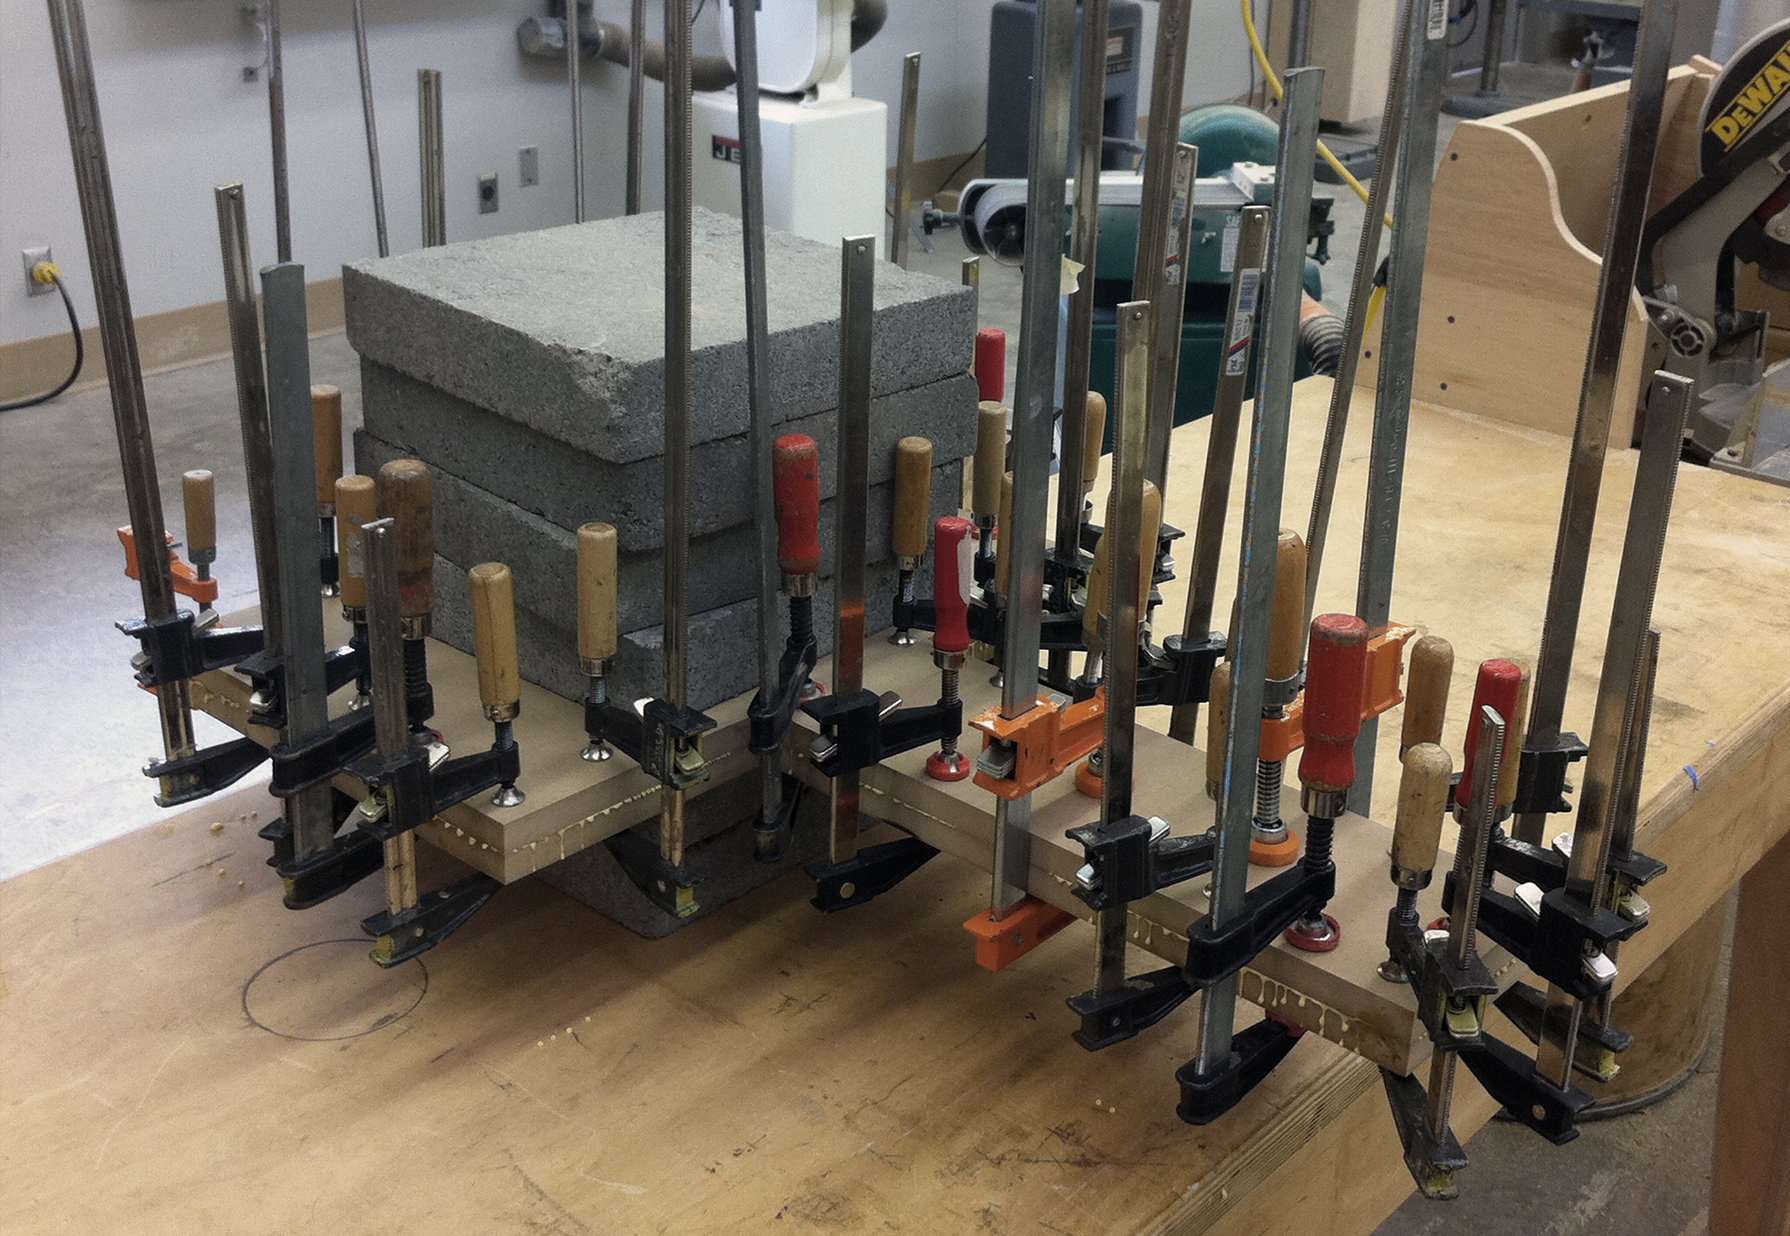
Clamping the MDF Base
If much larger clamps had been available, fewer would have been required to pull this off. Even so, nothing helps out a glue session like some heavy concrete blocks.
As a new woodworker I realized, after the fact, that heavier duty clamps were necessary to efficiently complete this task. Regardless, the end result turned out nearly flawless. Keeping some extra size in the original pieces, the table saw effortlessly cleaned up the edges of the base pieces, while maintaining sharp 90º angles. This approach allowed for minimal sanding near these sensitive edges.

Dealing with Forces
The two clamps at each glue line keep the pieces from buckling apart under the pressure from the large clamps pulling the pieces tightly together from the ends.
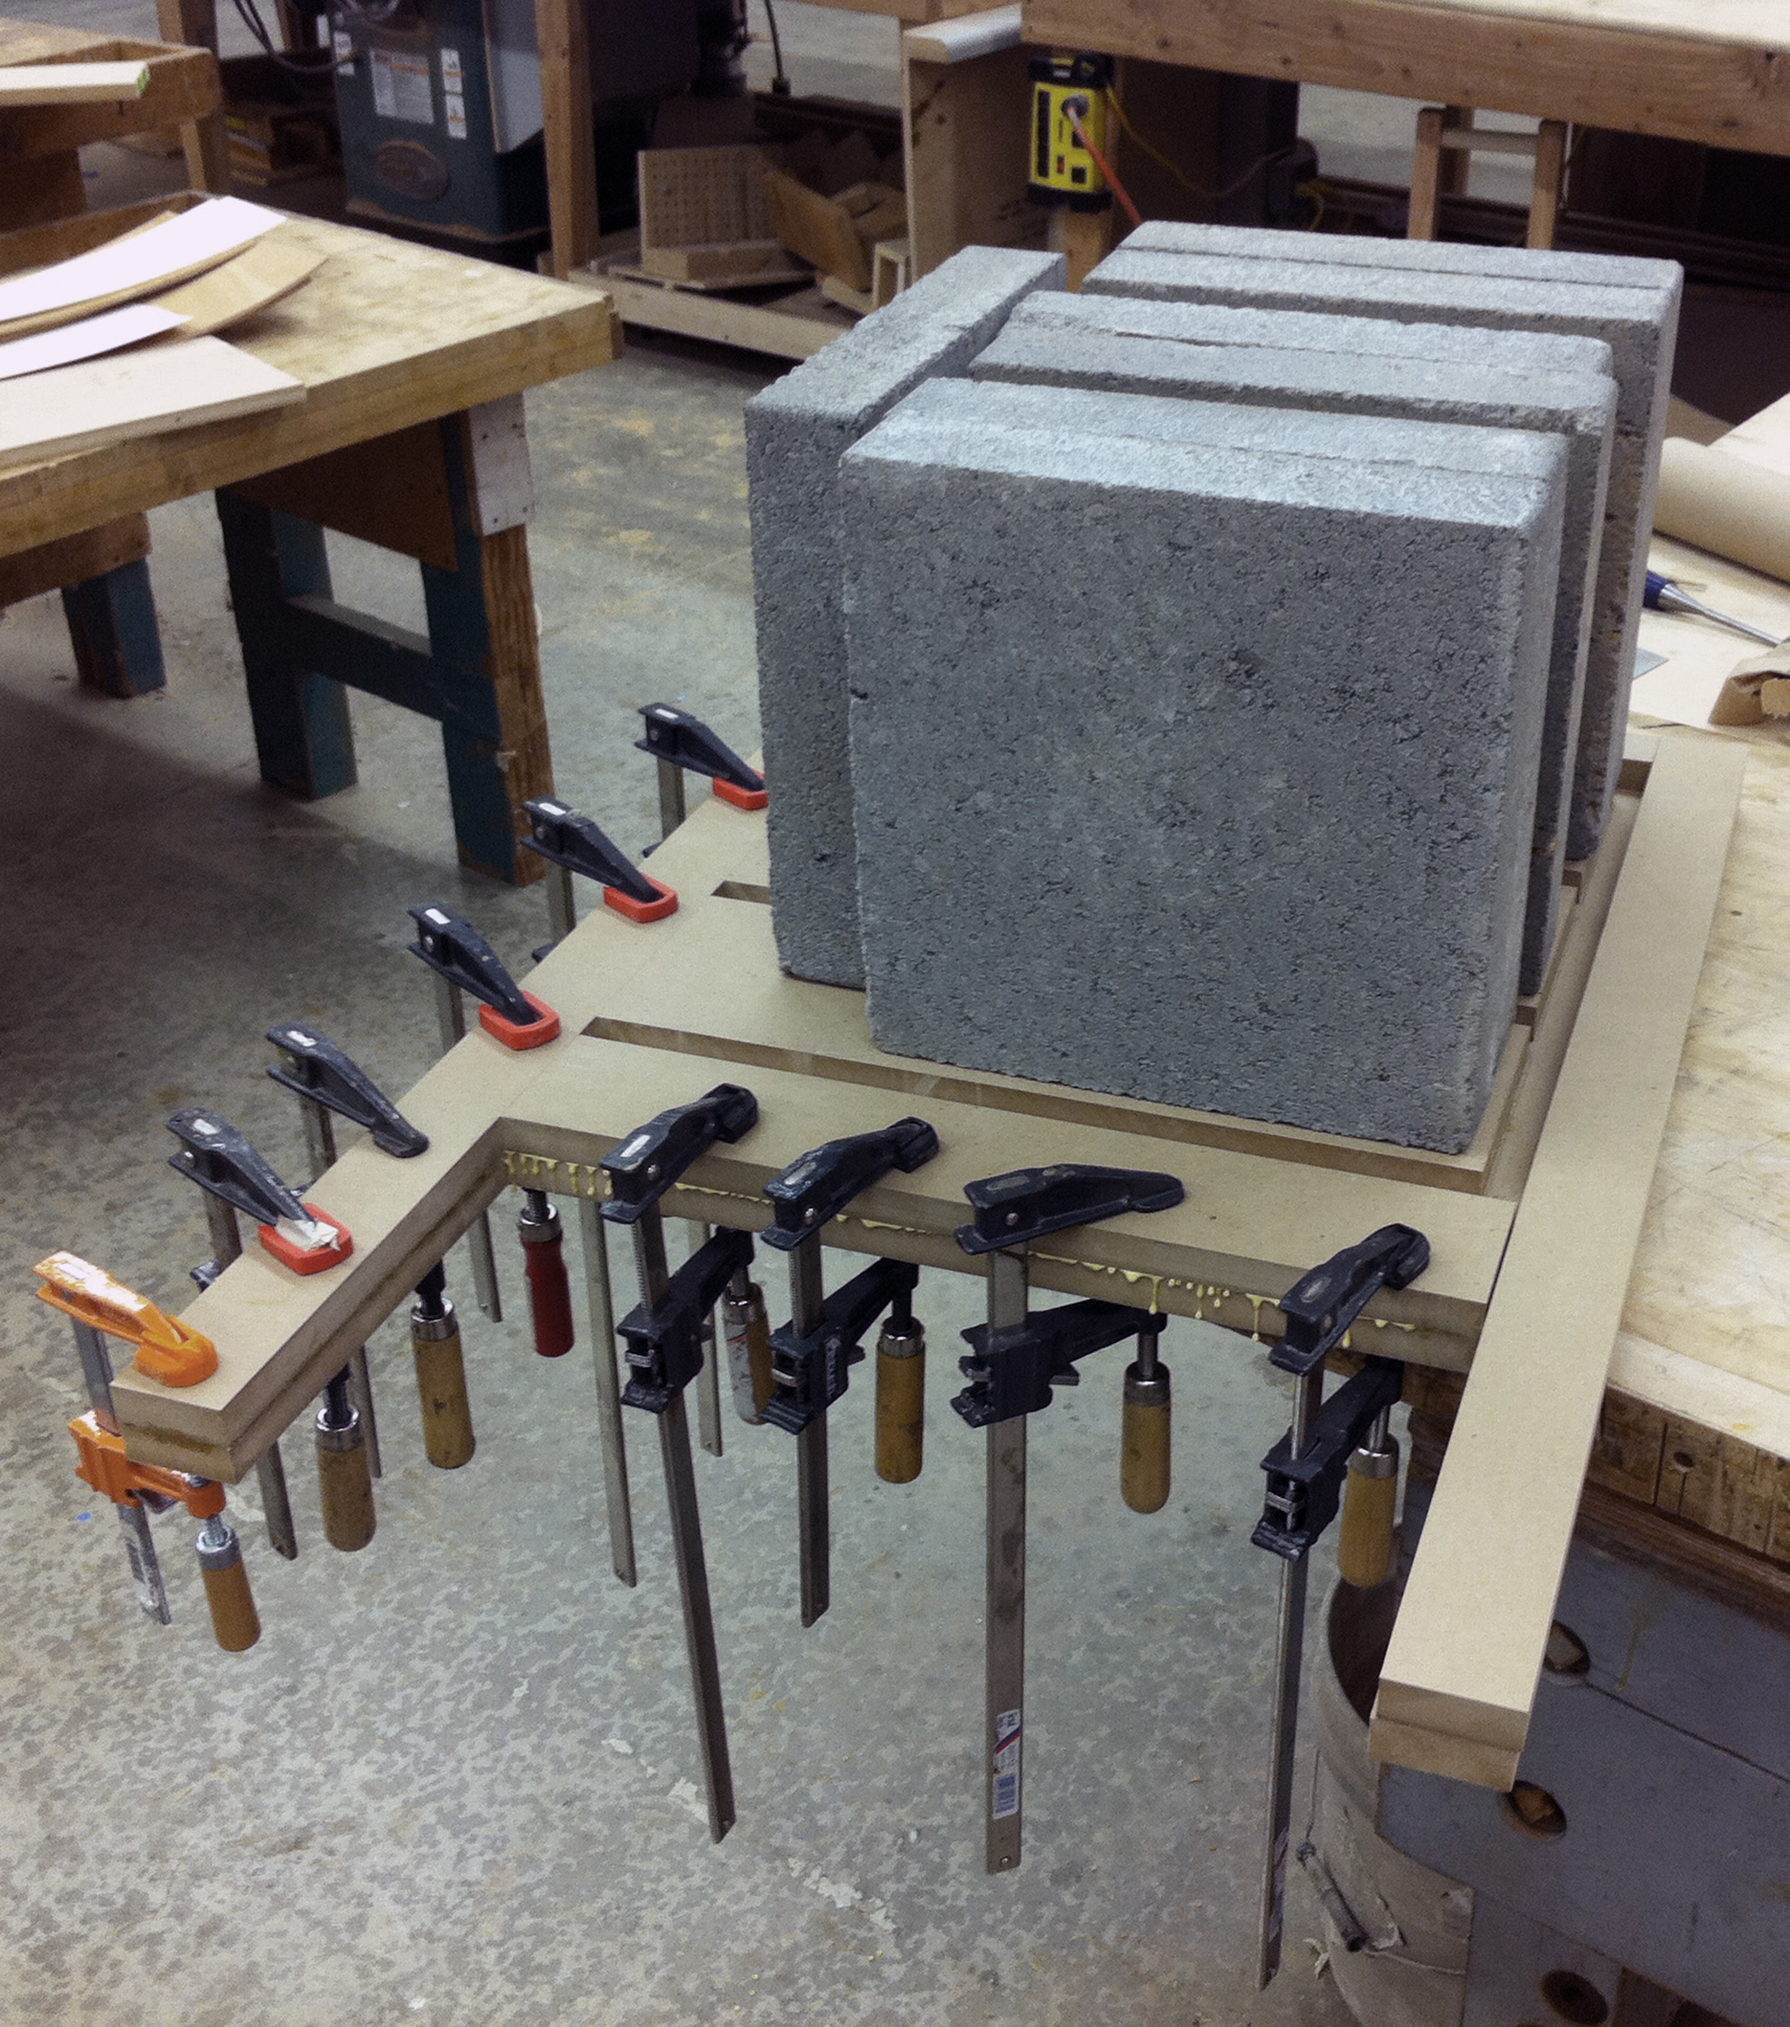
Clamping the MDF Core
Since the walnut elements must fit exactly into the MDF core, there is no room for error: the two pieces have to be sandwiched together consistently tight.
So, these images document some the “craziest clamping” that I got into during the entire project. I definitely received some strange looks in the wood shop while setting these up. But, there is reason for all of this. For example, that particular walnut board is designed to sit in the back portion of the top of the furniture piece, trapped vertically by the top and bottom boards, but allowed to expand and contract in the horizontal dimension. Allowing the grain to run vertically while the board is long in the horizontal dimension creates a detail supporting grain-orientation consistency throughout the piece. The solution also adheres to the regulating lines established by the smaller board-widths of the cabinet and base board.
May 18, 2011
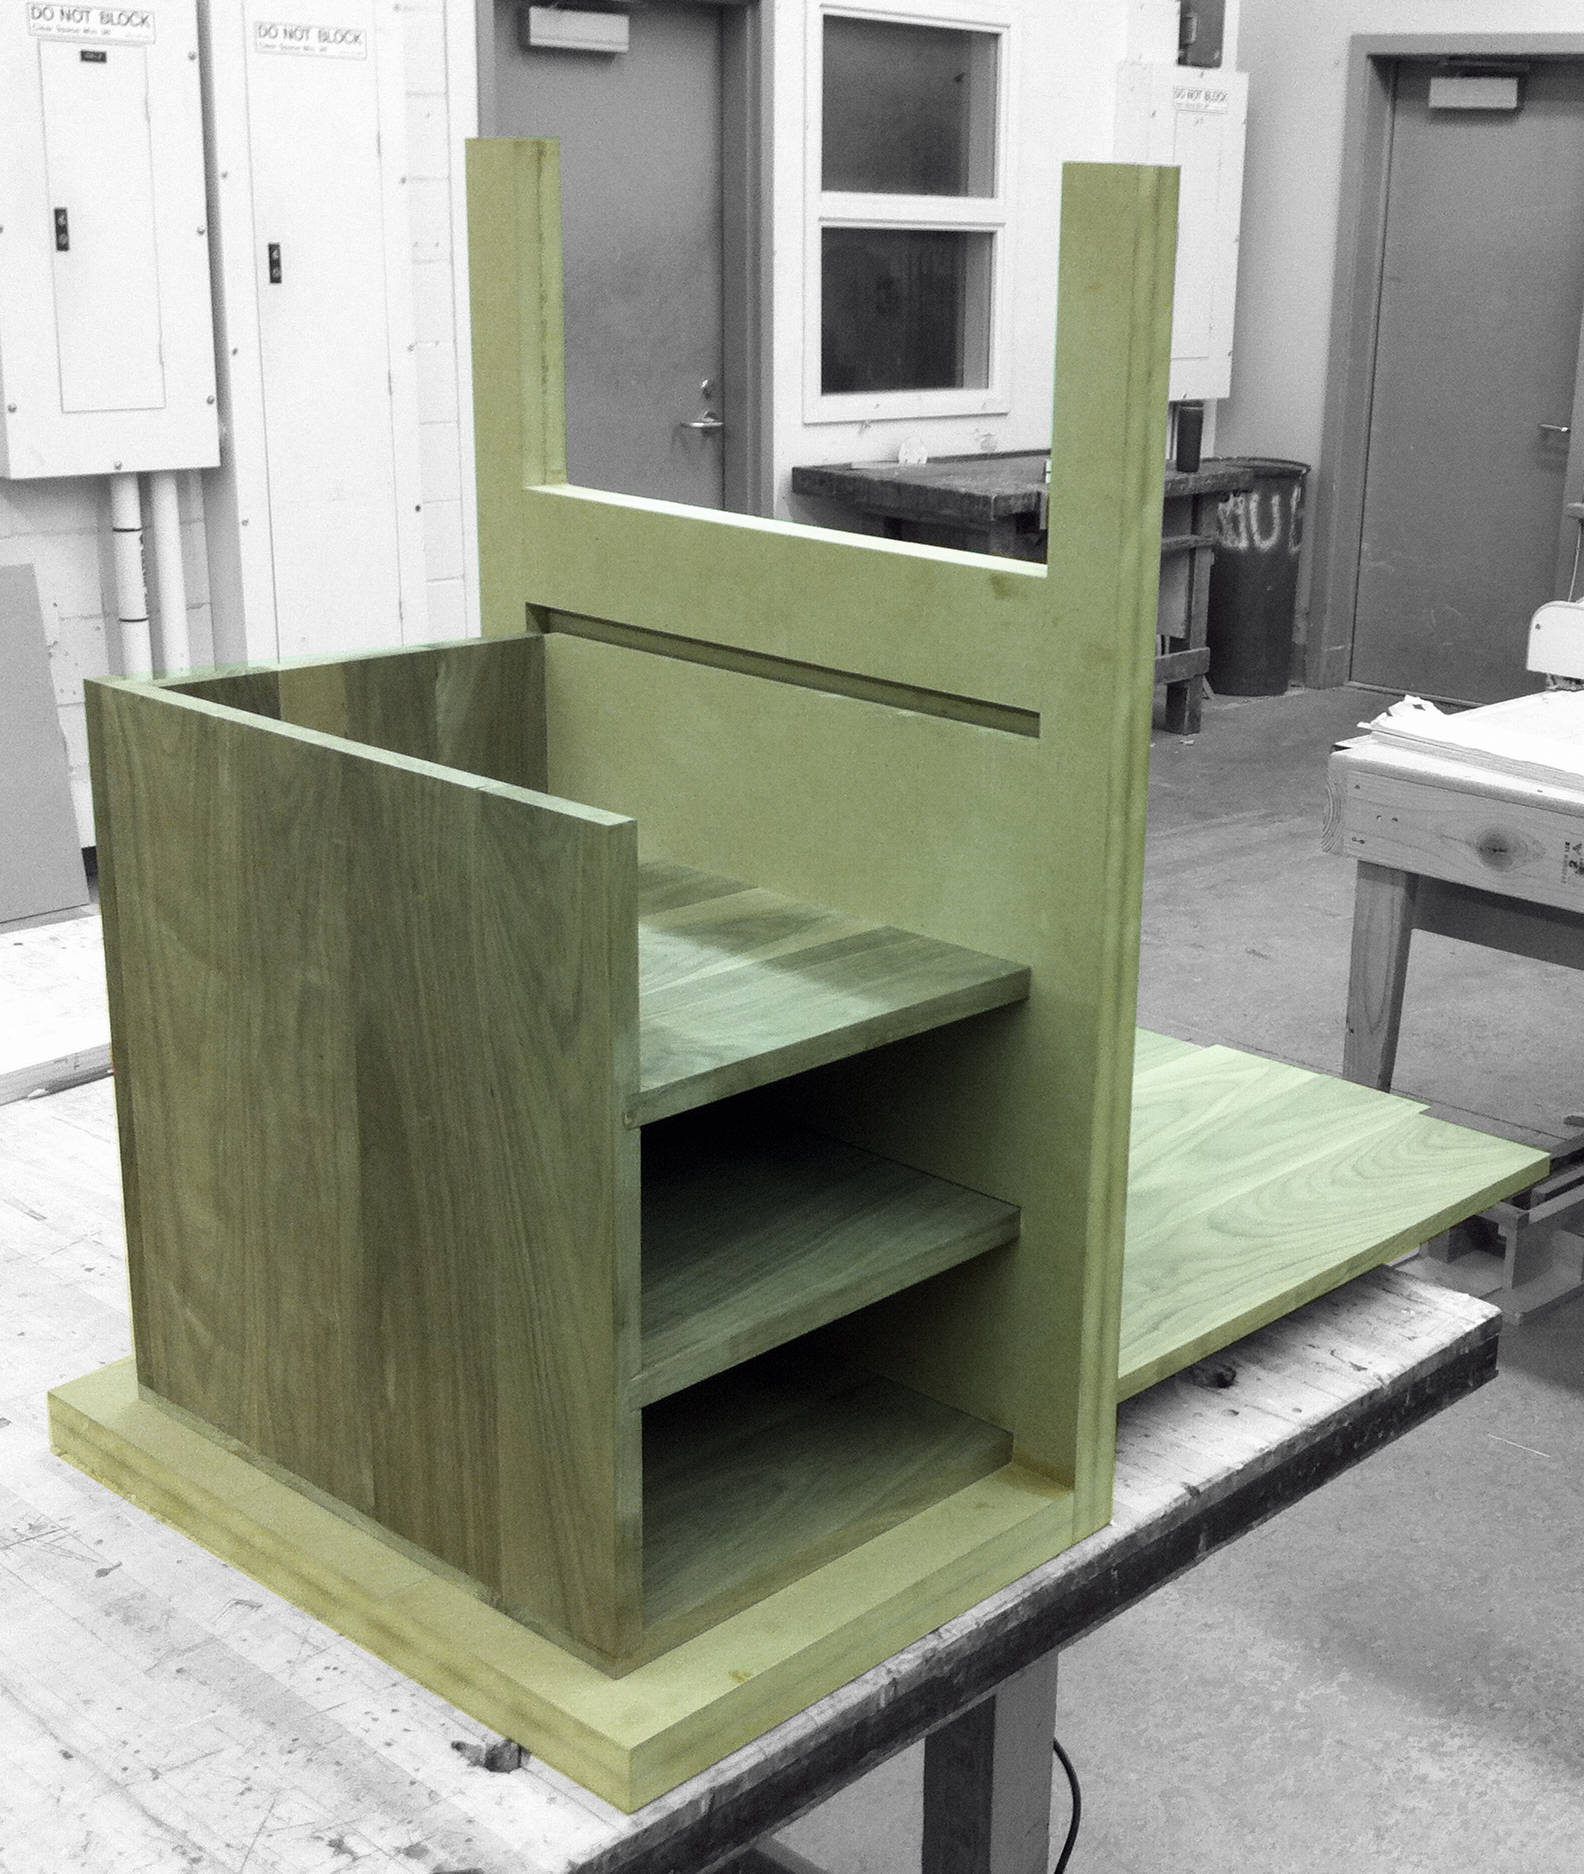
Cabinet Frustration
After the successful bout of crazy clamping documented above, I began the clamping for the cabinet assembly expecting a straight-forward experience. But, it turns out, it was deceptively difficult. Why? Creating a three-sided box, where all three pieces meet in one corner, is much trickier than creating a box where the three pieces form a U-shape. The challenge lies in maintaining proper 90º angles for the base, walls, and each shelf in the three-sided box.
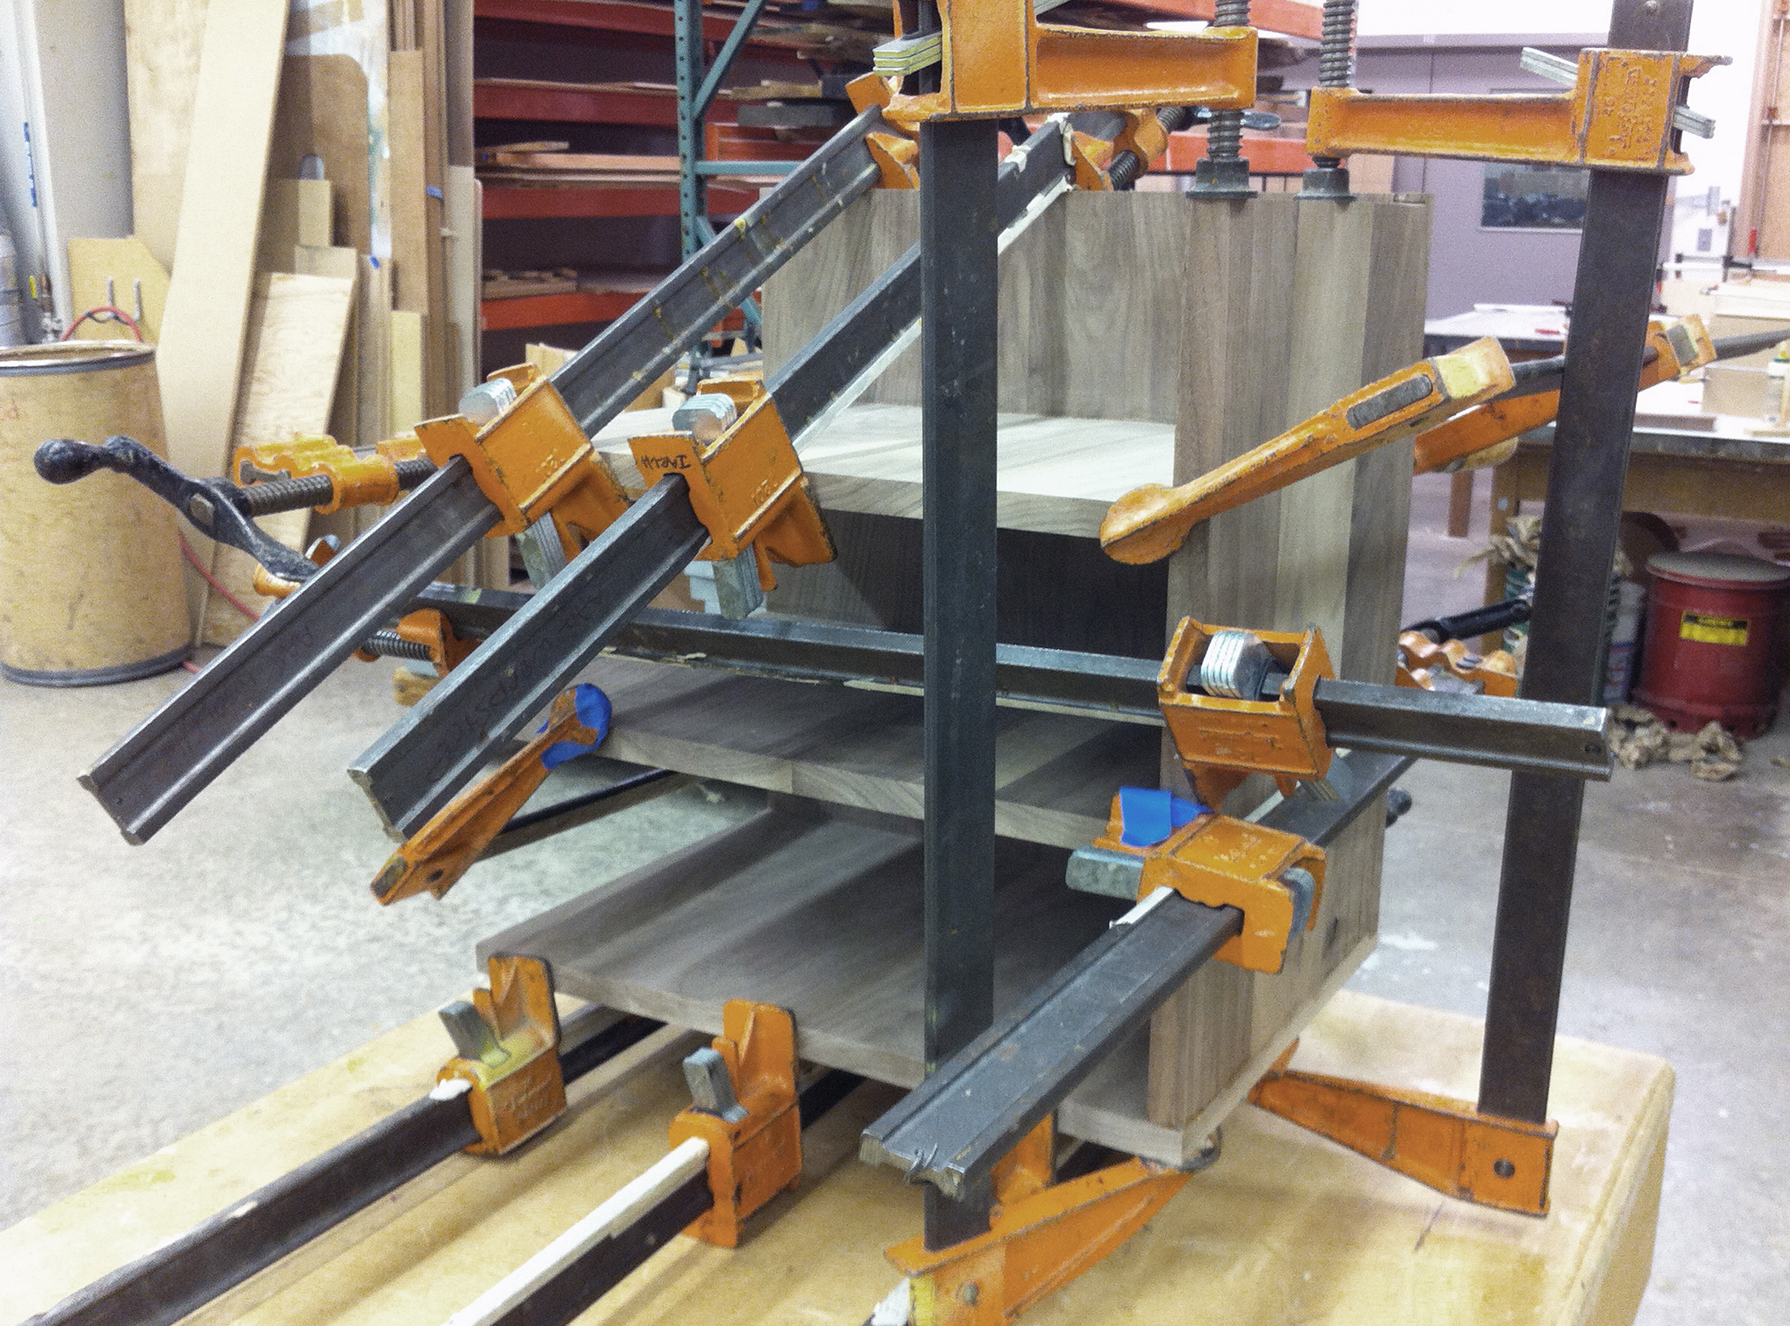
Clamping for the Cabinet Assembly
The clamping for this element proved trickier than expected because, with three sides meeting in one corner, there aren’t complementary pieces to pull together.
Maintaining Perfectly Squared Corners
If, instead, the three sides formed a “U” shape, this would have looked (and been) a lot less complex to execute.
The need for the shelf to have flexibility in the vertical dimension compounds this difficulty, as each shelf can only be glued along one edge. This particular construction detail allows for a seamless fit into the MDF base pieces.
May 18, 2011
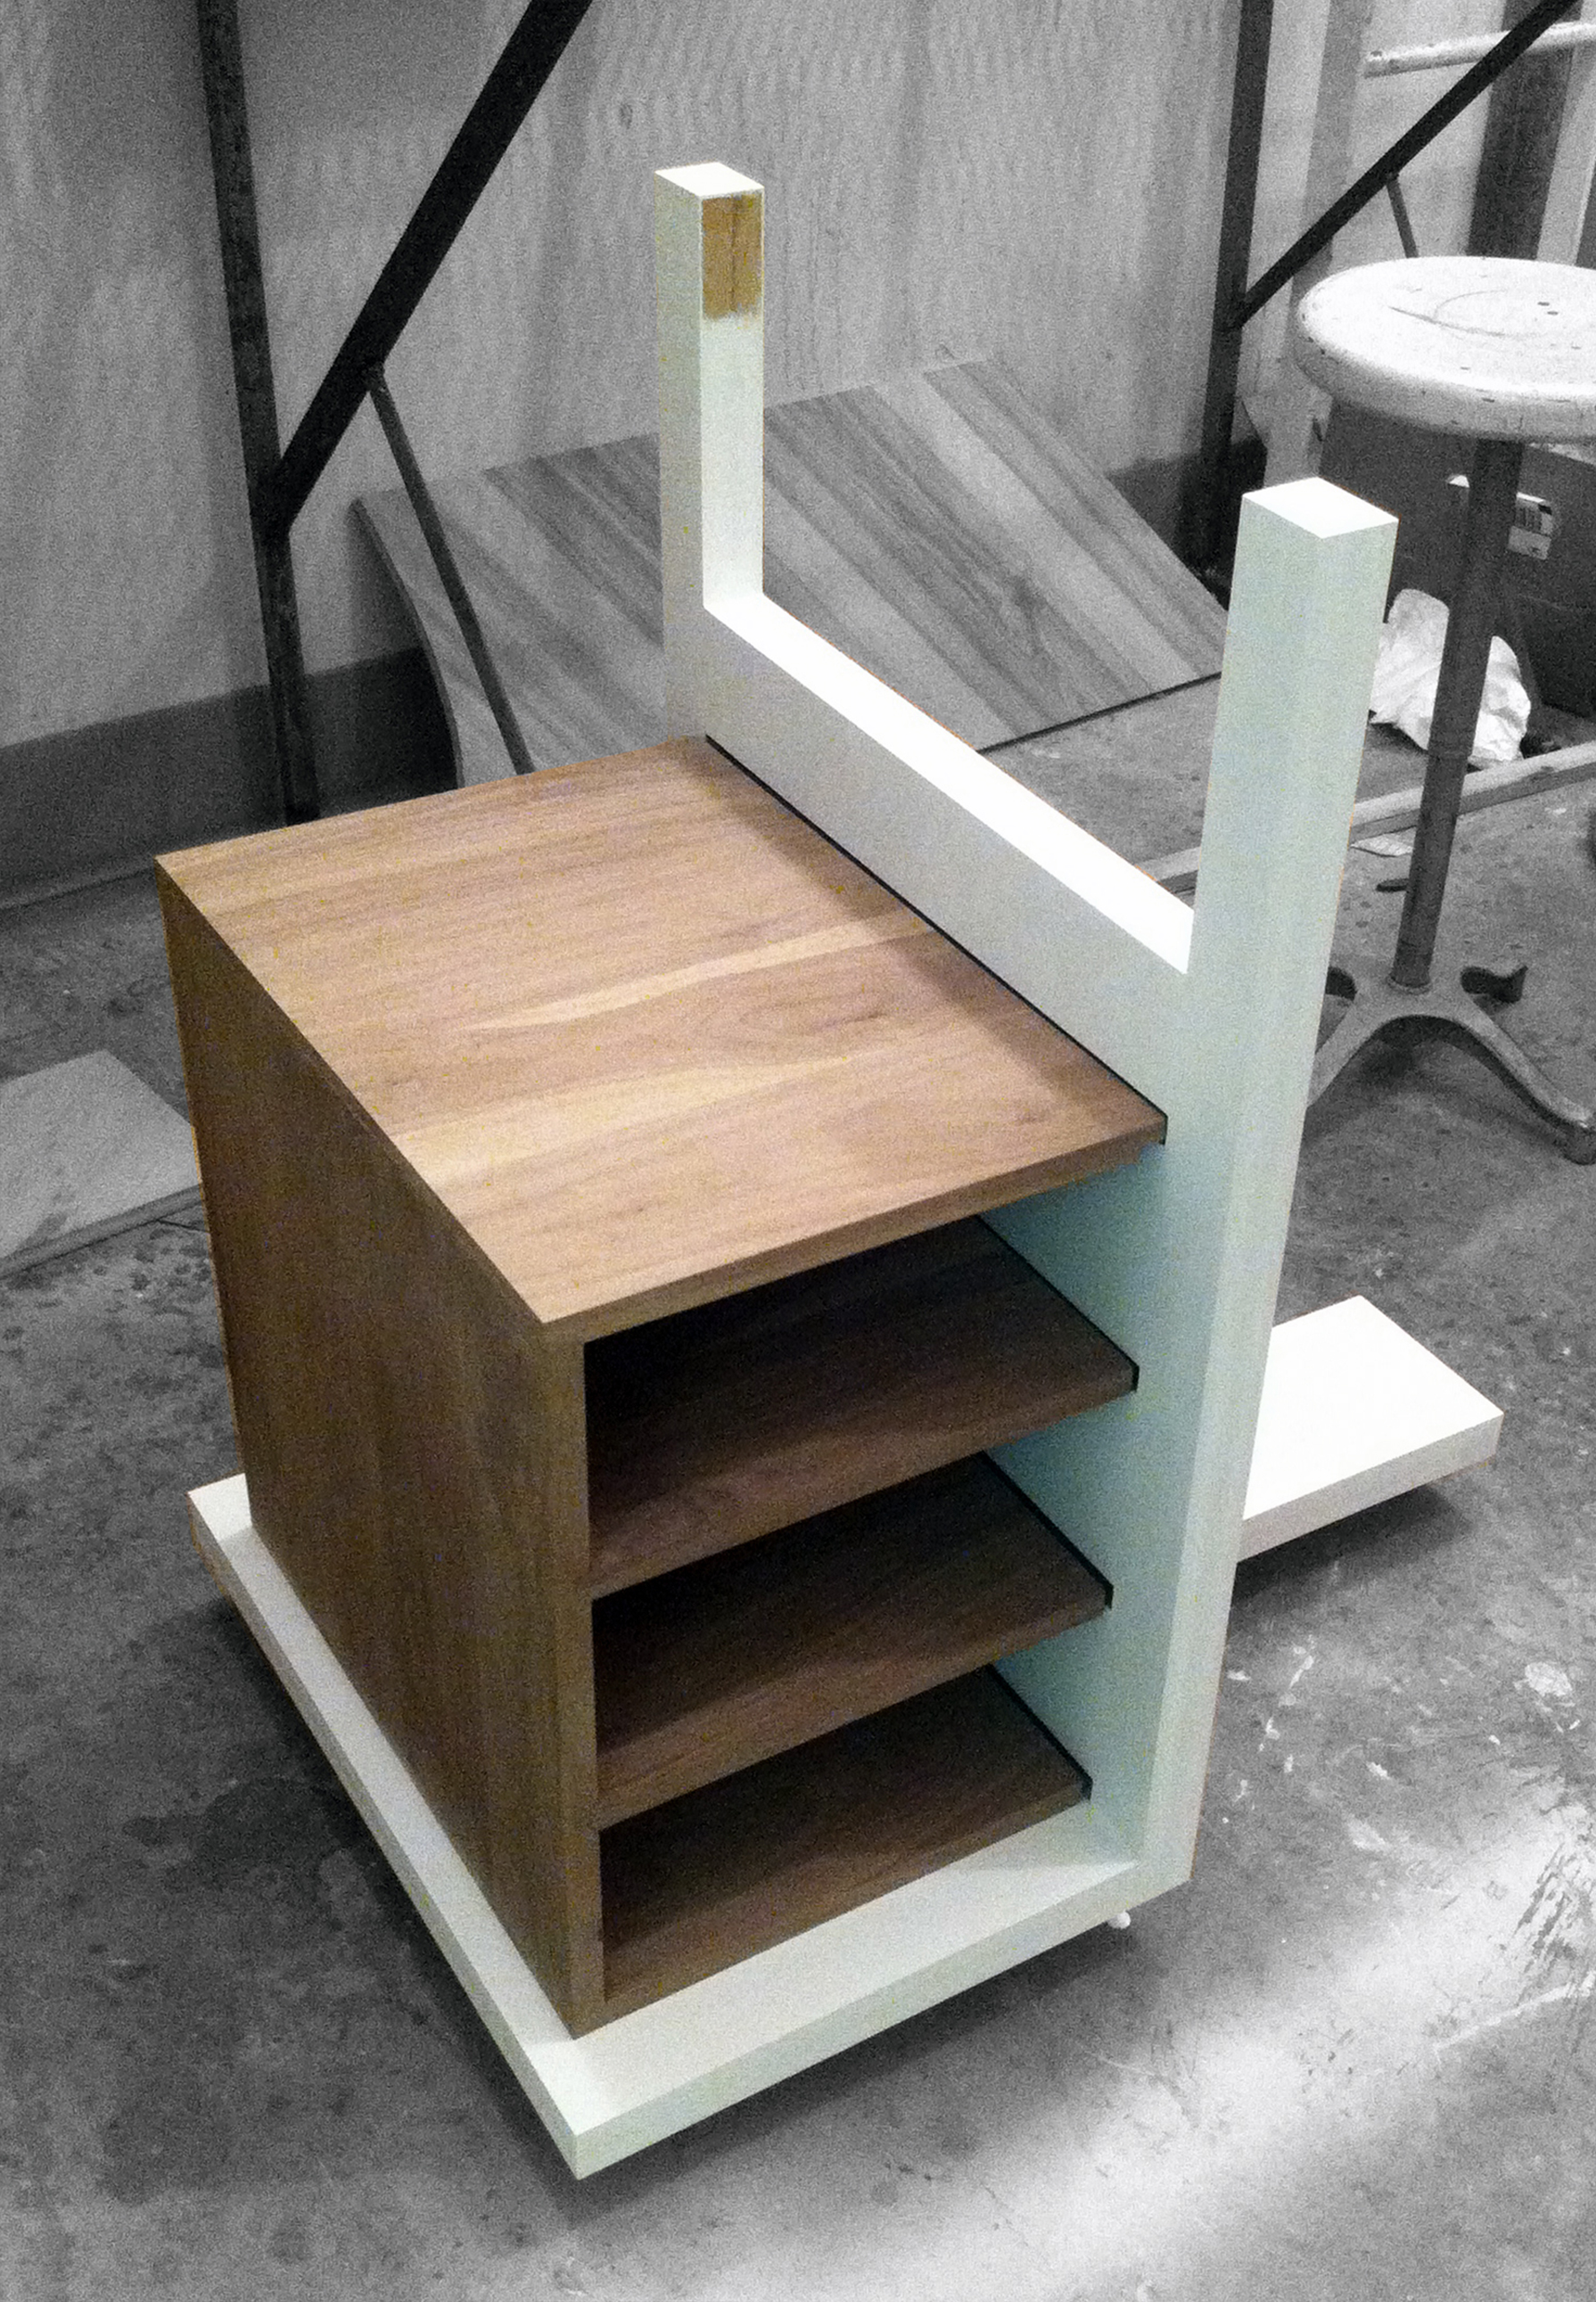
Dry Fit Like a Glove
Testing the Fit
It fits! Very, very, tightly, which is good, but it also means that fitting the pieces together once they both have their finish on them will be a challenge that probably requires more clamps!
Dry-fitting the cabinet into the base structural piece represents the first major test point for construction precision. Thankfully, everything worked out with the assistance of some minor sanding. In fact, the fit was so tight that assembly of the finished pieces will require some serious clamping. Now, fortunately, and I don't know if you recall... I know a little something about crazy clamping. I'm pretty sure that serious clamping will be a nerve-wracking experience. And, if it doesn't work, it's all over. So, stay tuned for that.
May 22, 2011
Detail Decisions

Paint Swatches
Though originally planning on a bright white for the MDF core, now I am leaning towards a blue or green that would be calmer, and less dominant.
Choosing the appropriate paint color for the MDF core took much more consideration than I initially anticipated. Throughout the term, I have been planning on painting it a bright, crisp white, to contrast sharply with the naturally finished walnut. However, I've now decided that this solution would have caused the core element to become too dominant in the composition, and make the whole thing a little too Capital-M Modern. Reds and oranges are out, also, because they are too similar to the wood. But, blue steps back as a color, which satisfies the desired intention of a “quiet core” (scribbled on those sketches a few weeks ago), so I pulled the swatches of a series of contenders.
Of them all, I narrowed it down to the top three options: Wedgewood Gray, Waterbury Green, and Bird's Egg. All three look great with the oiled walnut. In the end, I selected Wedgewood Gray, from the “18th & 19th Century Classic Palette,” as the color does remind me of an earlier era, which supports the goal for the furniture piece to bridge the gap between past and present.
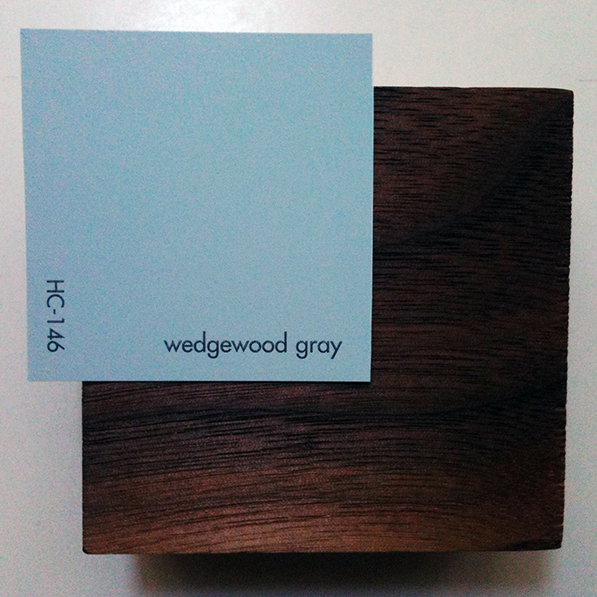
Option 1: Wedgewood Gray
A classic, soft blue.
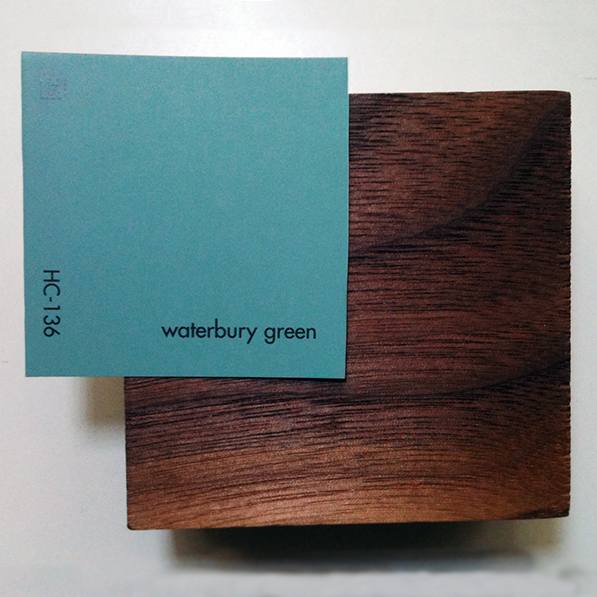
Option 2: Waterbury Green
A rich, saturated blue-green.
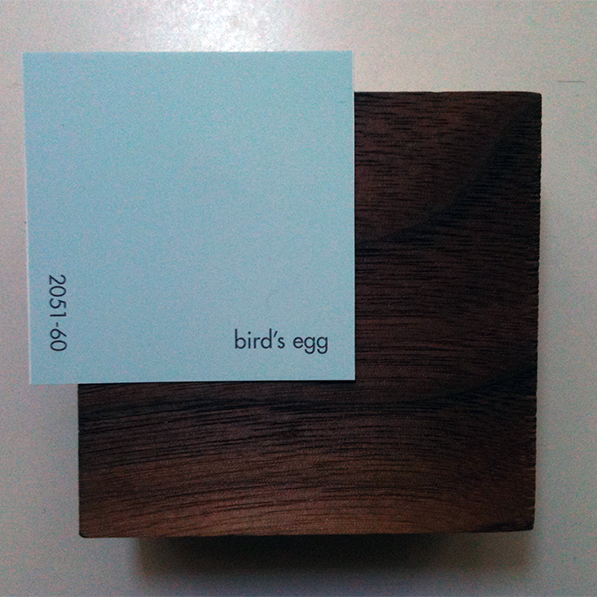
Option 3: Bird’s Egg
A standard robin’s egg blue.
Once the paint choice was nailed down, it was time to make a final decision on the hardware. (No pun intended about those nails. Incedentally, there won’t be a single nail in the whole piece.) It turns out, selecting the hardware choices for the piece proved quite frustrating.
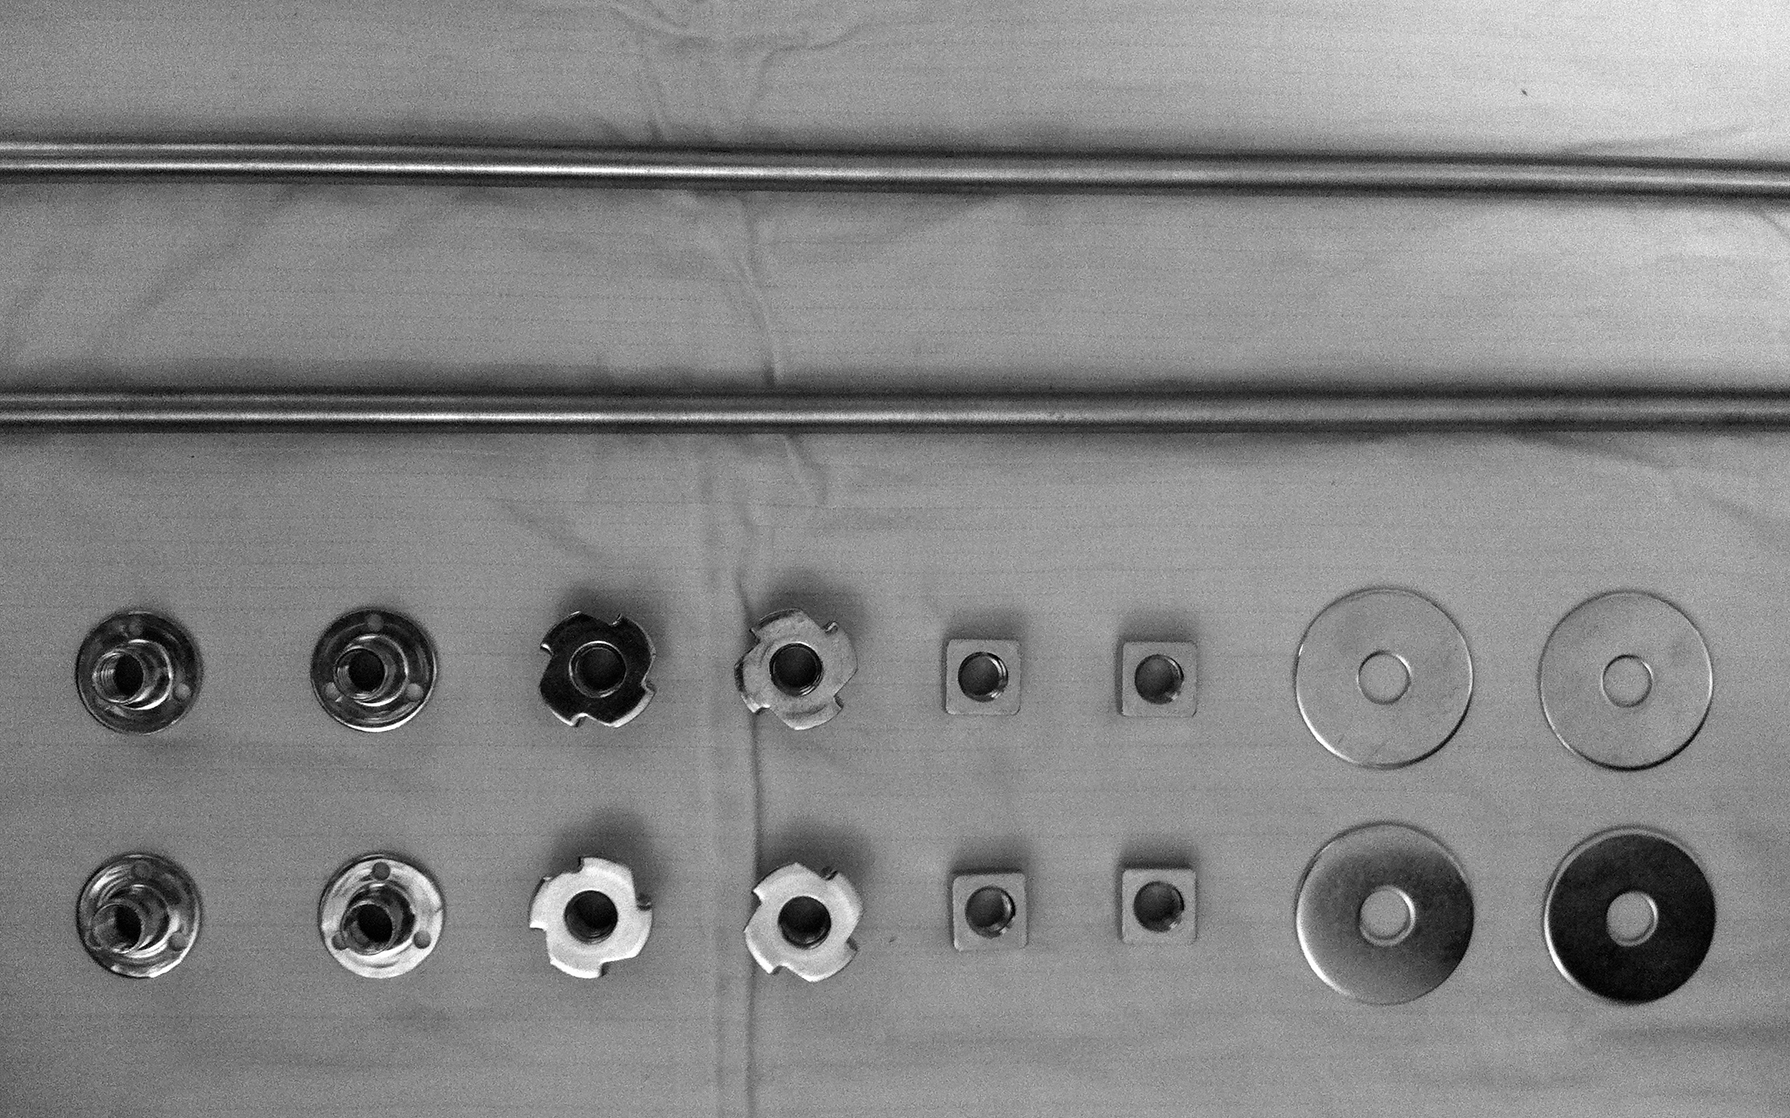
Nuts & Bolts
This stuff all needs to look great, since it will all show, out in the open, on the finished piece.
Since all hardware on the piece is exposed, the aesthetic of these pieces is very important. An “industrial” look is great, in fact, better than it trying to be something it's not, but it still needs to be clean.
May 23, 2011
Preparing for Finishing

Taping the Edges
Areas that will need to be glued together are covered with tape so they remain unfinished, allowing for better adhesion of the glue.
With the cabinet and core pieces constructed, it’s time for “finishing.” I put it in quotes because I realize for those unfamiliar with furniture making, it can be confusing, since most of the time we say we are going to “finish” something, it means we are going to “complete” it, which is not what we mean in this case. So, for the sake of easing communication here, finish and finishing the piece refer to the substance – and the application of it – to seal, protect, and/or color the piece of furniture. A finish might be paint, oil, varnish, or other alternatives, and the finishing process involves a lot of careful prep work, application time, drying time, more sanding, reapplication... It really is quite a process, and it varies by what variety of finish you use. Of course, maybe it's called “finish” in the first place because it is usually one of the last things you do before “completing” the piece.
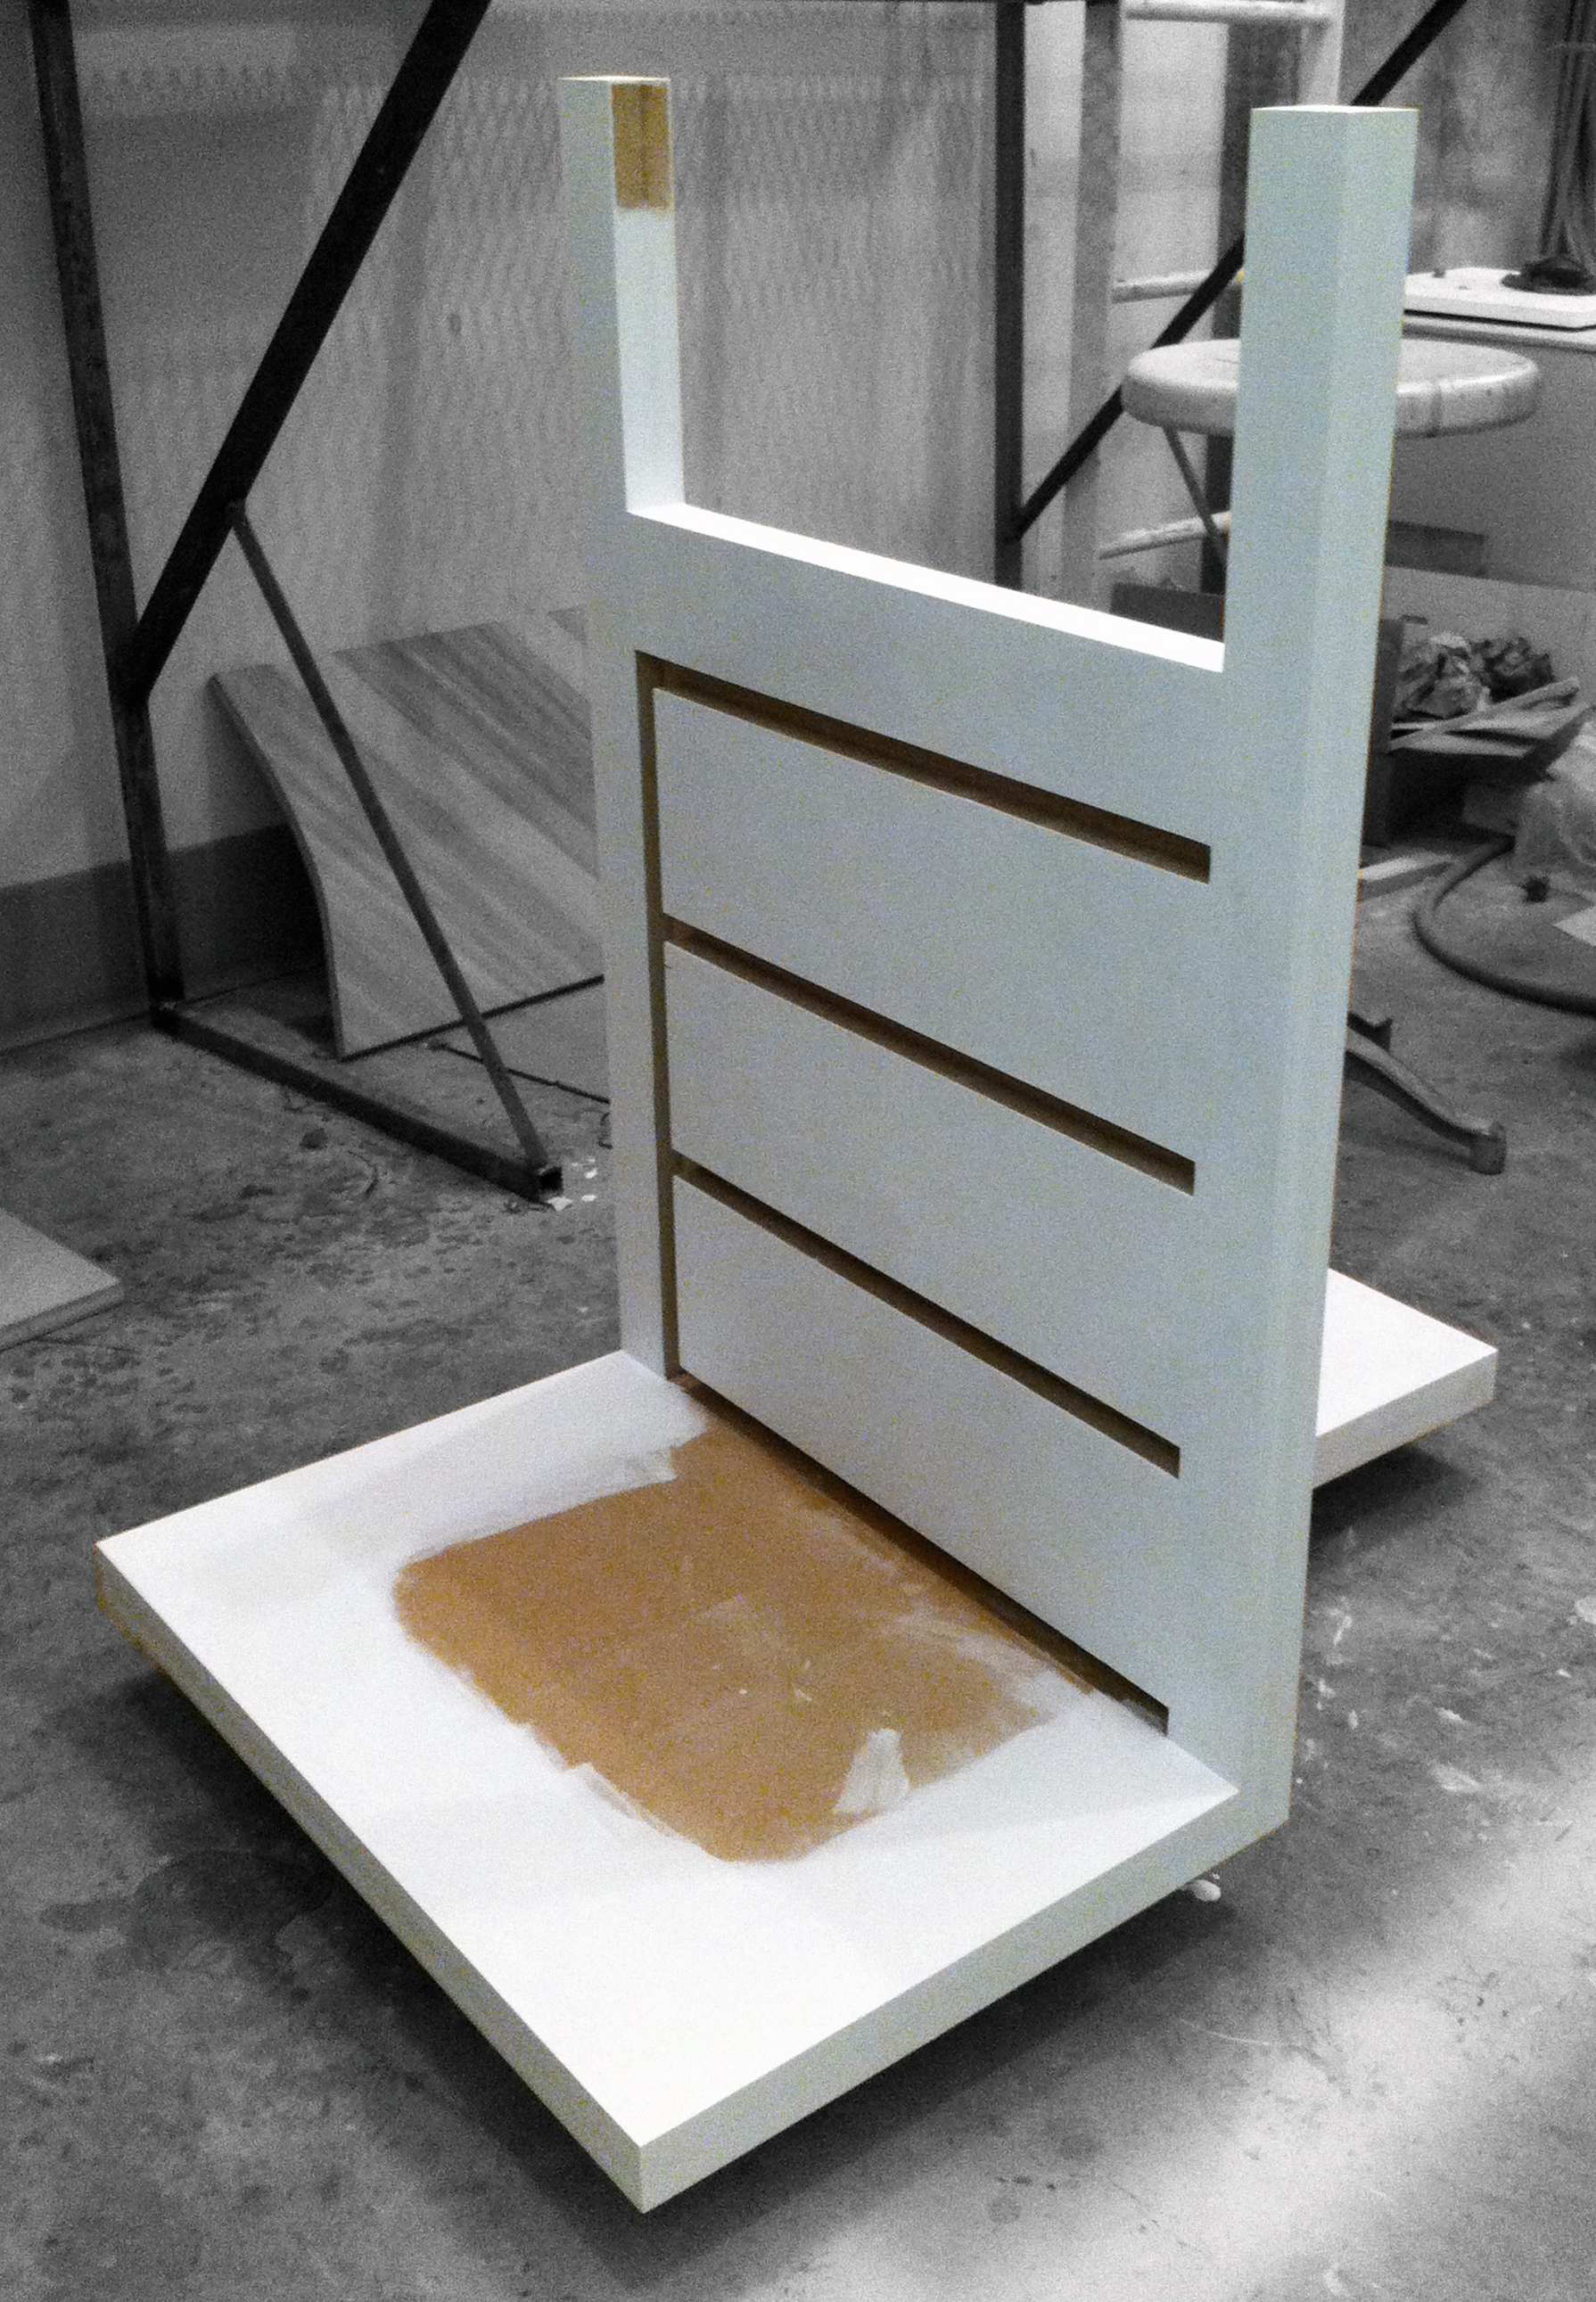
Priming the MDF
With the primer coat on and dry, the MDF core is looking more and more like the finished piece.
Testing the Fit
One coat on, and it still fits. Two more, and the finish on the walnut, to go.
However, in this case, since the walnut cabinet wedges into the MDF core by 3/4”, and because it sits on top of the base of the core, the wood finish and the paint for the MDF must be applied prior to assembly, which is uncommon, and leaves no room for error. In these photos, the MDF is primed, but not yet painted, and the cabinet has been sanded and taped in preparation for its finish. The tape is applied to the end grain of the wood to keep the finish off of it, which will assure that the glue applied later will be effective.
I've settled on a natural wood finish for all walnut surfaces. Comprised of linseed oil, tung oil, beeswax, pine resin, and orange oil, it is domestically produced and does not contain any petroleum products or heavy metal dryers. Rather than a distasteful chemical odor upon application, the finish will leave the piece and surrounding area smelling of citrus. This is even more important for an oil-finished piece, as the finish will need to be reapplied as time goes by.
May 25, 2010
A Rare Joint
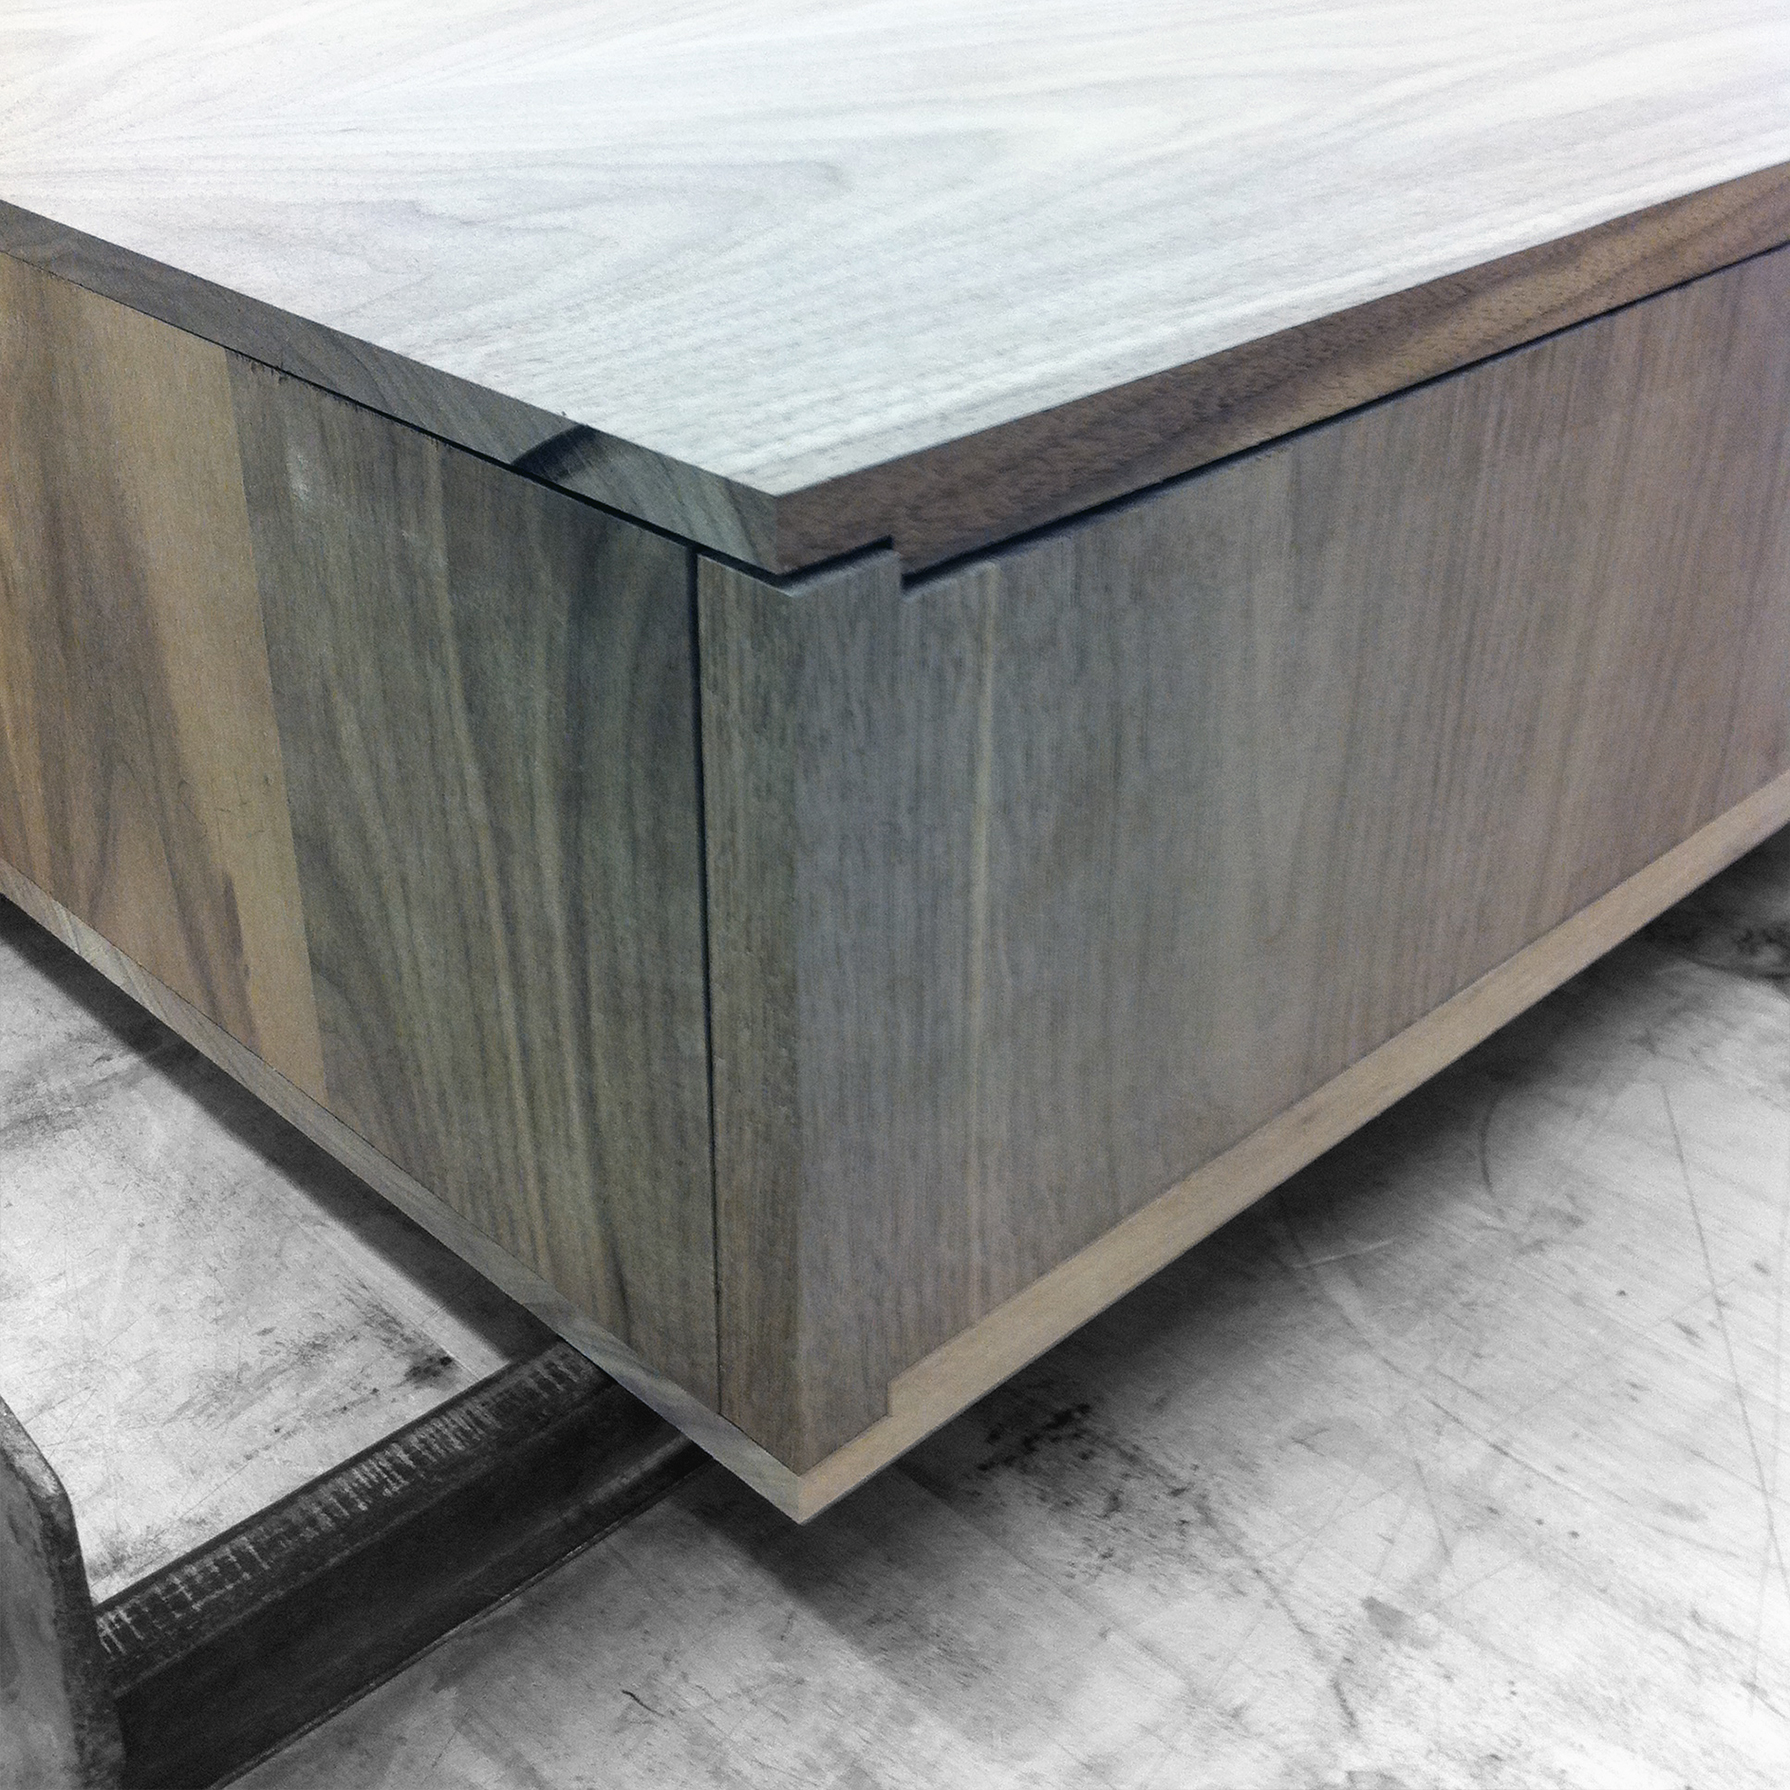
When You Can’t Find a Precedent, Make One
Without a documented example that met my needs, I had to design a joint for where the back of the keystone box meets the sides that would allow the wood to expand and contract, while also maintaining the proper grain orientation.
My favorite detail of the entire project is where the “H-shaped” back piece of the keystone box meets in a tight corner with the sides. I searched, but could not find a documented wood joint that would meet my particular needs, so I created one. Designing this joint, which maintains grain orientation integrity while also keeping the wood from being “trapped” took considerable time to plan and execute, but I'm pleased with the result.
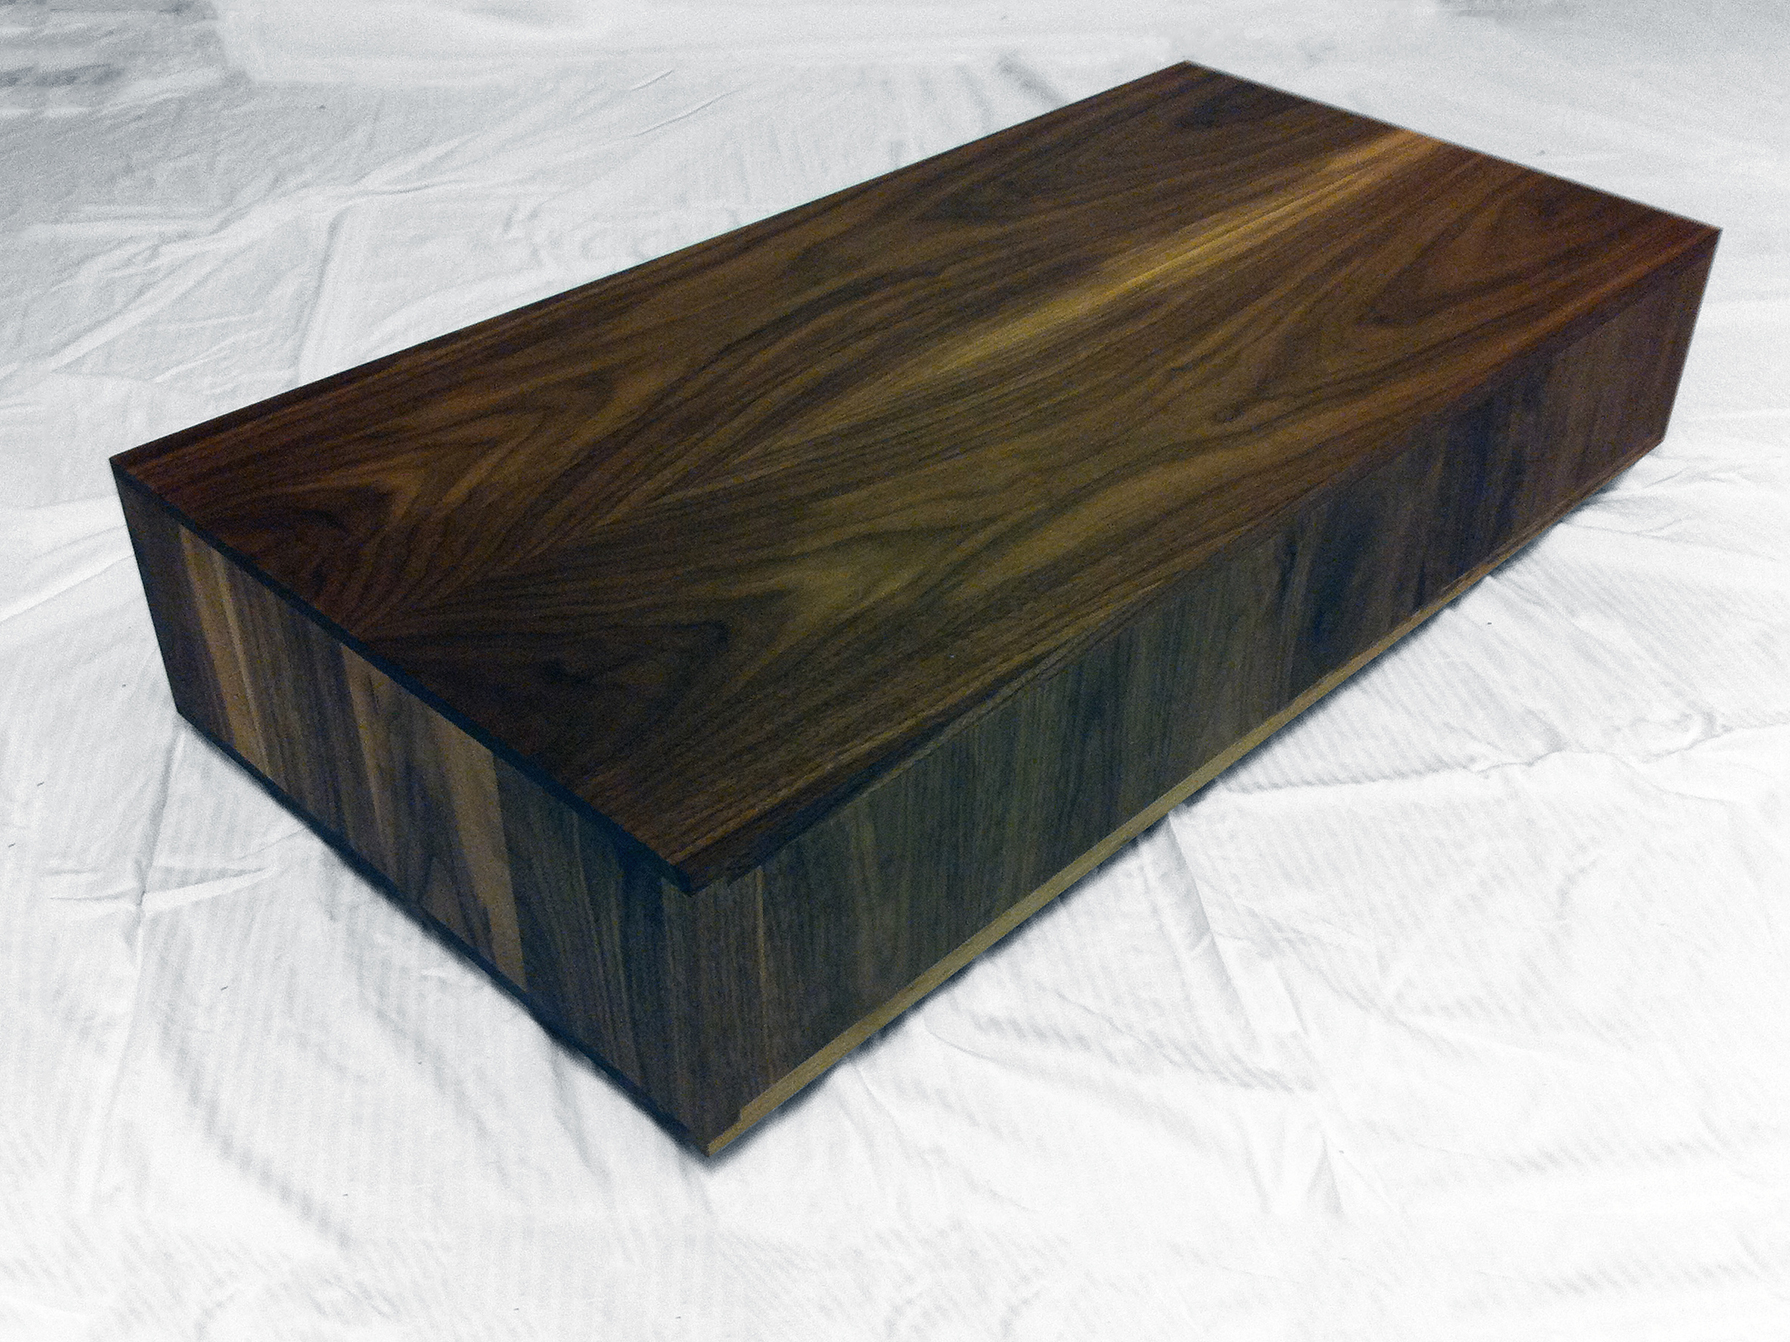
The Keystone
The large walnut box that wedges through the MDF core, “The Keystone,” ties the whole piece together. The top and bottom of it are fabricated from the massive walnut board (previously re-sawn by Urban Lumber), and composed into a beautiful bookmatch.

Again with the Clamps
Eleven clamps this time, to join and set the pieces for the keystone box.

Make that Thirteen
Two additional clamps, acting longitudinally, keep the box from racking.
Constructing this piece was complicated by its limited thickness. It meant that all planing and sanding had to occur after the glue-up. That process left the boards slightly warped for assembly. Fortunately, since big boards bend, it was not an unsurmountable problem. However, the warp did complicate the dado cut along each short edge.
May 29, 2010
Ready for Final Assembly
Well, all of the pieces have their finish applied, and dry. I am trying to take a breather and celebrate this milestone, but I am really starting to feel the pressure as assembly looms. It's been an amazing journey so far, but it's making me nervous that it's not all done just yet, and there may still be unforeseen challenges. But, in the interest of marking the moment, here are the finished component pieces, pre-assembly.

The Keystone Box, Finished: Front
The natural oil finish went on beautifully, really making the bookmatch top sing.
The Keystone Box, Finished: Back
Rather than the somewhat monochrome feel of the unfinished wood, the oil finish highlights the natural variation in the walnut grain.

The Cabinet Element, Finished: Interior
The lighter areas are where the tape sealed off the wood from the finish so that the glue will adhere better.
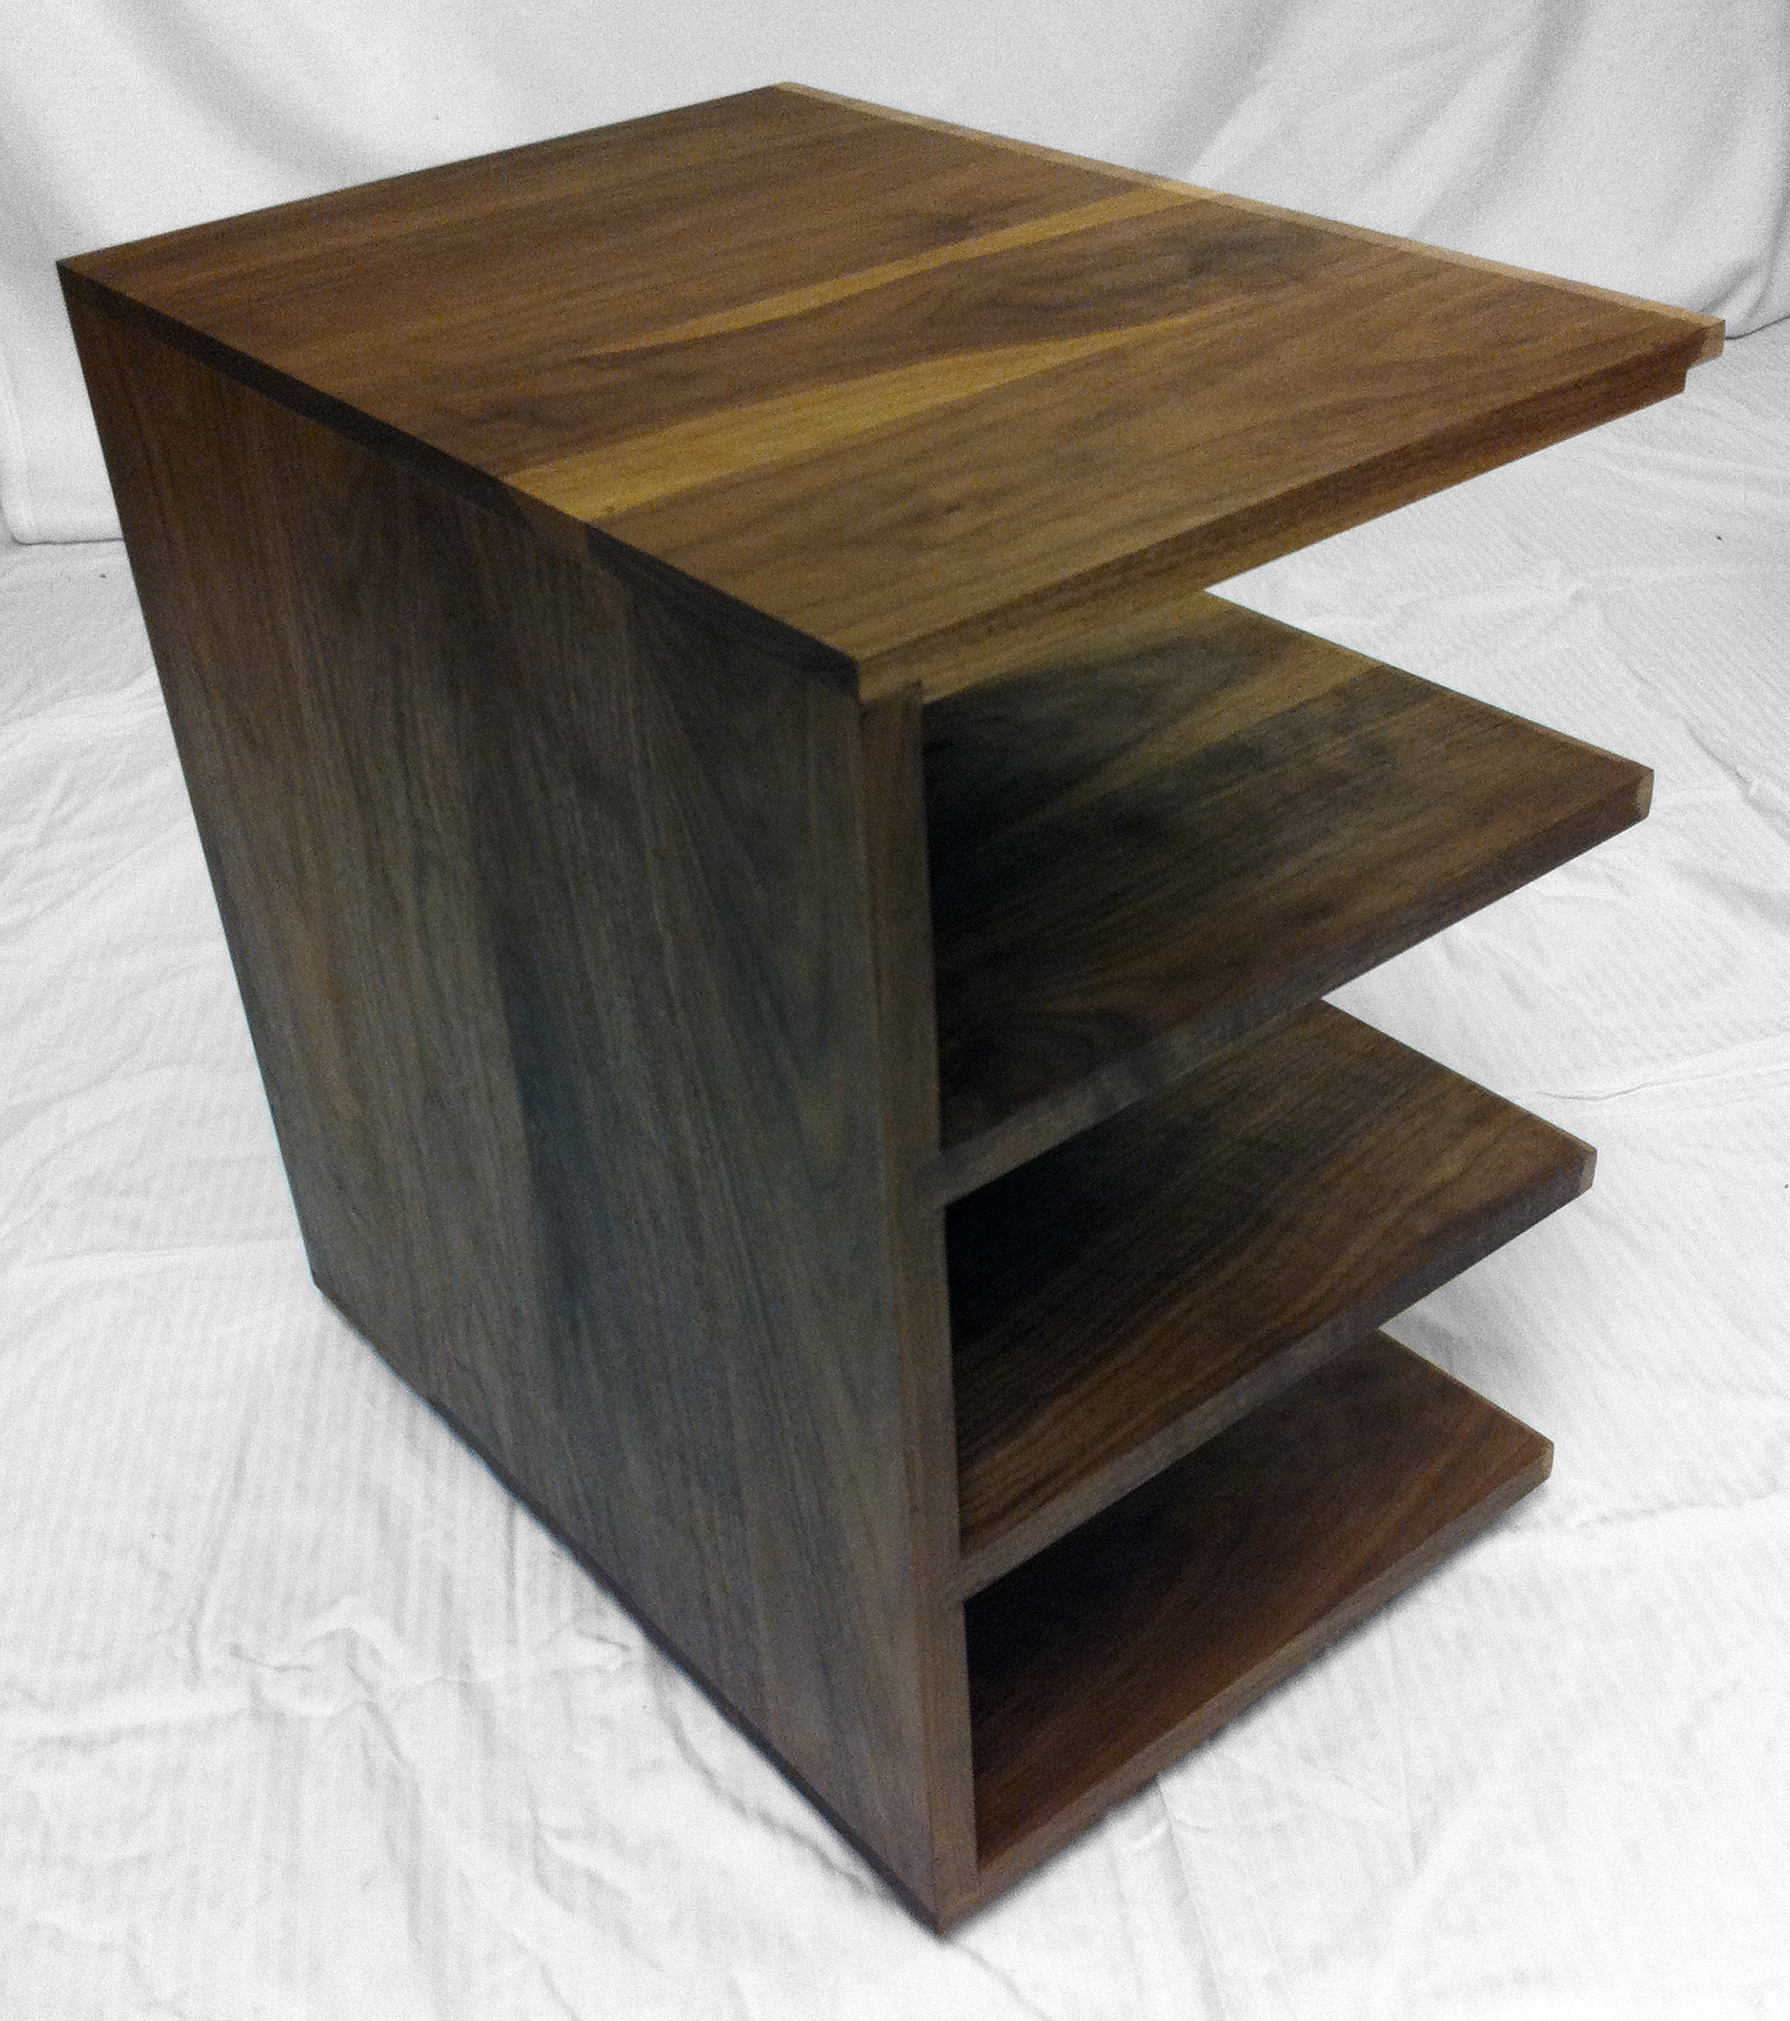
The Cabinet Element, Finished: Exterior
Every piece of walnut was curated for its grain, so that the blond accents and dramatic dark flourishes are seen at their best.
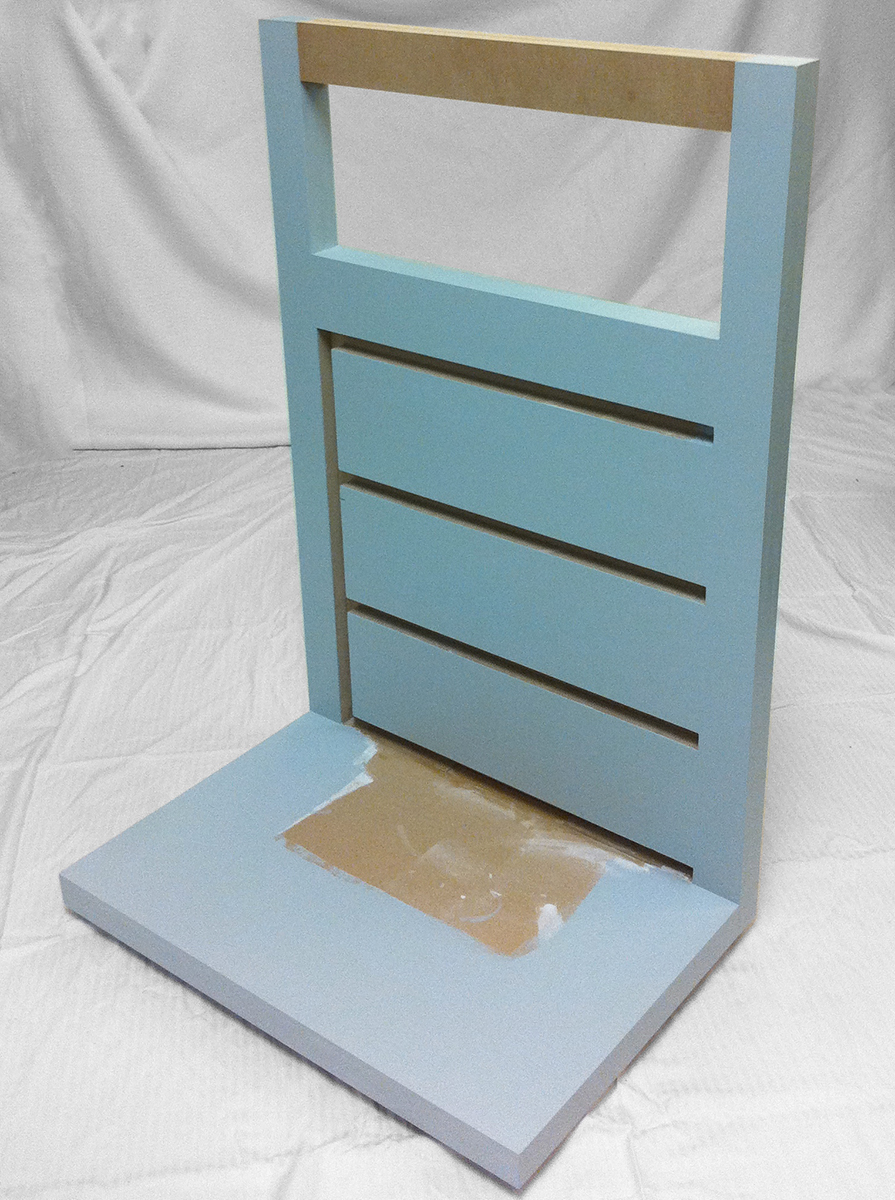
The MDF Core & Base, Finished: Interior
The Wedgewood Gray paint looks fantastic!

MDF Piece Core & Base, Finished: Exterior
The last unpainted section of the MDF lifts out for the assembly of the piece, as the keystone box will be set in the rectangular opening.
I really love how the natural finish makes the walnut sing, and the Wedgewood Gray looks fantastic with it. I couldn't be more pleased. Notice the unfinished end-grain on the walnut cabinet element: that is where I have left off the finish, so that the glue will adhere well when I take the plunge and put this baby together.
June 1, 2010
The Highest Pressure Point
Certainly, there has been a rise and fall over the course of this term, in terms of the degree of pressure and stress provoked by this project. Along with time, money, and hard work, I've put my heart into it. So, at moments when it could all be for naught, my adrenaline pumps, and I get genuinely nervous.
The wood creaked like the hull of a ship in a storm.
The highest pressure point by far occurred while inserting the walnut cabinet into the MDF core. Both pieces already had their finish on, and the joints were so tight that four heavy-duty clamps, innumerable towels, and a healthy glass of wine, were all required to bring things together. The glue timer was nerve-wracking: fifteen minutes to get things together before it dried, or bust. The whole project would never come to be if I failed at this one step. As the clamps were slowly tightened, turn by turn, evenly across each of them, the wood creaked like the hull of a ship in a storm. Thankfully, to my tremendous relief, everything worked out beautifully. It was a terrifying fifteen minutes, but it worked. Needless to say, I didn't pause to take pictures of any of that.
Fear & Loathing with a Drill Bit

Marking the Limits
The green tape on the drill bit marks the point at which, should it be passed, the drill will puncture the wood fully and ruin the piece.
Next, it all came down to a man, a drill, and the product of ten weeks of work in his hands. (Yes, me, and my hands. Forgive me, it felt like it needed some third-person drama.) The drilling phase was both exhilarating and, well, again, terrifying. This is another one of those cases in which, to realize this particular design, the order you would normally perform some tasks has to be shifted, and shifted in a way that means there is no room for error, no way to fix a mistake. For example, on a simpler project, you would drill holes using a drill press, before the pieces were assembled, because that guarantees a perpendicular bore. And, if there were to be an issue, maybe even just an accidental scratch, you could sand it out because the wood wouldn't have a finish on it at that point. But, that's not a luxury I get to have with this design, so, stressful construction tasks it is.

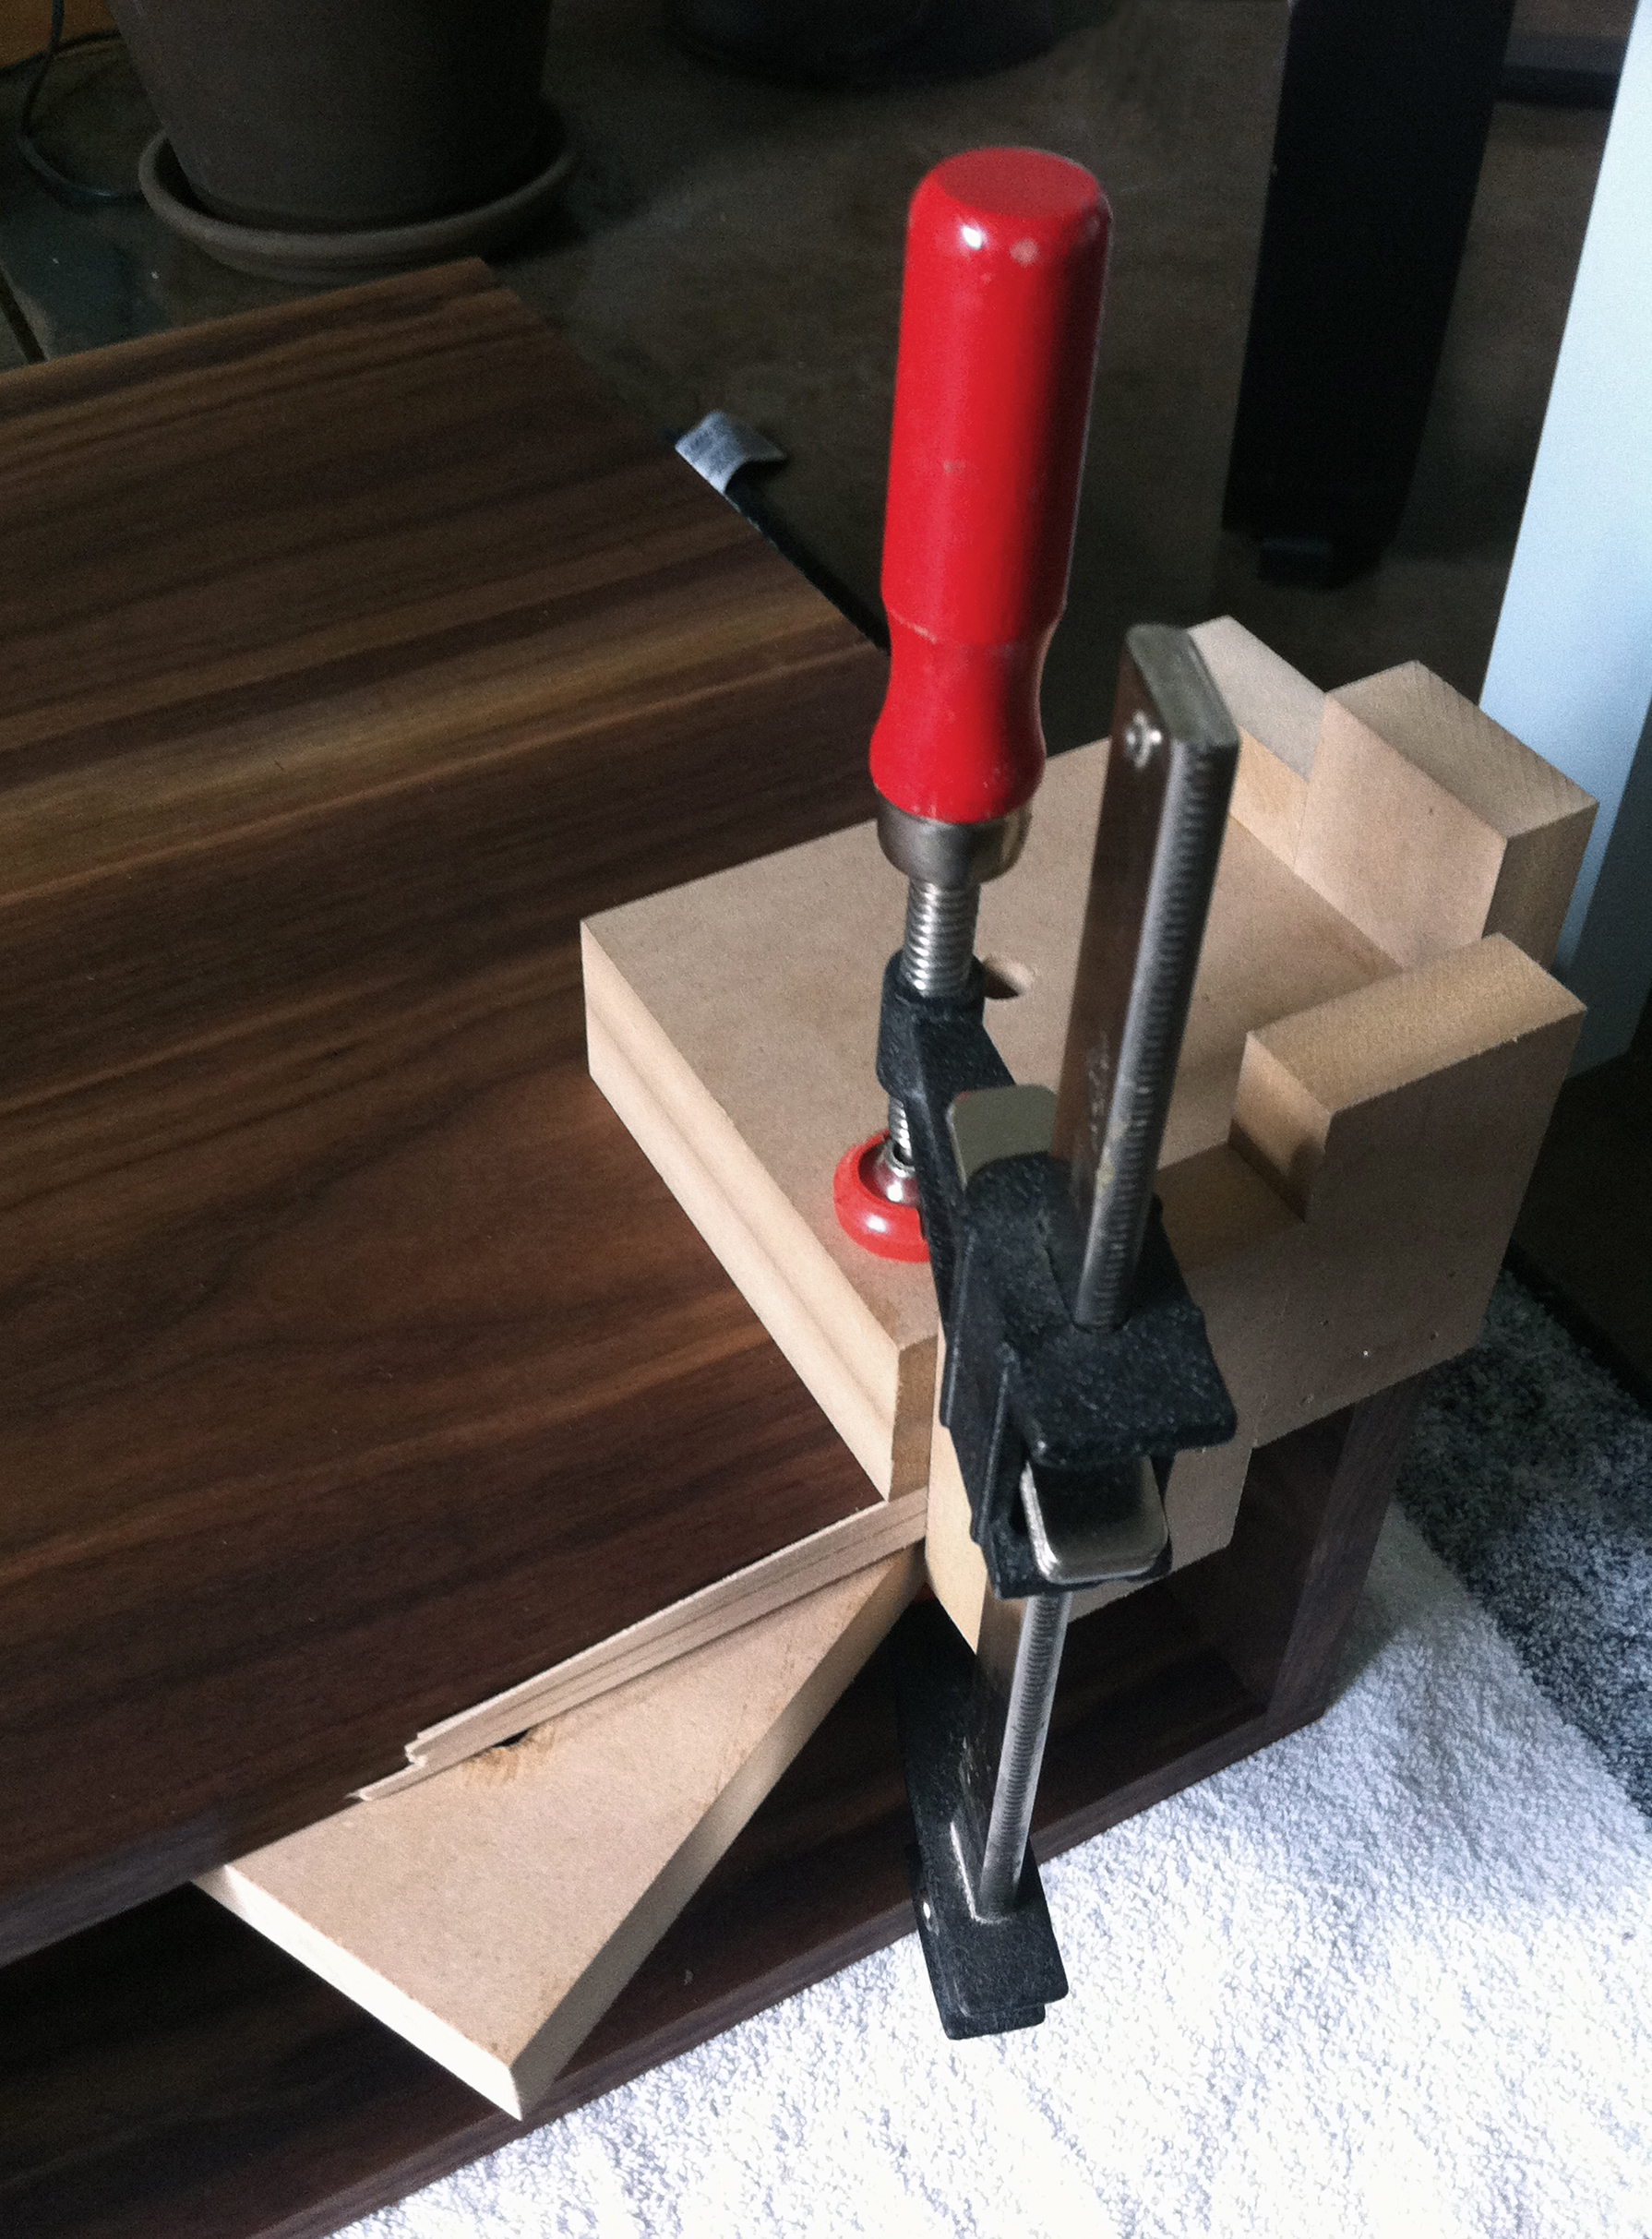
Jig on a Closed Corner
When a hole needs to be drilled on a closed corner, like this one, there is no way to clamp the jig in place, a scenario that adds more difficulty and fear to the mix.
Jig Clamped on an Open Corner
On open ends, the jig can be clamped in place, keeping it stationary and stable.
Without the option for a drill press, the next best thing is to build a jig. If you build it well, it should allow you to drill evenly from corners at a 90º angle without the use of a drill press, and at a consistent distance in from the edge. As always, careful measuring is essential to pull that off. See the thin strips of wood on one side of the jig? Those are 1/32” thick spacers, which I added for drilling the shallow holes on the bottom of the keystone because the width of the keystone and the cabinet differed by 1/16 of an inch. Without the spacers, even that slight error would have caused problems, so it was very important to be aware of every detail and inconsistency in the piece so I could adjust for them, ensuring a precise output.
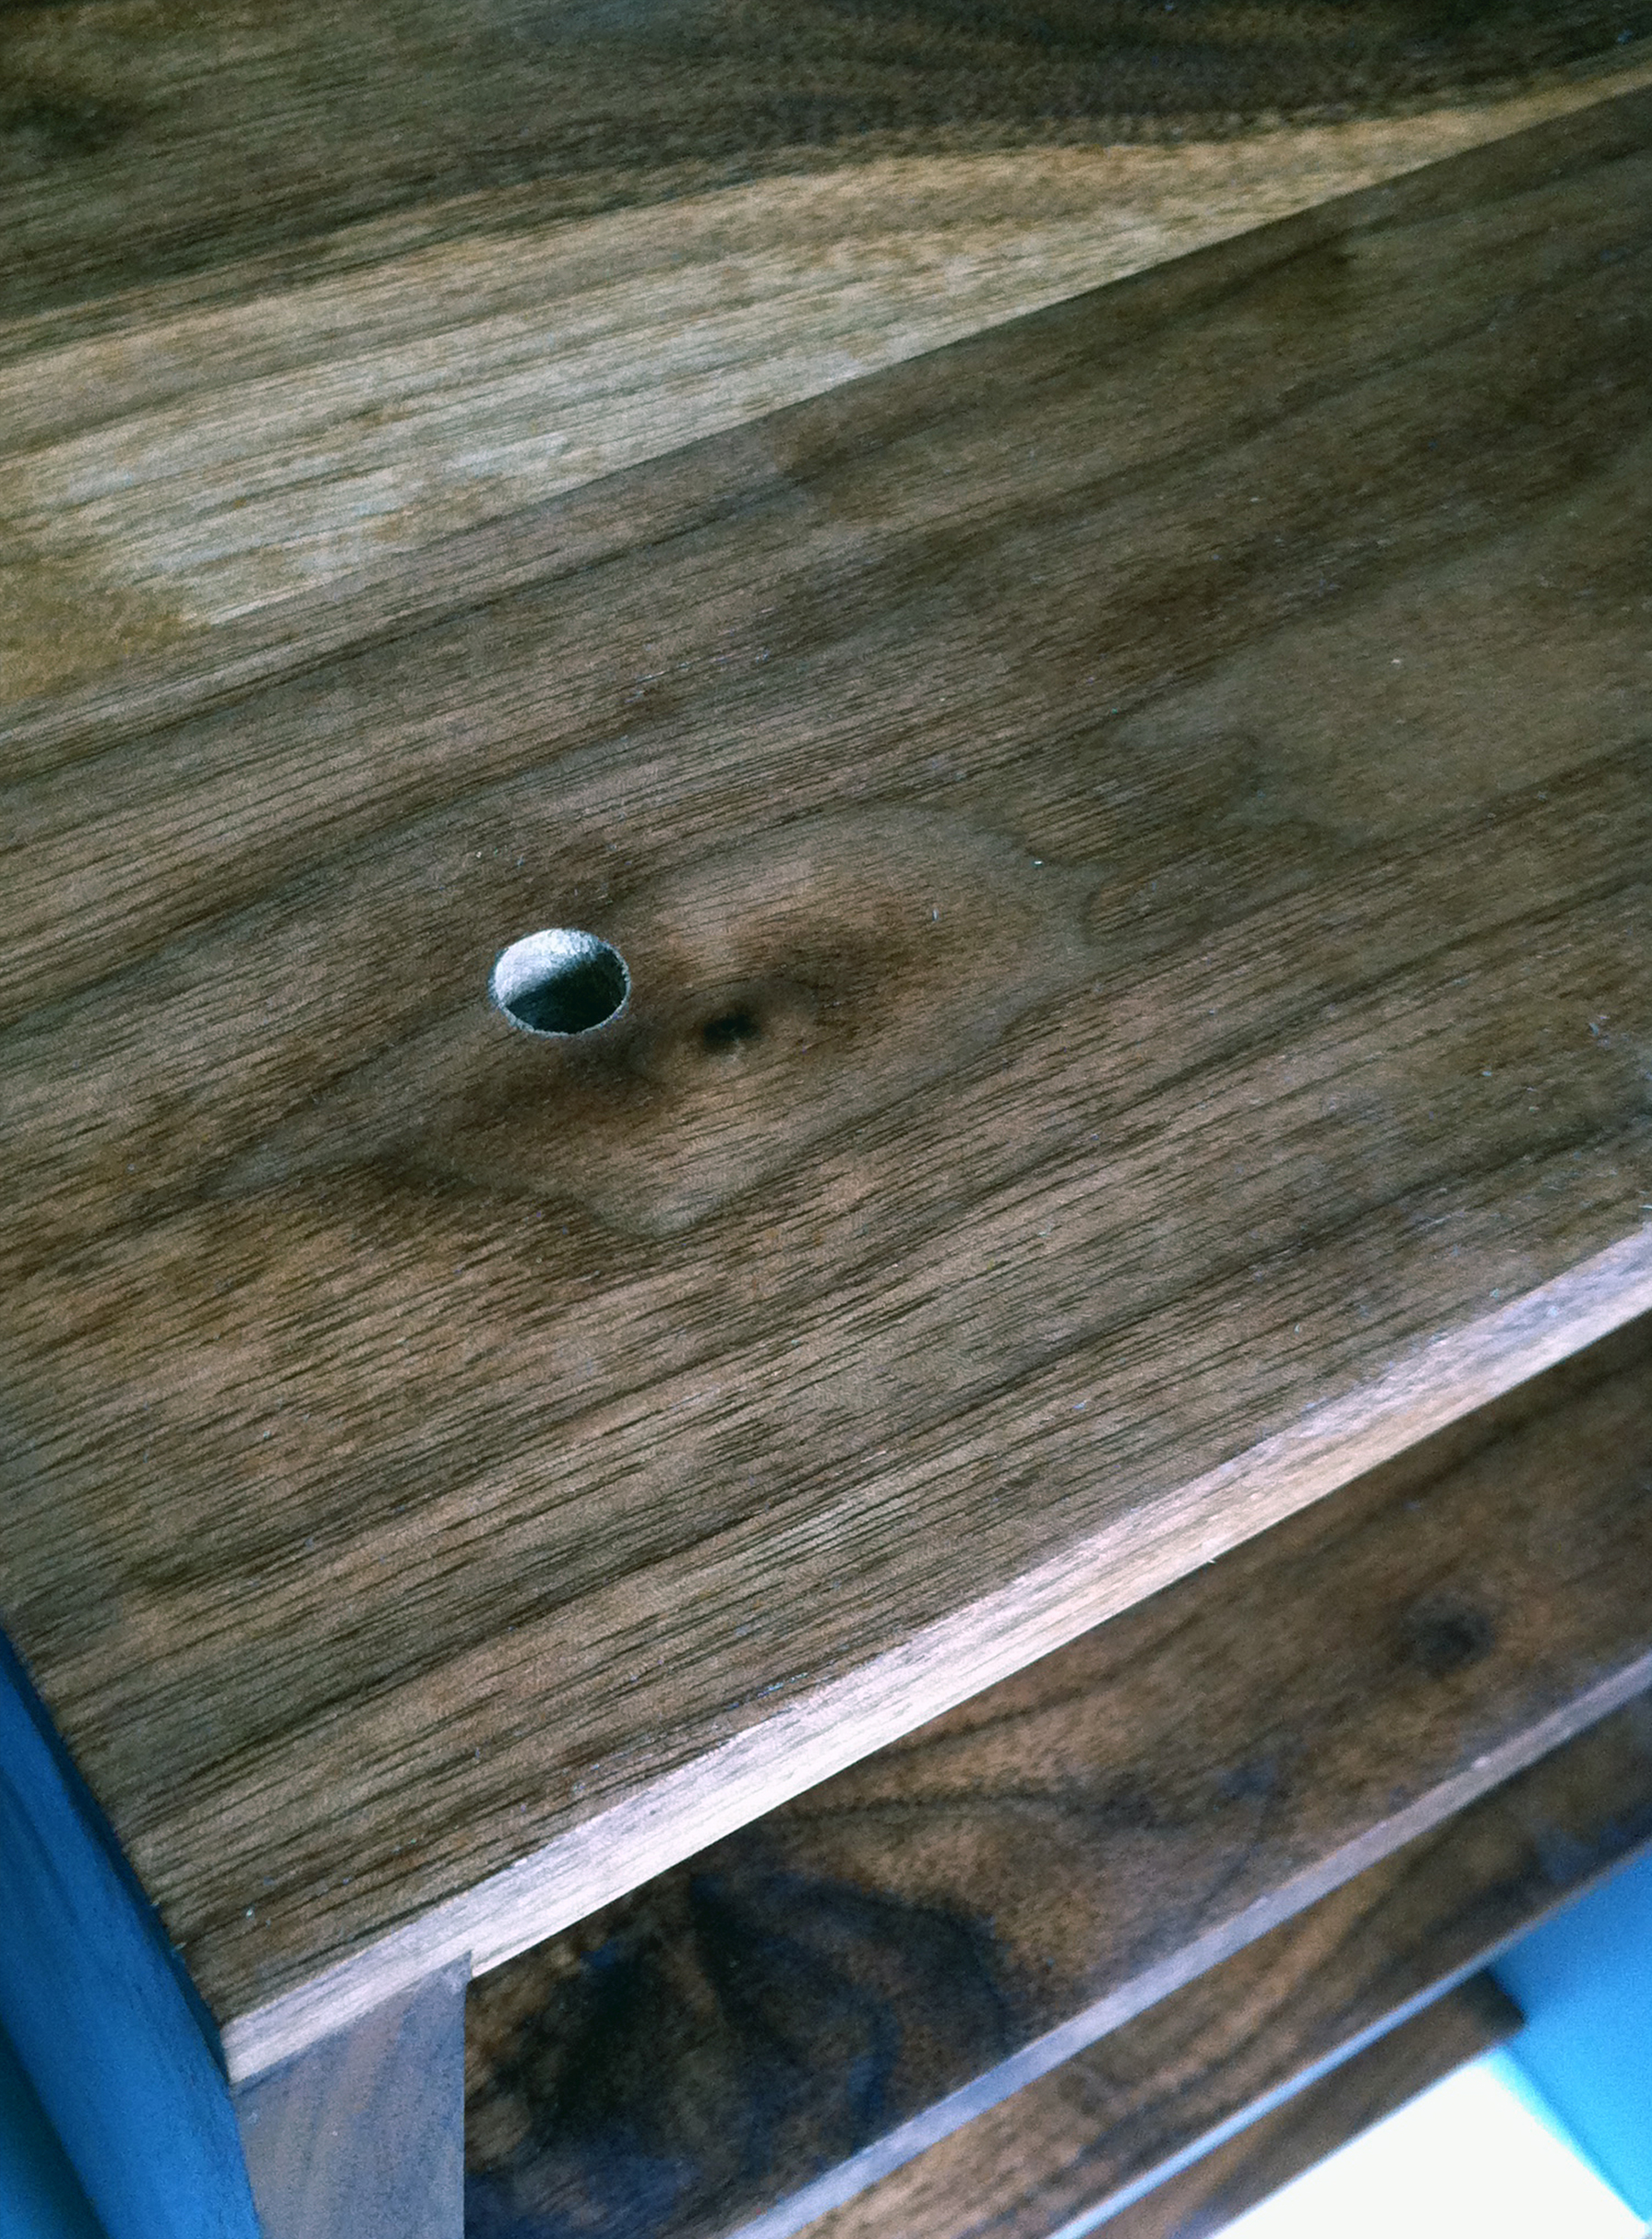
One Hole Drilled
Each one drilled is a relief.
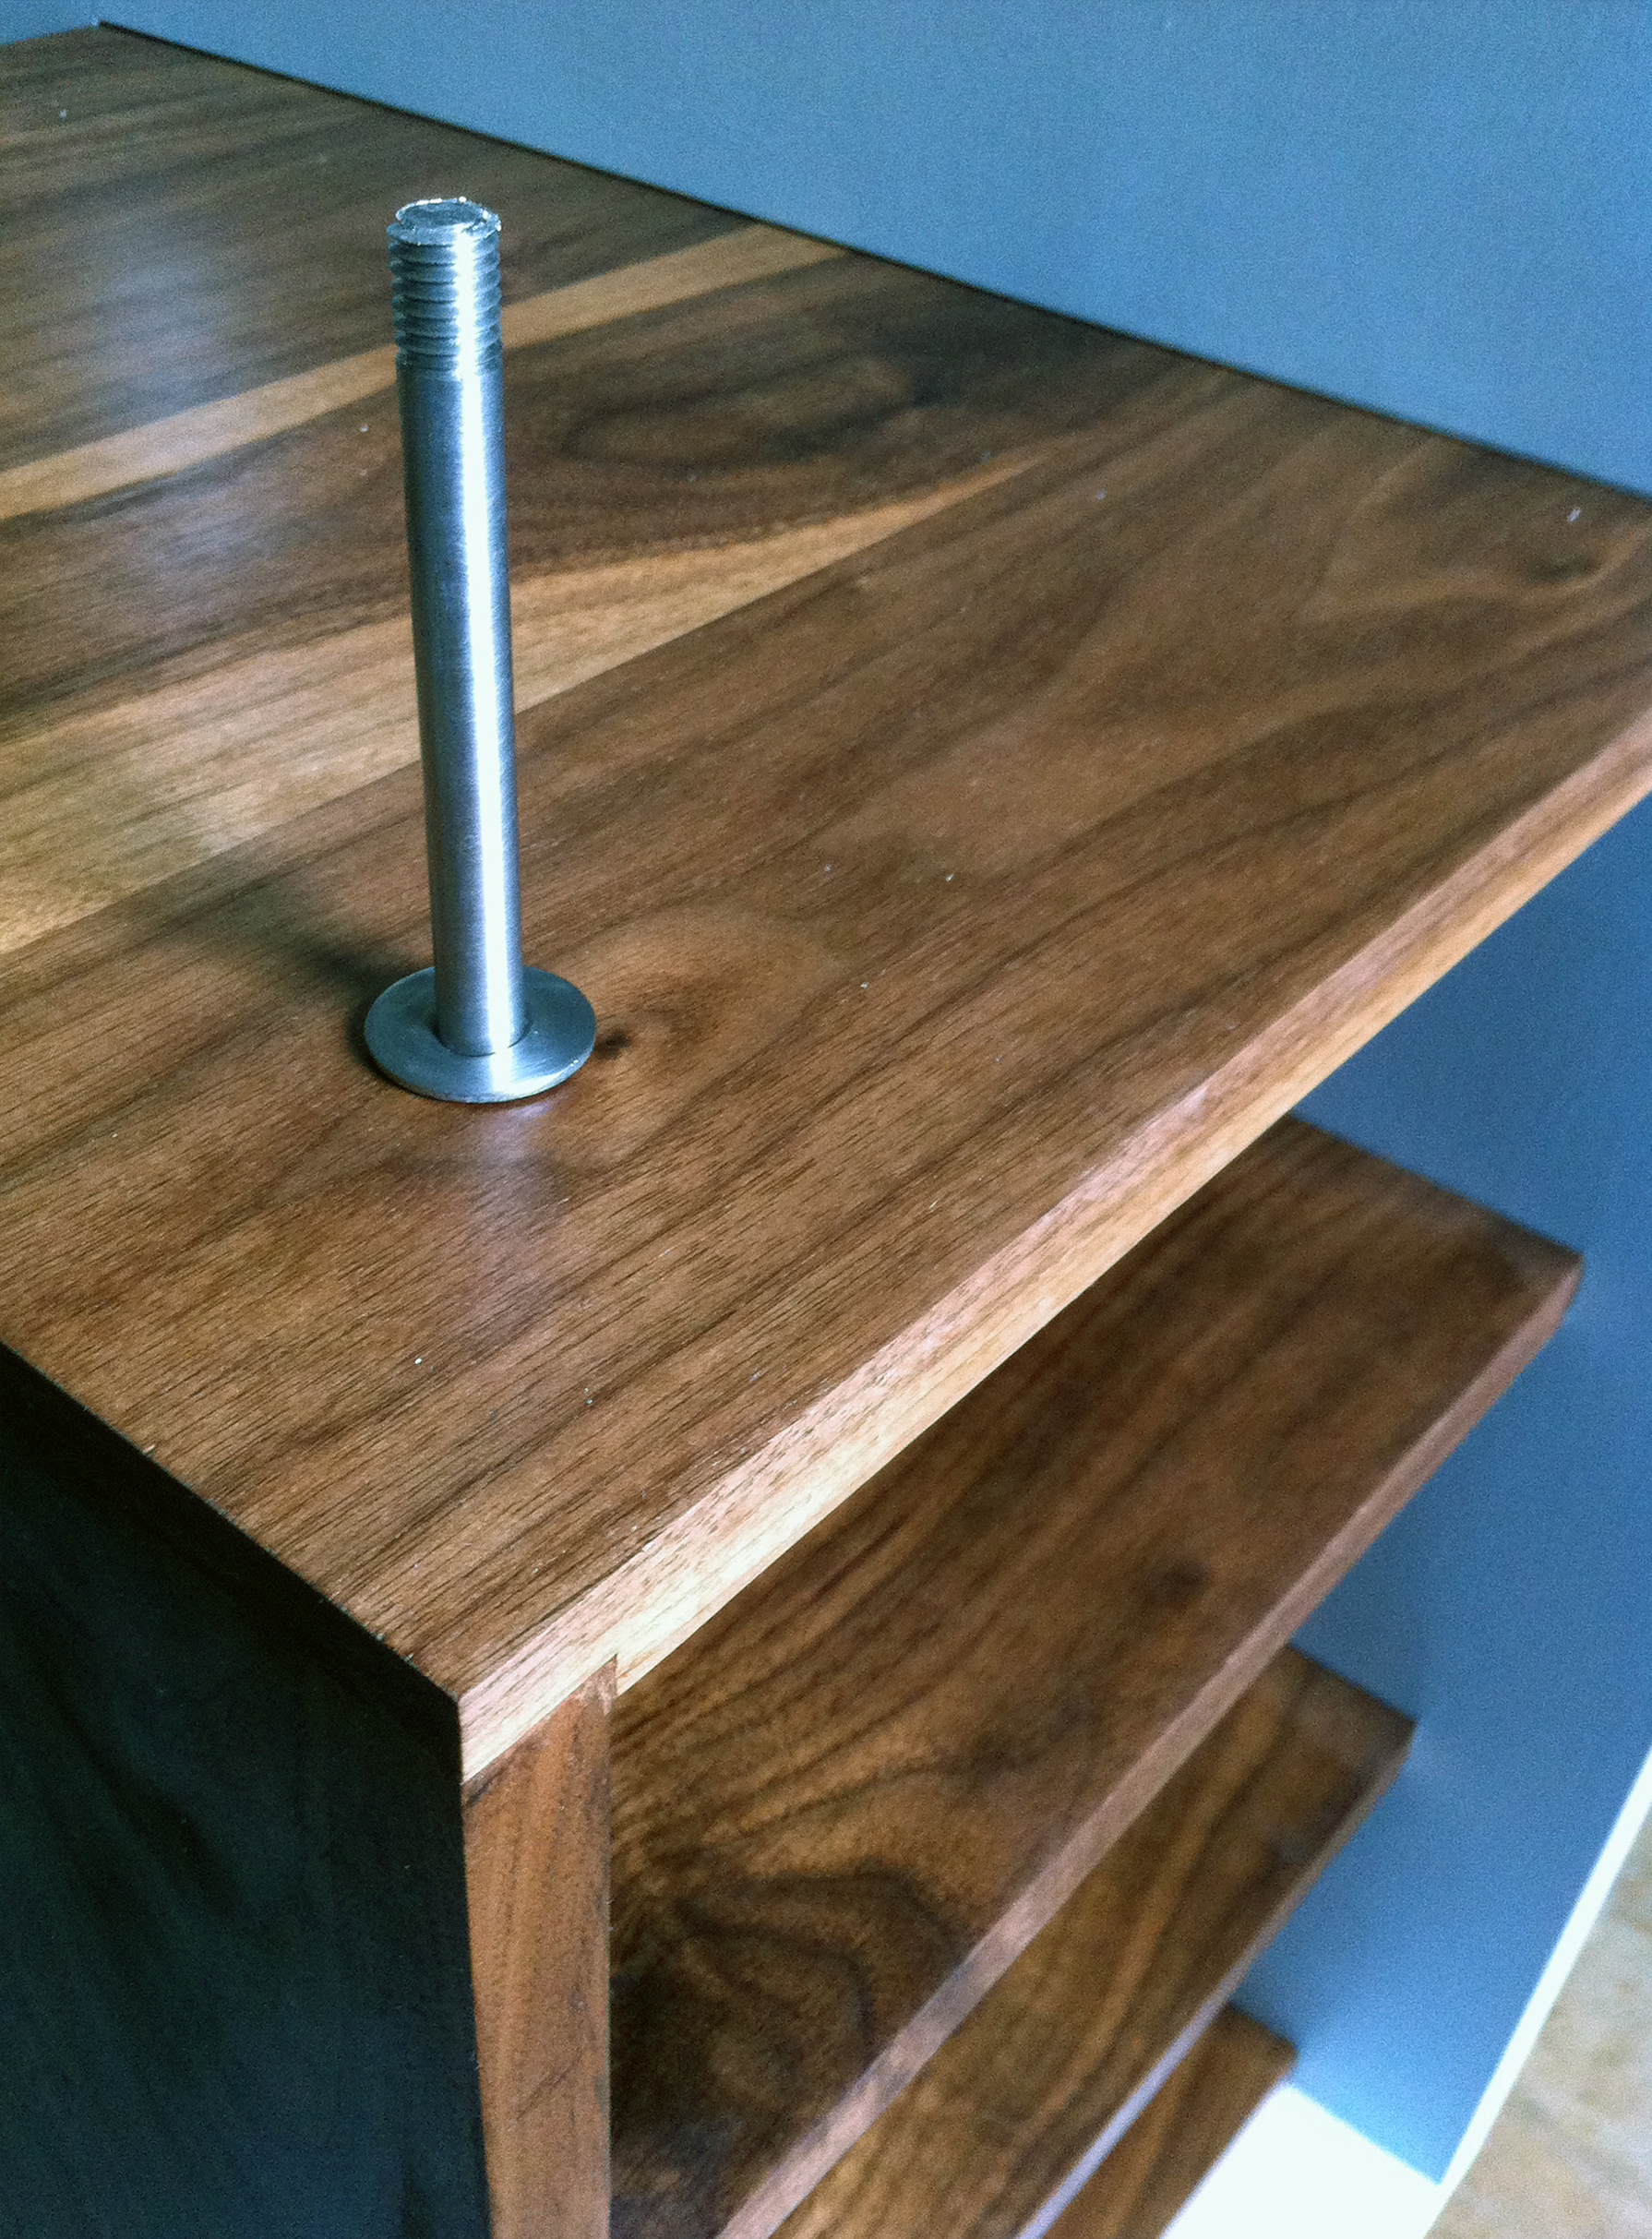
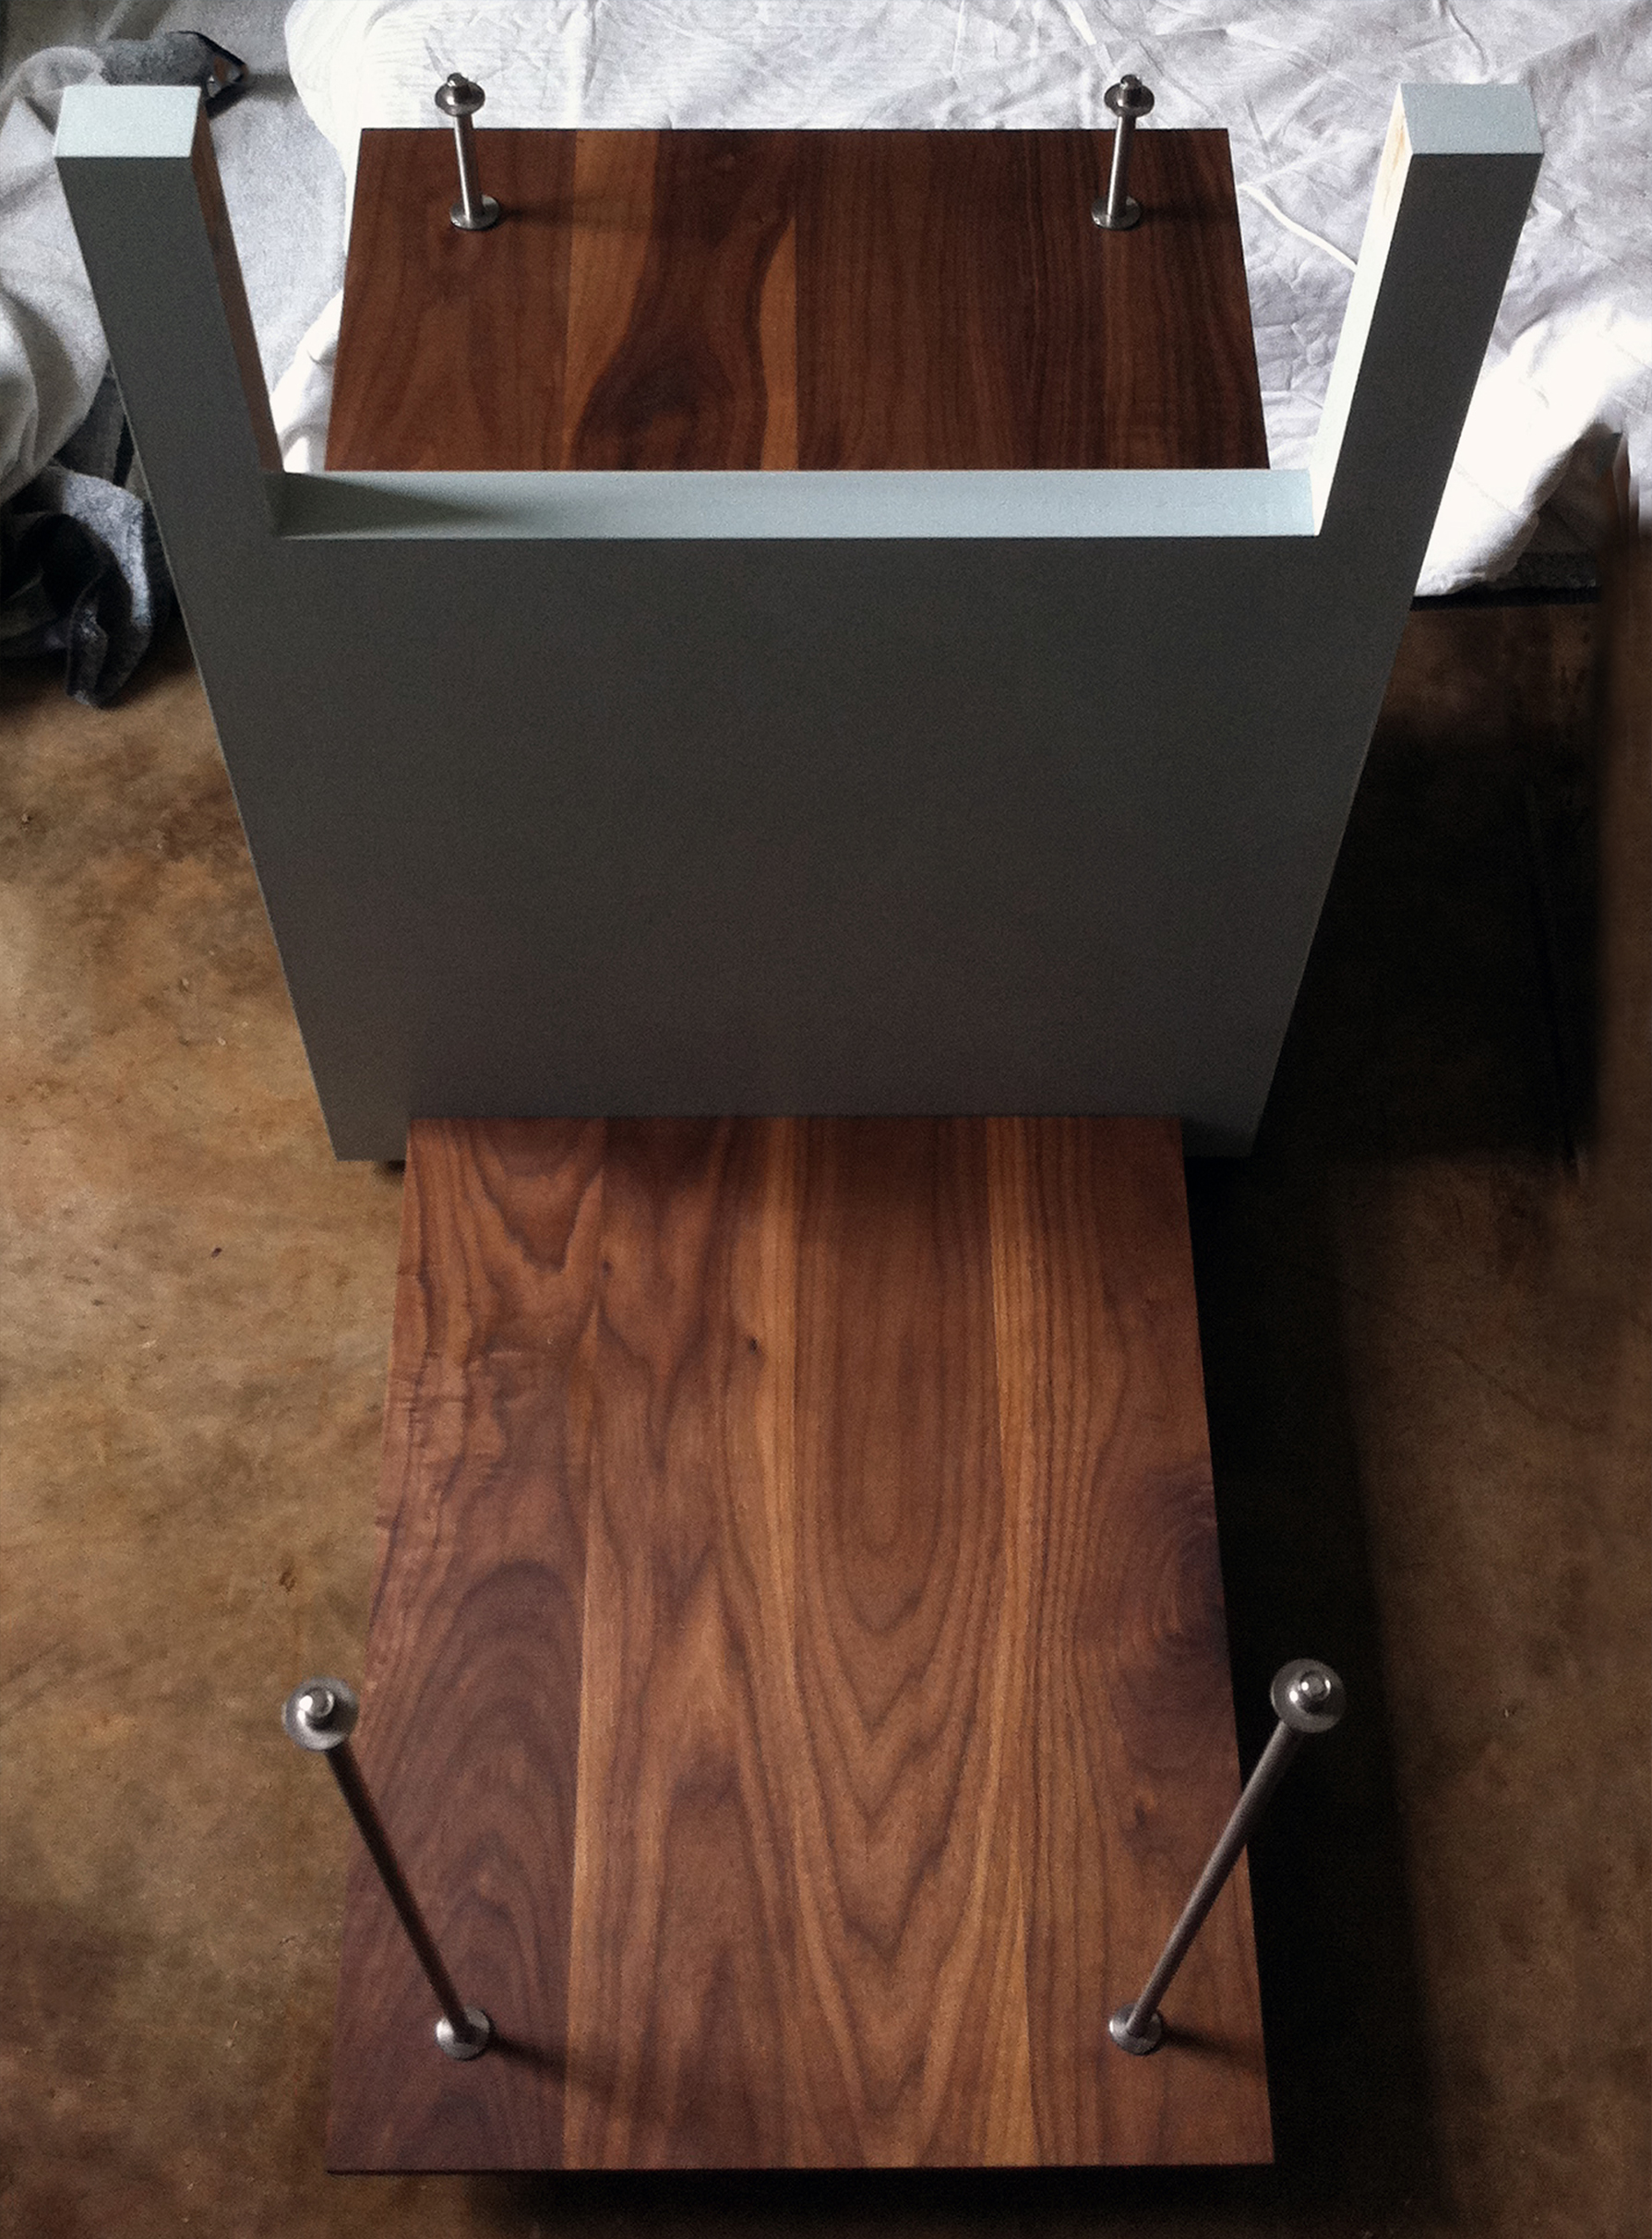
Fitting the Custom Threaded Steel Rods
Bolted underneath, the top end will be pressure fit.
The final hardware is also featured in these images. Stainless steel rods were cut to length by Justin at Coyote Steel and the precision custom threading was completed by Ken at Welch’s Machine Works. (A special thanks to Ken for rushing this job and taking the extra time to make sure the flange/weld nuts and the threaded rods fit together seamlessly.) All flange/weld nuts were pressure fit. Other than the six screws securing the horizontal and vertical pieces of the MDF core, the exposed hardware is the only hardware used in the entire piece.
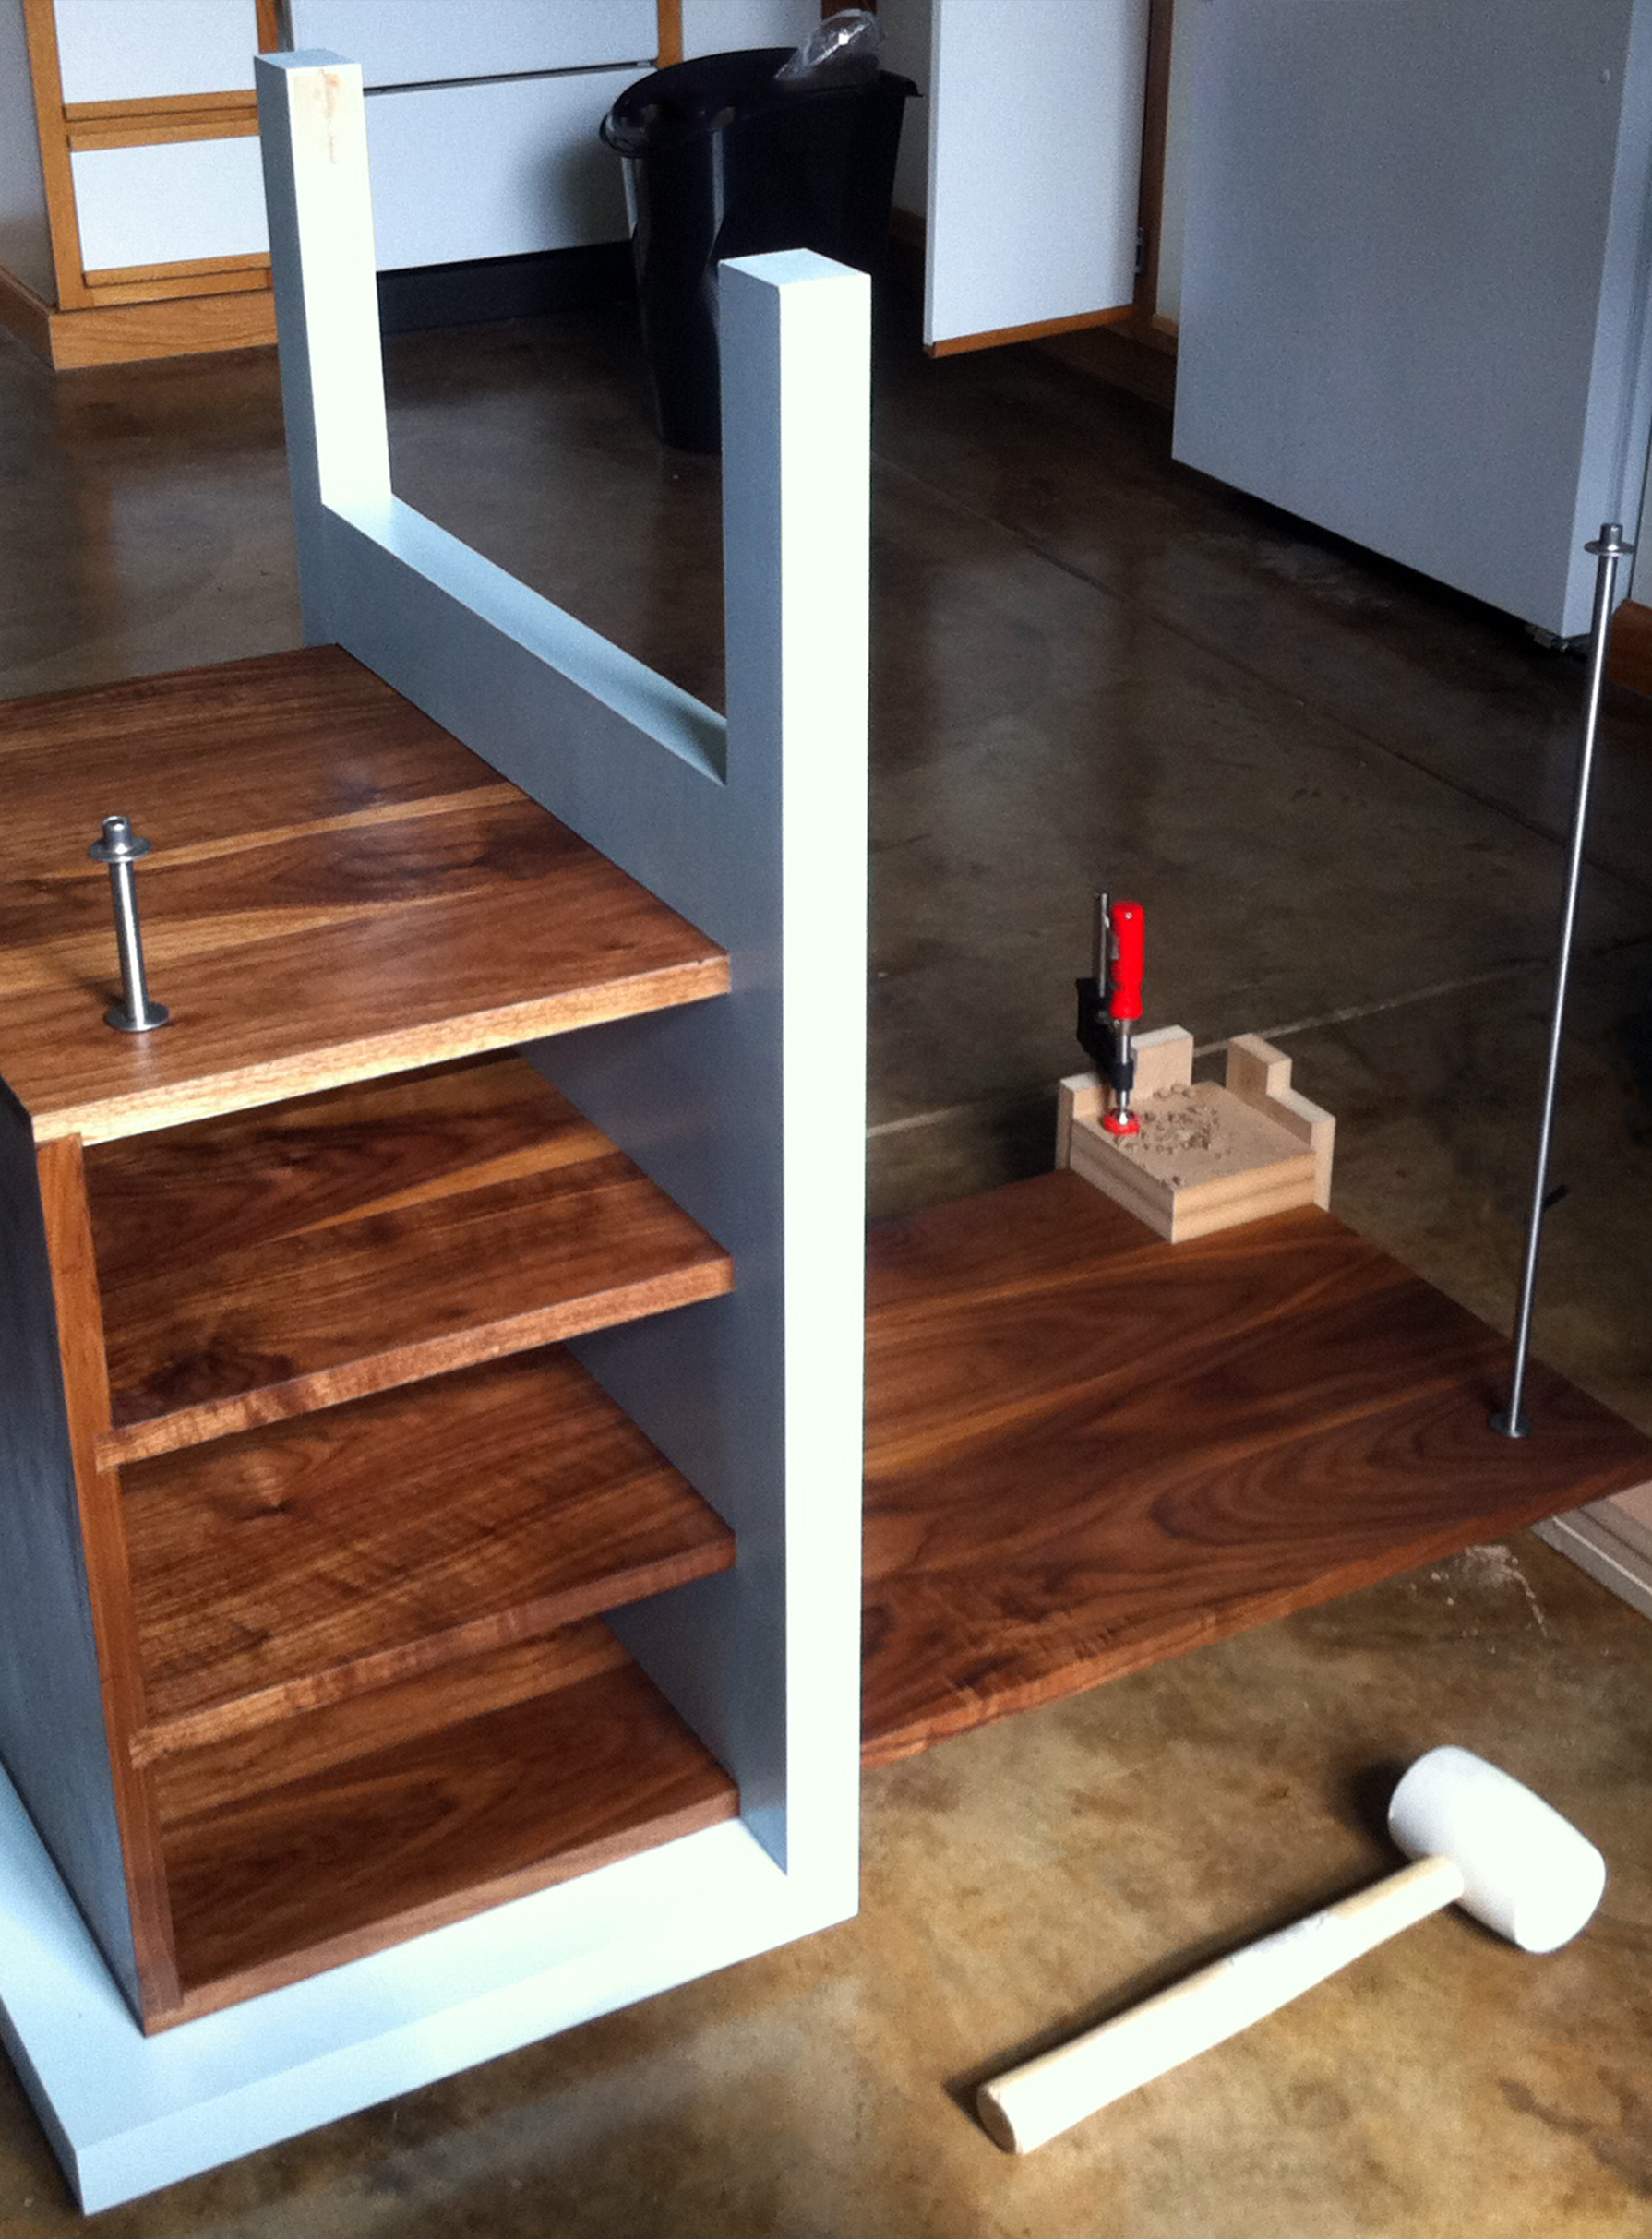
Three Holes Drilled
Each one a step closer. Each one missing, still a chance to ruin everything.
Four Holes Drilled
The pressure fit nuts on the ends of the steel rods will fit into partially drilled holes on the underside of the keystone box.
Scary as it was, the drilling process was successful. Because these sorts of tasks can so easily be messed up, because just one tiny error can multiply into disaster, it's always helpful to remember that old adage: “measure twice, cut once.” But, I'd recommend measuring more than twice, and then, on top of that, do whatever you can to minimize the potential for error. For example, see the green tape wrapped around the drill bit in the first photo? The tape marks the maximum depth the drill bit could travel before risking it puncturing through the wood of the keystone piece. Little extra steps like that are how you successfully pull off a clean, efficient build.
June 26, 2010
Completed Teaser Shot & Thanks
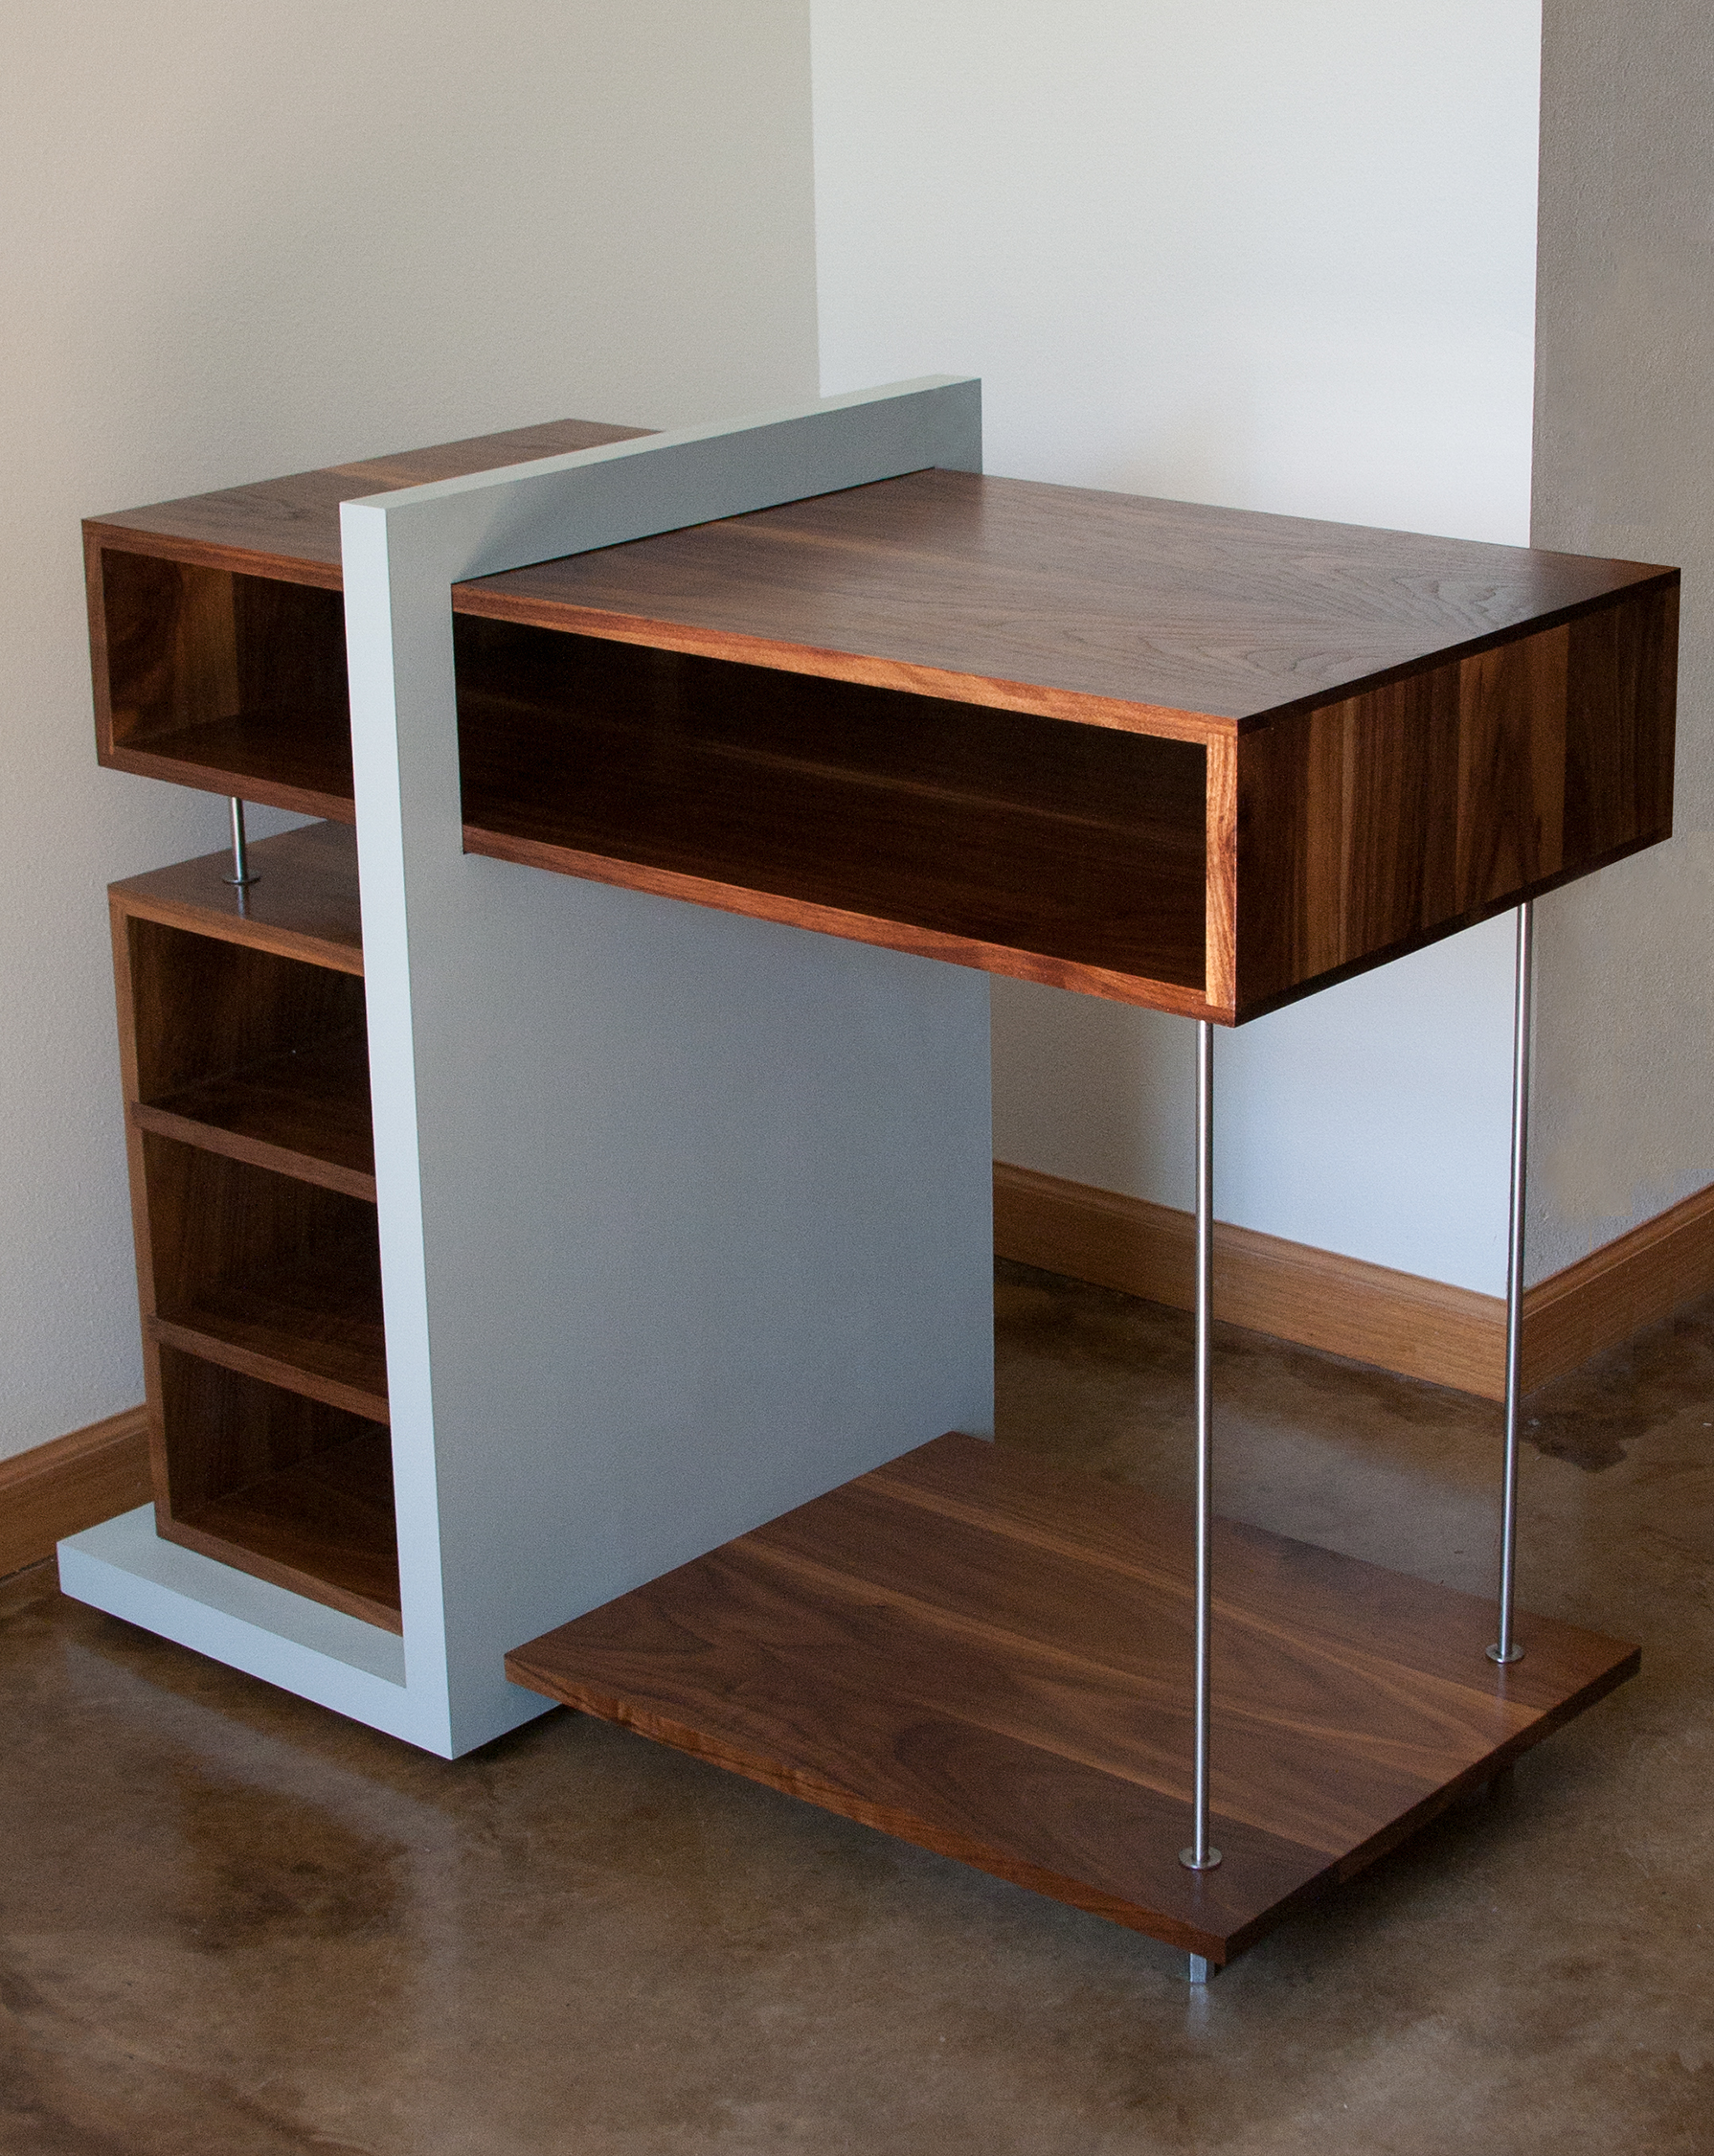
A Teaser
I will take some more professional shots later for the portfolio, but I’ll toss you this one as a teaser. It’s done!
Done! I completed the final assembly, and then (miraculously) relocated the piece from my walk-up second-story apartment, across campus, over to the architecture building for my final presentation, without it sustaining any damage. It was a hit, and I have to say, I'm proud of myself for making it happen. Anyway, here is a teaser image for you of the final piece. I'll have better ones shot later on for the portfolio.
Originally, I was planning on creating drawers for the cubbies at a later date. But, now that the project has come this far, it has rendered itself complete. The open cubbies actually allow the user to experience more of the piece, adding shadow, and depth. Drawers would have been a mistake. Sometimes, you have to see it realized to make your final design choices.
I'd like to give a resounding thank you to Sara Huston and Sawyer Christianson for their guidance throughout the term; to the good people at Urban Lumber, Coyote Steel, and Welch's Machine Works; and to Rachel for helping keep me sane through the stressful patches. It turns out, the stress and worry was worth it; it's been a very fulfilling term. Those people telling me to take this class were right: everyone should take the furniture studio!
Perhaps you'd like to see the portfolio spreads for the finished work?
Happy to oblige: have at it.


